
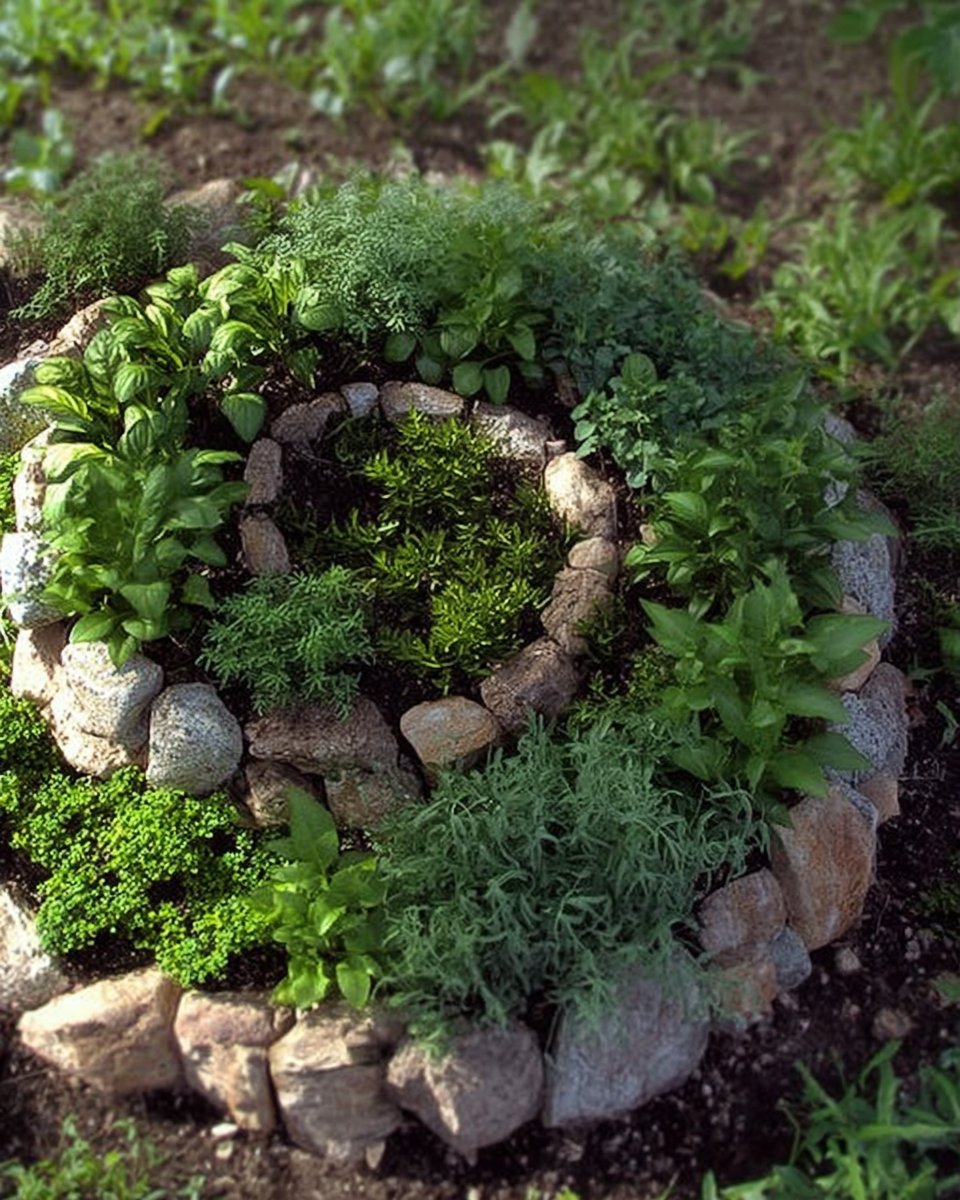
Introduction to Wonderful DIY Spiral Herb Garden
Have you ever thought about growing your own herbs but felt limited by space or gardening knowledge? The Wonderful DIY Spiral Herb Garden offers an innovative and stylish way to cultivate your favorite herbs right at home. This project is not only practical but also adds a beautiful touch to any garden or balcony. What makes this DIY project truly unique is its spiral design, which maximizes vertical space and allows for a diverse range of herbs to flourish in a compact area.
Imagine walking out to your garden and picking fresh basil, rosemary, or thyme to elevate your cooking. With this Wonderful DIY Spiral Herb Garden, you can do just that while enjoying the process of building it. This project is relatively affordable, with costs generally under $100, and can be completed in just a few hours. Plus, it’s suitable for anyone, regardless of previous gardening or woodworking experience.
The Wonderful DIY Spiral Herb Garden is a perfect weekend project that beautifully combines functionality and aesthetics. Whether you have a small backyard, a patio, or even an indoor space with adequate sunlight, this spiral garden will thrive. So, are you ready to transform your outdoor or indoor area into a fresh herb oasis? Let’s dive deeper into the benefits and specifics of this fantastic build.
Table of Contents
Key Benefits of Wonderful DIY Spiral Herb Garden
Why You’ll Love This Build
- Space Efficiency: The spiral design maximizes vertical space while minimizing the garden footprint.
- Variety: Grow multiple types of herbs in a single structure to meet your culinary needs.
- Easy Access: The spiral layout allows for easy reach to all plants, making maintenance a breeze.
- Aesthetic Appeal: The unique design adds a charming focal point to your garden.
- Cost-Effective: Building your own herb garden is often cheaper than buying a premade one.
- Customizable: Modify the size or layout according to your preferences and available space.
What Makes It Stand Out
This project stands out for its originality and functional beauty. Unlike traditional garden beds, the spiral herb garden captures attention and makes an excellent conversation starter. You have endless customization options; you can choose the materials that suit your taste and budget or alter the height of the spiral to fit your space requirements.
Additionally, the Wonderful DIY Spiral Herb Garden can be placed virtually anywhere. Whether you prefer it outdoors on your patio or indoors by a sunny window, the design is highly adaptable. This versatility is where this build truly shines compared to store-bought alternatives, which may lack that personal touch or specific dimensions to fit your home.
Project Specs for Wonderful DIY Spiral Herb Garden
At-a-Glance Details
- Skill Level: Beginner to Intermediate
- Estimated Time: 3–5 hours
- Estimated Cost: $50–$100
- Dimensions: Approximately 3 ft (91 cm) tall, 2 ft (61 cm) wide at the base
- Indoor/Outdoor Suitability: Suitable for both indoor and outdoor use
- Tools Needed: Drill, saw, measuring tape, level, and sandpaper
Materials and Tools for Wonderful DIY Spiral Herb Garden
Complete Materials List with Measurements
- Concrete Blocks: 12 pieces, standard 8″ x 8″ x 16″ (20 x 20 x 40 cm) for the base
- Wood for Spiral Structure:
- 2″x4″ lumber: 6 pieces, 8 ft (243 cm) long for supporting structure
- Landscaping Fabric: 1 roll, 3 ft (91 cm) wide, length as needed to wrap around spiral
- Soil: 2 bags of potting soil (around 20 lbs each)
- Herb Plants: Varied selection, about 10–15 plants depending on preference
Complete Tools List
- Drill: With ½-inch and 1-inch bit sizes
- Saw: Circular saw or miter saw for wood cutting
- Measuring Tape: At least 25 ft (7.6 m) long
- Level: To ensure the structure is stable
- Sandpaper: (80, 120, 220 grit) for finishing edges
Substitutes and Alternatives
If you’re on a budget, consider using recycled wood pallets for the structure instead of buying new lumber. Look for local sources of concrete blocks through second-hand sales or community resources. For plants, consider starting from seed if you want to save money or have specific herb varieties in mind. These adjustments still allow you to create a visually stunning herb garden without breaking the bank.
Cut List and Measurements for Wonderful DIY Spiral Herb Garden
- 2″x4″ lumber cut into:
- 6 pieces at 36″ (91 cm)
- 6 pieces at 48″ (122 cm)
- Concrete Blocks: No cuts needed; lay flat and stack.
- Landscaping Fabric: Cut to wrap around spiral base as needed (3 ft x length).
Safety and Prep for Wonderful DIY Spiral Herb Garden
Working with wood and concrete requires a few basic safety precautions. Always wear safety goggles when cutting wood and a face mask to protect against dust. Set up your workspace in a well-ventilated area to keep the air clear of harmful particles. Accurate measuring and marking are key to a successful build, so take your time to ensure everything is marked correctly before cutting or drilling.
Use clamps to keep pieces stable during assembly. If you’re working with your spiral herb garden outdoors, be mindful of weather conditions that might impact your project, such as rain affecting the soil mix.
How to Build Wonderful DIY Spiral Herb Garden – Step-by-Step Directions
Step 1 – Prep and Layout
Begin by selecting a suitable location for your spiral herb garden. Ensure there’s adequate sunlight and good drainage. Using your measuring tape, mark out a small circular base about 2 ft (61 cm) wide. This will serve as the foundation for your spiral.
Step 2 – Cut and Label Pieces
Using the saw, cut the wood into the specified lengths. Label the pieces as you cut them, so you know which ones will fit together during assembly. When cutting, ensure all pieces are of uniform length, which will help in building a sturdy base.
Step 3 – Dry Fit and Mark Joinery
Before proceeding with assembly, dry fit all wood pieces to see how they fit together. Mark where you will drill pilot holes on each piece. This will make it easier to assemble later and help prevent the wood from splitting.
Step 4 – Assemble the Frame/Body
Start assembling the frame using your labeled pieces. Use screws to attach the 36″ pieces vertically to the concrete blocks, allowing for a spiral shape at the top. Make sure to use a level to verify that everything is straight and secure, tightening screws as needed.
Step 5 – Reinforce and Square
Check the structure’s squareness by measuring diagonals from corner to corner. If the lengths are equal, your square is perfect. Add additional screws or brackets as needed to reinforce joints and ensure stability.
Step 6 – Attach Surfaces or Panels
Once the frame is sturdy, attach the landscaping fabric along the inside of the spiral. This will help contain the soil and prevent erosion. Use a staple gun to secure the fabric, making sure to leave enough material to wrap around the edges.
Step 7 – Sanding and Edge Treatment
Using sandpaper, gently sand down any rough edges on your wood structure. Start with a lower grit sandpaper and work your way up to a finer grit. This will provide a smooth finish and prevent splinters.
Step 8 – Finish Application
Apply an outdoor sealant or stain to protect the wood from moisture and weather conditions. Allow it to cure as per manufacturer instructions. Once dried, fill your spiral with soil and plant your herbs according to their spacing and sunlight needs.
FAQ about Wonderful DIY Spiral Herb Garden
What type of herbs can I plant in my spiral herb garden? You can grow a variety of herbs including basil, parsley, thyme, dill, rosemary, and mint.
How often should I water my herbs? Watering frequency may vary depending on climate. Generally, it’s best to keep the soil moist but not soggy. Check the soil moisture regularly.
Can I use this project indoors? Yes, as long as you place it in a spot that receives plenty of sunlight, your spiral herb garden can thrive indoors.
Is it difficult to maintain the garden? No, the spiral design actually makes maintenance easy. Just ensure that you prune and harvest your herbs regularly.
How long will it take for my herbs to grow? This depends on the type of herbs and growing conditions. Most herbs can be ready for harvest within 4–6 weeks.
Do I need to use specific soil for my spiral herb garden? Using a quality potting soil is recommended. Look for soil that drains well, as herbs generally don’t like to sit in water.