
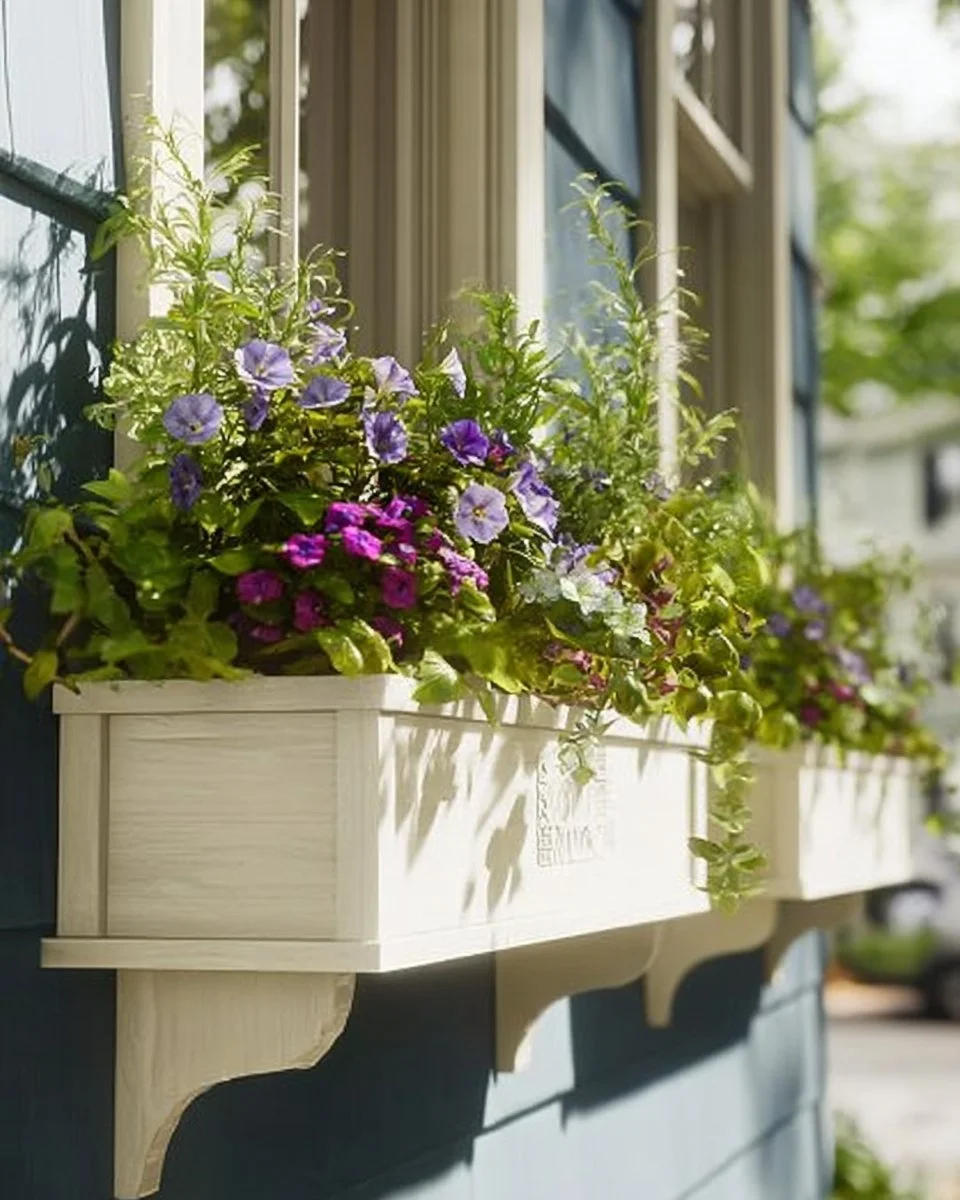
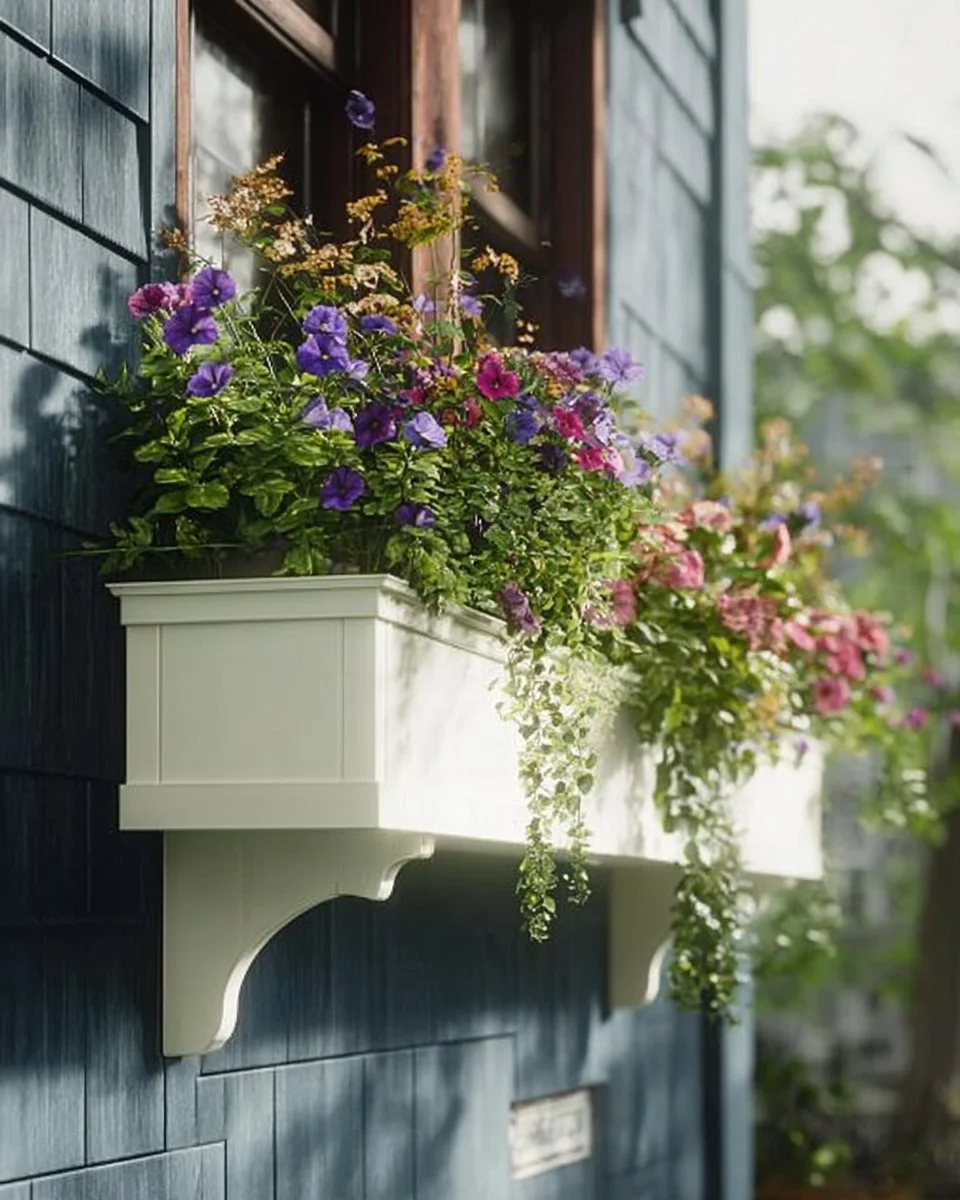
Introduction to Weather-Proof Window Boxes
Have you ever dreamed of creating a garden that brightens up your windows without the hassle of extensive upkeep? Weather-Proof Window Boxes can transform your living space both inside and out, infusing style and color into your home. Not only do they bring life to your windows, but they also offer a practical way to enjoy gardening, even in small spaces.
Imagine having vibrant flowers or lush greenery just outside your home without needing a full garden. This DIY project is special because it allows you to customize the design, size, and color according to your preference, making it a fun and rewarding experience. Moreover, with a modest budget and some essential tools, you can complete this project in a weekend, making it perfect for both novice and experienced DIY enthusiasts.
A vital aspect of these window boxes is their weather-proof feature, ensuring your plants remain safe and secure during rainfall or intense sunlight. Priced affordably, you won’t have to break the bank to enhance your home’s exterior. This project is designed for outdoor use and can withstand various weather conditions, providing a reliable option for all plant lovers.
Table of Contents
Key Benefits of Weather-Proof Window Boxes
Why You’ll Love This Build
- Durability: Built to withstand the elements, ensuring longevity.
- Simplicity: Straightforward construction process for all skill levels.
- Versatility: Suitable for a range of plants, from herbs to flowers.
- Portability: Easily movable, allowing you to rearrange your display.
- Weather Resistance: Protects plants from harsh outdoor conditions.
- Cost Savings: More economical than purchasing pre-made options.
What Makes It Stand Out
Weather-Proof Window Boxes stand out by offering the potential for personalization; you can select the materials and finishes that suit your style. Unlike store-bought alternatives, you can create a box that perfectly fits your window dimensions. Additionally, a DIY approach allows you to use sustainable materials and techniques, reducing your environmental footprint.
This project shines in its flexibility; whether you want to grow cascading flowers for a pop of color or fresh herbs for your cooking, you can easily adapt the design to meet your needs. Ultimately, crafting these window boxes provides a rewarding experience while enhancing the aesthetic appeal of your home.
Project Specs for Weather-Proof Window Boxes
At-a-Glance Details
- Skill Level: Beginner to Intermediate
- Estimated Time: 4-6 Hours
- Estimated Cost (USD): $50 – $100
- Dimensions: Length: 24 in (61 cm), Height: 8 in (20.3 cm), Width: 10 in (25.4 cm)
- Indoor/Outdoor Suitability: Outdoor
- Tools Needed at a Minimum:
- Drill
- Saw
- Measuring Tape
- Screwdriver
Materials and Tools for Weather-Proof Window Boxes
Complete Materials List with Measurements
- Cedar Boards: 1 inch x 6 inches x 8 feet (x2 for the base and sides)
- Plywood: 1/2 inch thick, 2 feet x 3 feet (for the bottom)
- Wood Screws: 1 1/4 inch (for assembly)
- Damp-Proof Sealant: One quart (to protect against moisture)
- Plastic Liner: 24 inches x 10 inches x 8 inches (to hold soil and moisture)
- Wood Stain (optional): One quart (for aesthetic appeal)
Complete Tools List
- Drill: For making pilot holes and driving screws
- Saw: Circular or miter saw for precise cuts
- Measuring Tape: For accurate measurements
- Screwdriver: To tighten screws and complete the assembly
- Clamps: To secure pieces during assembly
Substitutes and Alternatives
If you’re looking for budget-friendly options, consider using treated pine instead of cedar, as it’s often less expensive. Similarly, a plywood alternative for the base can still provide adequate strength while reducing costs. For the sealant, various waterproofing products are available at different price points, allowing for flexibility based on your budget or preferences.
Cut List and Measurements for Weather-Proof Window Boxes
- Cedar Boards:
- 2 pieces of 24 inches (61 cm) for the sides
- 2 pieces of 6 inches (15.2 cm) for the front and back
- Plywood:
- 1 piece of 24 inches x 10 inches (61 cm x 25.4 cm) for the bottom
- Pilot Holes: Drill 1/8-inch pilot holes for the wood screws to prevent splitting.
Safety and Prep for Weather-Proof Window Boxes
Before starting any DIY project, it’s essential to prioritize safety. Wear appropriate personal protective equipment (PPE) such as goggles, gloves, and a dust mask. Setting up your workspace in a well-ventilated area will protect you from fumes or dust produced during cutting and assembling.
Taking precise measurements and marking your cuts accurately will help ensure everything fits together nicely. Use clamps to hold pieces in place, making assembly smoother and safer. Proper ventilation is essential, especially when applying sealants or paints to avoid inhaling harmful fumes.
How to Build Weather-Proof Window Boxes – Step-by-Step Directions
Step 1 – Prep and Layout
Begin by measuring your window space to determine the size of your window box. Make sure your measurements are clear and accurate. Lay out your cedar boards and cut them to the specified lengths for the sides, front, and back. Ensure there’s enough space for drainage.
Step 2 – Cut and Label Pieces
Using a saw, cut the cedar boards and plywood according to your cut list. As you cut, label the pieces to avoid confusion later. Measure twice, cut once to ensure a clean fit.
Step 3 – Dry Fit and Mark Joinery
Before attaching the pieces, perform a dry fit. Place the base, sides, front, and back together. Mark joinery points where screws will go, ensuring they line up properly. This will make the assembly easier and more precise.
Step 4 – Assemble the Frame/Body
Start by attaching the sides to the back piece using wood screws. Secure the front piece next, making sure all corners are square. The assembly should feel sturdy with a tight fit.
Step 5 – Reinforce and Square
After the frame is assembled, check for square by measuring the diagonals from corner to corner. If the lengths are equal, your frame is square. If not, adjust the corners and retighten the screws.
Step 6 – Attach Surfaces or Panels
Once the frame is square, attach the plywood base to the bottom. Use screws evenly spaced along the perimeter to secure it. This base will hold the soil and plants. Ensure it aligns well with the edges of the frame.
Step 7 – Sanding and Edge Treatment
Sand down all edges and surfaces using varying grits, starting from coarse to finer ones. This will smooth out the surface, ensuring safe handling and a professional finish. Don’t forget to wipe away dust after sanding.
Step 8 – Finish Application
Apply a damp-proof sealant to the outside of the window box to protect it from rain and humidity. If desired, add a coat of wood stain for aesthetic value, following the manufacturer’s instructions. Allow adequate time for drying between coats.
FAQ Section
Q: How do I ensure my window boxes are drained properly?
A: Include drainage holes in the bottom plywood to prevent excess water accumulation and root rot.
Q: Can I use any type of wood for this project?
A: It’s best to use rot-resistant woods like cedar or treated pine for outdoor use to prolong the lifespan of your window boxes.
Q: How often should I replace the plants in my window boxes?
A: This depends on the type of plants. Annual flowers typically need replacing every year, while perennials can last longer.
Q: How can I customize the look of my weather-proof window boxes?
A: Feel free to paint or stain the wood and add decorative elements or designs to match your home’s exterior style.
Q: What plants are best suited for window boxes?
A: Herbs, annuals, and trailing plants like petunias or ivy are excellent for window boxes, offering both beauty and practicality.