
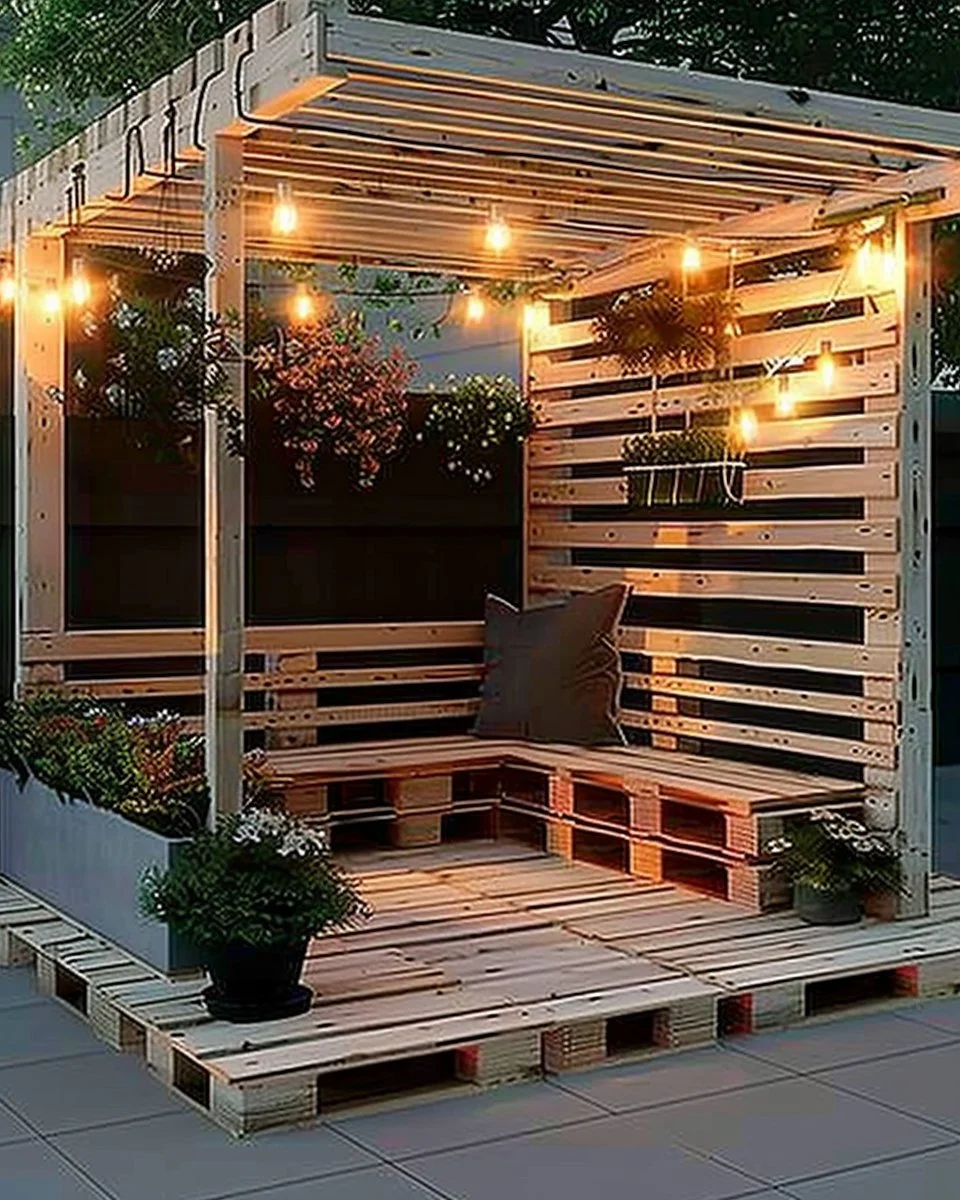
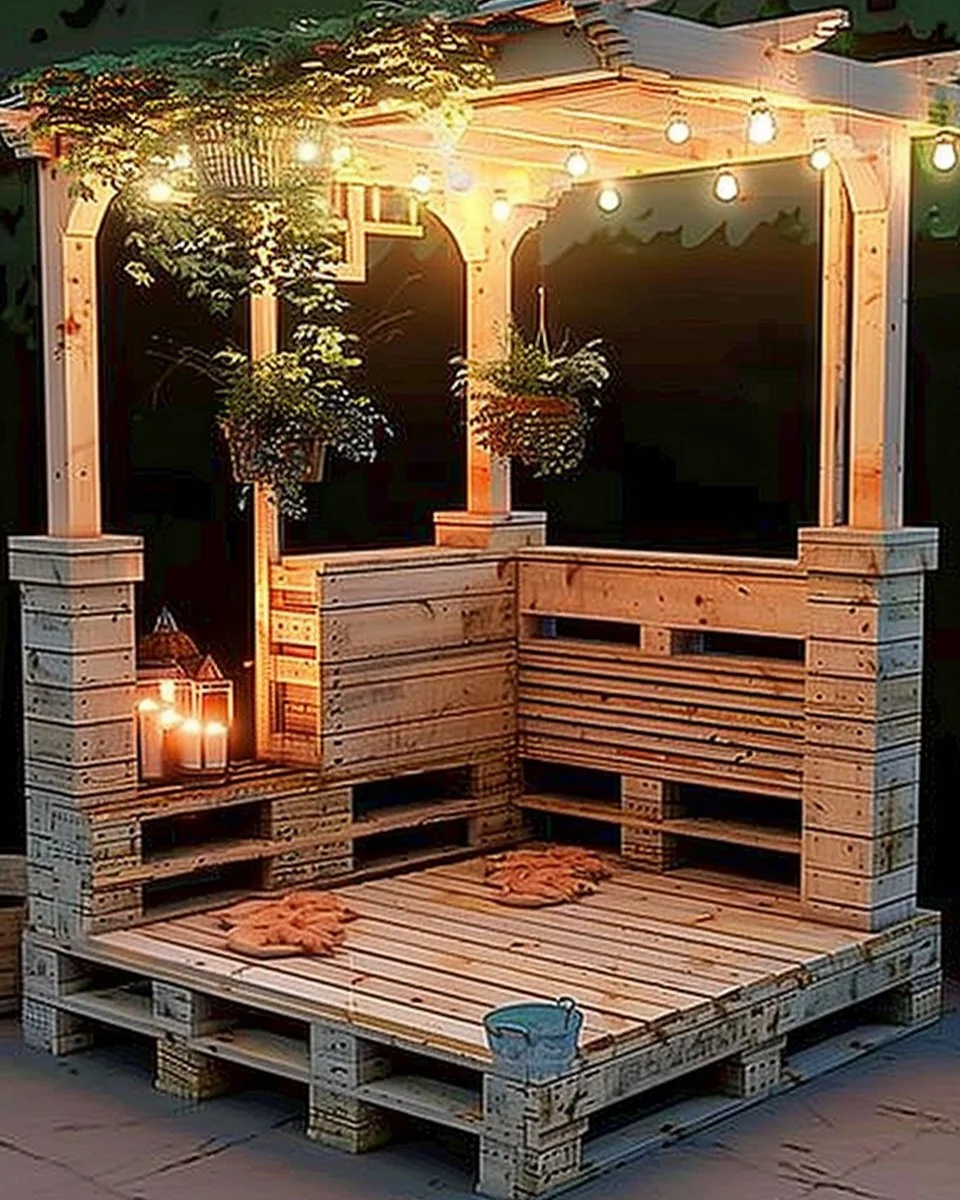
Introduction to Skid Projects & Pallet Ideas: Creative Ways to Upcycle Wood Pallets
Are you ready to turn discarded wooden pallets into something truly remarkable? Skid Projects & Pallet Ideas: Creative Ways to Upcycle Wood Pallets offers a treasure trove of possibilities for DIY enthusiasts. Whether you’re a seasoned woodworker or a beginner, these projects can unleash your creativity while being cost-effective and fun.
Imagine transforming those neglected pallets into furniture, garden decorations, or even functional artwork. But what makes these builds special? It’s the combination of practicality and uniqueness. Most of these projects can be completed in just a weekend, saving you money while providing a satisfying hands-on experience. Plus, many can be adapted for both indoor and outdoor use, making them versatile additions to any environment.
These projects not only breathe new life into wasted materials but also offer endless customization options. You can paint, stain, or modify them to fit your personal style, ensuring your creations stand out. This guide will empower you with all the information you need, from skill level to estimated costs, ensuring a delightful crafting journey.
Key Benefits of Skid Projects & Pallet Ideas: Creative Ways to Upcycle Wood Pallets
Why You’ll Love This Build
- Durability: Pallets are made from sturdy wood that can withstand wear and tear.
- Simplicity: Most projects require basic tools and minimal woodworking skills.
- Versatility: Use pallets for furniture, storage, decor, and much more.
- Portability: Many projects are lightweight and easy to move around.
- Cost Savings: Wood pallets are often free or extremely low-cost.
- Space Efficiency: Many designs can fit into small areas seamlessly.
What Makes It Stand Out
One of the most appealing aspects of upcycling wood pallets is their originality. Each piece of wood has its own character, from grain patterns to imperfections, which can be highlighted in your project. This is a far cry from mass-produced furniture that lacks personality.
The customization options are endless; you can modify sizes, shapes, and finishes to match your taste. Whether you’re looking to create rustic charm in your home or a modern aesthetic in your garden, there’s something for everyone. Plus, these projects are typically more affordable than buying new furniture or decor, making them suitable for those on a budget.
Project Specs for Skid Projects & Pallet Ideas: Creative Ways to Upcycle Wood Pallets
At-a-Glance Details
- Skill Level: Beginner to Intermediate
- Estimated Time: 1-2 weekends
- Estimated Cost (USD): $0 – $100 (depending on materials used)
- Dimensions: Varies by project (common sizes: 48” x 40” for pallets)
- Indoor/Outdoor Suitability: Both, depending on the project
- Tools Needed at a Minimum:
- Circular saw
- Drill with bits
- Hammer
- Screwdriver
- Sander
Materials and Tools for Skid Projects & Pallet Ideas: Creative Ways to Upcycle Wood Pallets
Complete Materials List with Measurements
- Wood Pallets: 2-6 pallets, depending on project size
- Wood Screws: 1.25” to 2” screws (quantity based on assembly)
- Wood Glue: 1 bottle (optional, but recommended)
- Sandpaper: 80, 120, and 220 grit (variety for finishing)
- Finish (optional): Stain or paint based on personal preference (1 quart)
Complete Tools List
- Circular Saw: For cutting pallets to size
- Drill and Bits: Essential for creating pilot holes and driving screws
- Hammer: For assembling pieces
- Screwdriver: For manual assembly if necessary
- Sander: To smooth surfaces and edges
Substitutes and Alternatives
If you’re on a budget or don’t have access to specific tools or materials, consider alternatives like second-hand tools, elbow grease instead of power tools, or simple hand tools. Many projects can be altered to use scrap wood if pallets aren’t available. For finishes, consider using natural oils instead of conventional stains to give a unique look and feel.
Cut List and Measurements for Skid Projects & Pallet Ideas: Creative Ways to Upcycle Wood Pallets
- Standard Pallet Sections:
- 40” (101.6 cm) x 48” (121.9 cm) base frame pieces (cut as needed)
- 4” (10.16 cm) slats for shelving or decoration (as many as desired)
- Various sizes based on desired dimensions
Note: Make sure to mark the grain direction when cutting to maintain structural integrity. Pre-drill holes for screws to prevent wood splitting.
Safety and Prep for Skid Projects & Pallet Ideas: Creative Ways to Upcycle Wood Pallets
Always wear Personal Protective Equipment (PPE), including safety goggles, gloves, and a dust mask. Set up a clean, organized workspace with adequate ventilation, particularly when sanding or applying finishes. For accuracy, use a square and measuring tape for all cuts, ensuring everything lines up correctly. Clamping pieces together during assembly can help maintain stability while you work.
How to Build Skid Projects & Pallet Ideas: Creative Ways to Upcycle Wood Pallets – Step-by-Step Directions
Step 1 – Prep and Layout
Begin by selecting your pallets. Ensure they’re intact with no rotting or significant damage. Lay them out where you plan to build. Mark the dimensions of your project on the floor for visual reference.
Step 2 – Cut and Label Pieces
Using a circular saw, cut the pallets into the required pieces according to your project plans. Label each piece to avoid confusion during assembly.
Step 3 – Dry Fit and Mark Joinery
Assemble the pieces without attaching them. This step allows you to make sure everything fits as it should. Mark where you intend to create pilot holes.
Step 4 – Assemble the Frame/Body
Start by attaching the base frame pieces together using wood screws. Ensure they’re straight and secure. Check for squareness at the corners as you go.
Step 5 – Reinforce and Square
Once the primary structure is assembled, measure diagonals to ensure there is no racking. Adjust where necessary to achieve a balanced frame.
Step 6 – Attach Surfaces or Panels
Begin adding shelves or other panels by securing them with screws. Make sure to space your fasteners evenly for stability.
Step 7 – Sanding and Edge Treatment
Once everything is assembled, sand all surfaces starting with 80-grit paper, then moving to 120 and finishing with 220. Ensure all dust is removed before proceeding.
Step 8 – Finish Application
Apply your chosen stain or paint following the manufacturer’s instructions. Allow adequate drying time between coats, and check if re-coating is necessary for your desired finish.
Frequently Asked Questions
What tools do I need for my first pallet project?
For a beginner project, a circular saw, drill, and hammer are sufficient.
Can I use any pallets?
Not all pallets are safe; avoid ones marked with chemicals. Look for heat-treated pallets.
What are some easy projects to start with?
Simple projects include garden planters or pallet shelves, which require minimal cutting and assembling.
How do I know if my pallet is safe to use?
Check for the “HT” mark, indicating heat treatment. Avoid those with chemical treatment markers such as “MB.”
Can I leave my projects outdoors?
Yes, but make sure to apply a weather-resistant finish to prolong the life of your project.