
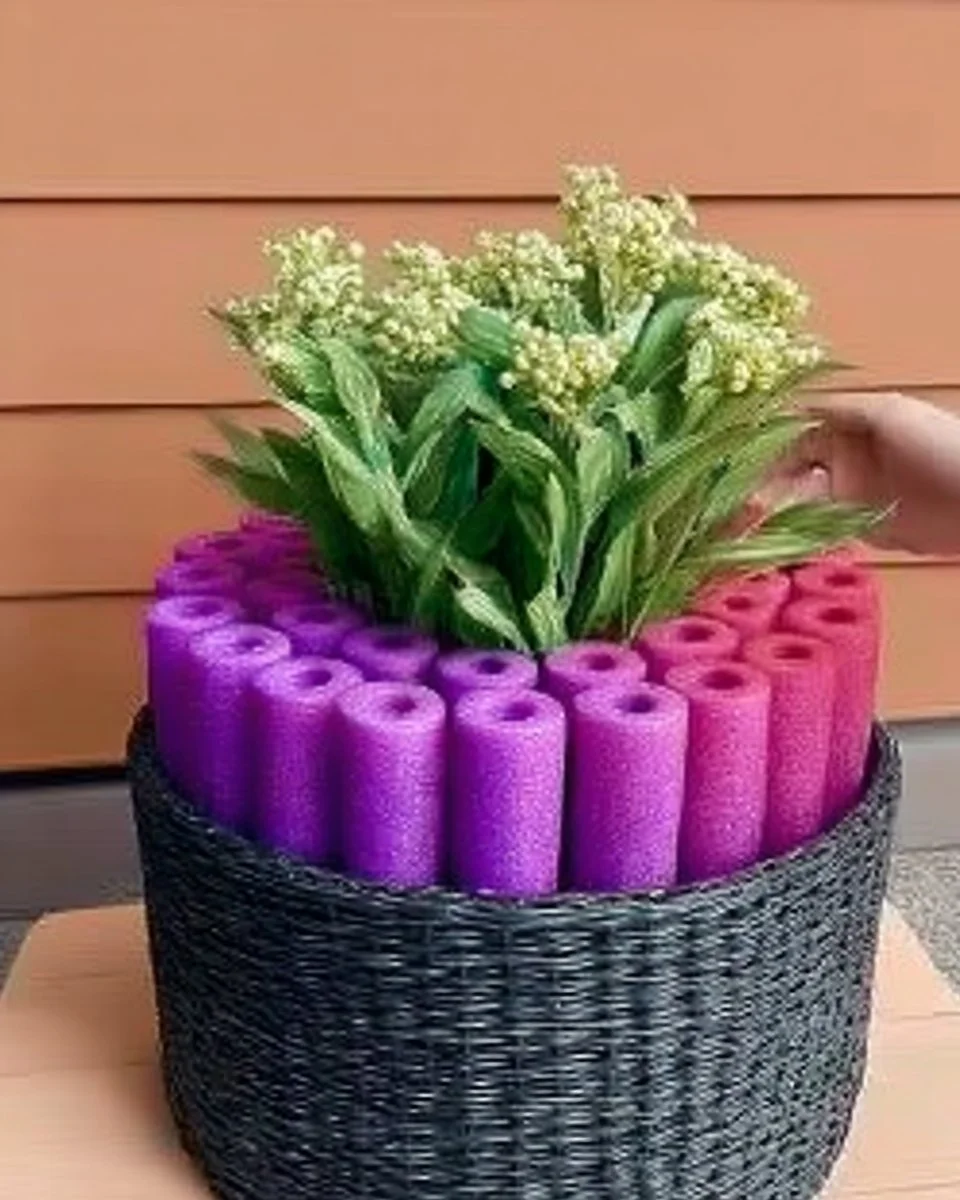
Introduction to Sharing my SECRET 🤫DECOR HACK: Dollar Tree Planter (trashcan + pool noodles) 🤯 #hack #diy
Have you ever walked into a store only to be overwhelmed by the price tags? Creating beautiful decor shouldn’t break the bank. That’s where our Sharing my SECRET 🤫DECOR HACK: Dollar Tree Planter (trashcan + pool noodles) 🤯 #hack #diy comes into play! This affordable yet stunning DIY project combines common household items to create a unique planter that can brighten your outdoor space or spruce up your indoor decor.
Imagine transforming a simple trashcan and pool noodles into a charming planter for your favorite flowers or herbs! This process is both budget-friendly and simple enough that even beginners can execute it with ease. The estimated cost is low, making it an ideal project for those looking to beautify their space without spending much. Plus, you can complete this amazing hack in a weekend!
This craft is perfect for both indoor and outdoor use. Whether you want to add some greenery to your home or create a welcoming entrance with vibrant plants, this project can fit any space. It’s not only quick and easy, but it also provides a creative outlet, allowing you to put your own personal touch on your decor. So, are you ready to learn more about this exciting project?
Table of Contents
Key Benefits of Sharing my SECRET 🤫DECOR HACK: Dollar Tree Planter (trashcan + pool noodles) 🤯 #hack #diy
Why You’ll Love This Build
- Cost-Effective: Using low-cost materials, this project won’t dent your wallet.
- Durable: The materials are chosen specifically for their resilience against weather elements.
- Versatile: Suitable for both indoor and outdoor decor, the planter fits anywhere.
- Customizable: You can personalize it with paint, embellishments, or plant choices.
- Fun to Make: Engage in a creative process that is enjoyable and rewarding.
- Space Efficient: Fit it into small areas, be it a balcony, porch, or window sill.
What Makes It Stand Out
The originality of Sharing my SECRET 🤫DECOR HACK: Dollar Tree Planter (trashcan + pool noodles) 🤯 #hack #diy lies in its innovative use of everyday materials that would typically be discarded. By repurposing a trashcan, which is often overlooked, you’re not only creating something beautiful but also promoting sustainability.
Customization is another highlight. You can paint your planter to match your outdoor furniture or add decorations like twine, beads, or satin ribbons. This means you are not just limited to one design; you can create an array of planters, making this hack a wonderful option for mini gifts or themed decorations.
Project Specs for Sharing my SECRET 🤫DECOR HACK: Dollar Tree Planter (trashcan + pool noodles) 🤯 #hack #diy
At-a-Glance Details
- Skill Level: Beginner to Intermediate
- Estimated Time: 1-2 hours
- Estimated Cost: $10-$15 USD
- Dimensions:
- Trashcan: 12 inches (30.5 cm) height
- Pool Noodles: 1 inch (2.54 cm) in diameter, cut to 12 inches (30.5 cm) length
- Indoor/Outdoor Suitability: Both
- Tools Needed at a Minimum: Scissors, hot glue gun, paintbrush.
Materials and Tools for Sharing my SECRET 🤫DECOR HACK: Dollar Tree Planter (trashcan + pool noodles) 🤯 #hack #diy
Complete Materials List with Measurements
- 1 Plastic trashcan (12 inches tall)
- 3 Pool noodles (1 inch diameter, 12 inches long each)
- 1 Can of outdoor spray paint (color of your choice)
- Potting soil
- Plants or flowers (herbs, succulents, etc.)
- Optional embellishments (ribbon, stones, etc.)
Complete Tools List
- Scissors (for cutting pool noodles)
- Hot glue gun (and glue sticks)
- Paintbrush (for applying paint if needed)
- Marker or chalk (for marking cuts)
Substitutes and Alternatives
If you can’t find a plastic trashcan, consider using a bucket or large plastic container instead. These alternatives should provide similar functionality and aesthetic. For pool noodles, foam pipe insulation could offer an alternative, but ensure its dimensions align with your requirements.
When it comes to plants, feel free to swap them with seasonal flowers or indoor plants that suit your aesthetic. If you prefer a more permanent solution, consider using larger varieties of faux flowers.
Cut List and Measurements for Sharing my SECRET 🤫DECOR HACK: Dollar Tree Planter (trashcan + pool noodles) 🤯 #hack #diy
- Trashcan: 1 piece at 12 inches (30.5 cm) tall
- Pool Noodles: 3 pieces, each cut to 12 inches (30.5 cm) long
Ensure when cutting that the noodles are straight for the best fit. Use a straight edge for accuracy.
Safety and Prep for Sharing my SECRET 🤫DECOR HACK: Dollar Tree Planter (trashcan + pool noodles) 🤯 #hack #diy
Preparation is key to a seamless project. Always wear protective gloves when using a hot glue gun. Set up your workspace in an area with good ventilation, especially when using spray paint. This will help disperse fumes and keep your environment safe.
Accurately measure and mark your cuts with a straight edge or measuring tape to mitigate any errors. It’s also wise to use clamps to hold materials in place while the glue sets, ensuring everything adheres properly.
How to Build Sharing my SECRET 🤫DECOR HACK: Dollar Tree Planter (trashcan + pool noodles) 🤯 #hack #diy – Step-by-Step Directions
Step 1 – Prep and Layout
Start by arranging your workspace efficiently. Gather all materials and tools. Make sure the trashcan is clean. Lay it down on a flat surface to mark the spots where you’ll attach the pool noodles.
Step 2 – Cut and Label Pieces
Use scissors to cut the pool noodles into three equal parts, each measuring 12 inches (30.5 cm). Label each piece if necessary to avoid confusion during assembly.
Step 3 – Dry Fit and Mark Joinery
Hold the cut pool noodles against the trashcan to visualize their placement. Make small marks on the trashcan to ensure the noodles are evenly spaced and positioned.
Step 4 – Assemble the Frame/Body
Using the hot glue gun, begin affixing the pool noodle pieces to the trashcan. Apply a generous amount of glue to the bottom of each noodle, pressing firmly against the can for a good bond.
Step 5 – Reinforce and Square
Once all noodles are attached, check for any wobble by gently rocking the planter. If necessary, add extra glue or even a small piece of tape around the base of the noodles to reinforce them.
Step 6 – Attach Surfaces or Panels
If you want an additional decorative feature, consider painting the outer surface of the trashcan. Use spray paint and allow it to dry for about 30 minutes before continuing.
Step 7 – Sanding and Edge Treatment
After painting, lightly sand any rough edges on the trashcan’s top and noodle ends to create a smoother finish, thereby enhancing the aesthetics.
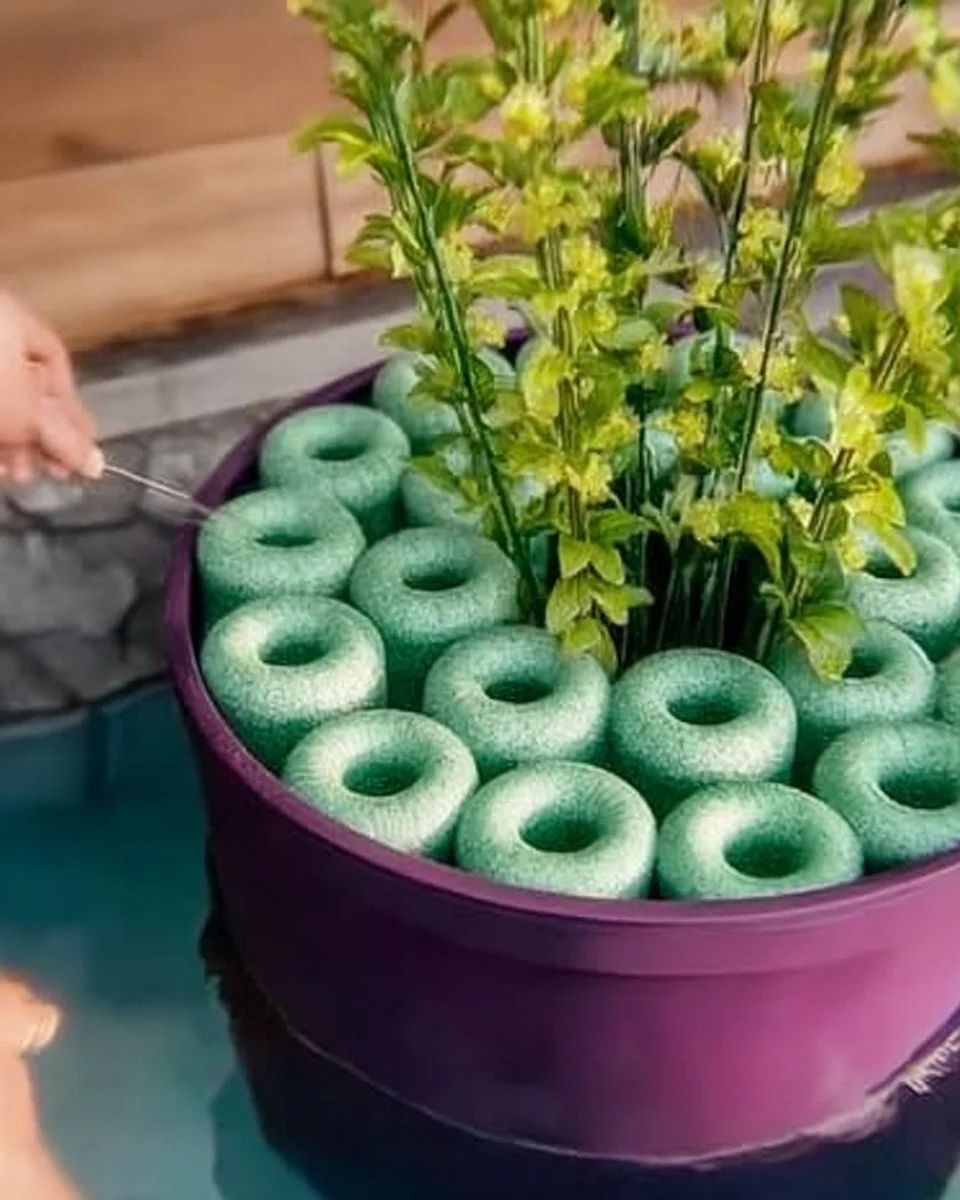
Step 8 – Finish Application
Finally, add soil and your choice of plants to the planter. Fill it to the top with potting soil, then gently press in the plants, ensuring they are secure.
FAQ for Sharing my SECRET 🤫DECOR HACK: Dollar Tree Planter (trashcan + pool noodles) 🤯 #hack #diy
Can I use other materials instead of pool noodles?
Yes! Foam pipe insulation or thick styrofoam could work, but ensure similar dimensions.
Is this planter suitable for outdoor use?
Absolutely. The planter is designed to withstand outdoor elements, especially when painted with outdoor spray paint.
How often do I need to water the plants?
This depends on the type of plants you’ve chosen. Generally, check the soil moisture; if it’s dry an inch down, it’s time to water.
Can I use this planter indoors?
Yes! It’s perfect for brightening up indoor spaces as well.
What types of plants work best in this planter?
Consider using succulents, herbs, or any small flowering plant that fits your aesthetic preferences and watering habits.