
Introduction to How to Build Raised Garden Bed Boxes
Have you ever dreamed of growing your own vegetables, herbs, or flowers but found limited space in your yard or garden? Building a raised garden bed box might be the solution you’ve been looking for! This project is not only fulfilling but also practical. Raised garden beds enhance drainage, keep plants safe from pests, and elevate the gardening experience.
Imagine nurturing your favorite plants without bending over too much or struggling with poor soil quality. The aesthetic appeal of raised garden beds can also transform your outdoor space into a picturesque retreat. You can enjoy watching your plants thrive while savoring the satisfaction of having built it yourself.
This guide on how to build raised garden bed boxes will take you through every step, making it accessible for anyone, whether you’re a novice gardener or a seasoned DIYer. You can complete this project in a weekend, and it won’t break the bank! The materials are affordable, and many can be sourced locally or even reclaimed. Plus, the skill level is suitable for beginners, ensuring that everyone can create their own beautiful garden oasis.
Key Benefits of How to Build Raised Garden Bed Boxes
Why You’ll Love This Build
- Durability: Using quality materials means your garden bed will last for years.
- Simplicity: Clear step-by-step instructions make the build a breeze.
- Versatility: Customize the size and color to fit your space and aesthetics.
- Portability: Move the beds around to optimize sunlight exposure or design changes.
- Weather Resistance: Choose materials that can withstand rain, sun, and temperature fluctuations.
- Cost Savings: Growing your own produce leads to significant savings at the grocery store.
What Makes It Stand Out
This project allows for creativity. Unlike store-bought options, building your raised garden bed enables you to customize everything, from size to materials. Want a larger planter? No problem! Prefer cedar to resist rot? You can choose that too! Furthermore, you can effortlessly adapt this project to fit your specific needs and preferences.
Raised beds also improve drainage and soil quality, making it easier to manage gardening conditions. They are especially beneficial in areas with poor soil, allowing you to control the planting medium entirely.
Project Specs for How to Build Raised Garden Bed Boxes
At-a-Glance Details
- Skill Level: Beginner
- Estimated Time: 6-8 hours
- Estimated Cost: $100-$200
- Dimensions: 4′ x 8′ (121.92 cm x 243.84 cm) or customized
- Indoor/Outdoor Suitability: Outdoor
Tools Needed at a Minimum
- Cordless drill
- Saw (circular or miter)
- Level
- Tape measure
- Safety glasses
Materials and Tools for How to Build Raised Garden Bed Boxes
Complete Materials List with Measurements
- 4x 2” x 8” pressure-treated lumber (for the long sides)
- 2x 2” x 4” pressure-treated lumber (for end pieces)
- 4x corner brackets for added stability
- Wood screws (3-inch) for assembly
- Landscape fabric (to prevent weeds)
- Wood sealer or stain (optional for aesthetics)
Complete Tools List
- Cordless power drill
- Circular saw or miter saw
- Tape measure
- Level
- Safety glasses and work gloves
Substitutes and Alternatives
If you’re looking to save money, consider using reclaimed wood or pallets to create your garden bed. Be mindful of the wood’s condition to avoid any chemicals that may leach into the soil. Also, you may substitute wood screws with outdoor-rated lag bolts for extra durability, though they may require pre-drilling.
Cut List and Measurements for How to Build Raised Garden Bed Boxes
- Long Sides (4 pieces): 4’ (121.92 cm)
- Short Sides (4 pieces): 2’ (60.96 cm)
- Corner brackets (4 pieces): Specific sizes vary
- Make sure to cut with the grain to minimize splintering.
- Pre-drill holes for screws to prevent splitting the wood.
Safety and Prep for How to Build Raised Garden Bed Boxes
Before you start, always wear safety glasses and gloves to protect yourself while handling wood and power tools. Set up your workspace in a well-ventilated area, preferably outdoors. Ensure that you have all your materials and tools nearby to avoid interruptions once you start building. Finally, measure twice, cut once to ensure accuracy. A sturdy clamp can be helpful to secure your pieces while working.
How to Build Raised Garden Bed Boxes – Step-by-Step Directions
Step 1 – Prep and Layout
Begin by deciding where you want your raised garden bed to be located. Use a tape measure to lay out the 4’ by 8’ rectangle. Mark the corners with stakes or spray paint. Ensure the area is flat for stability and to help with drainage.
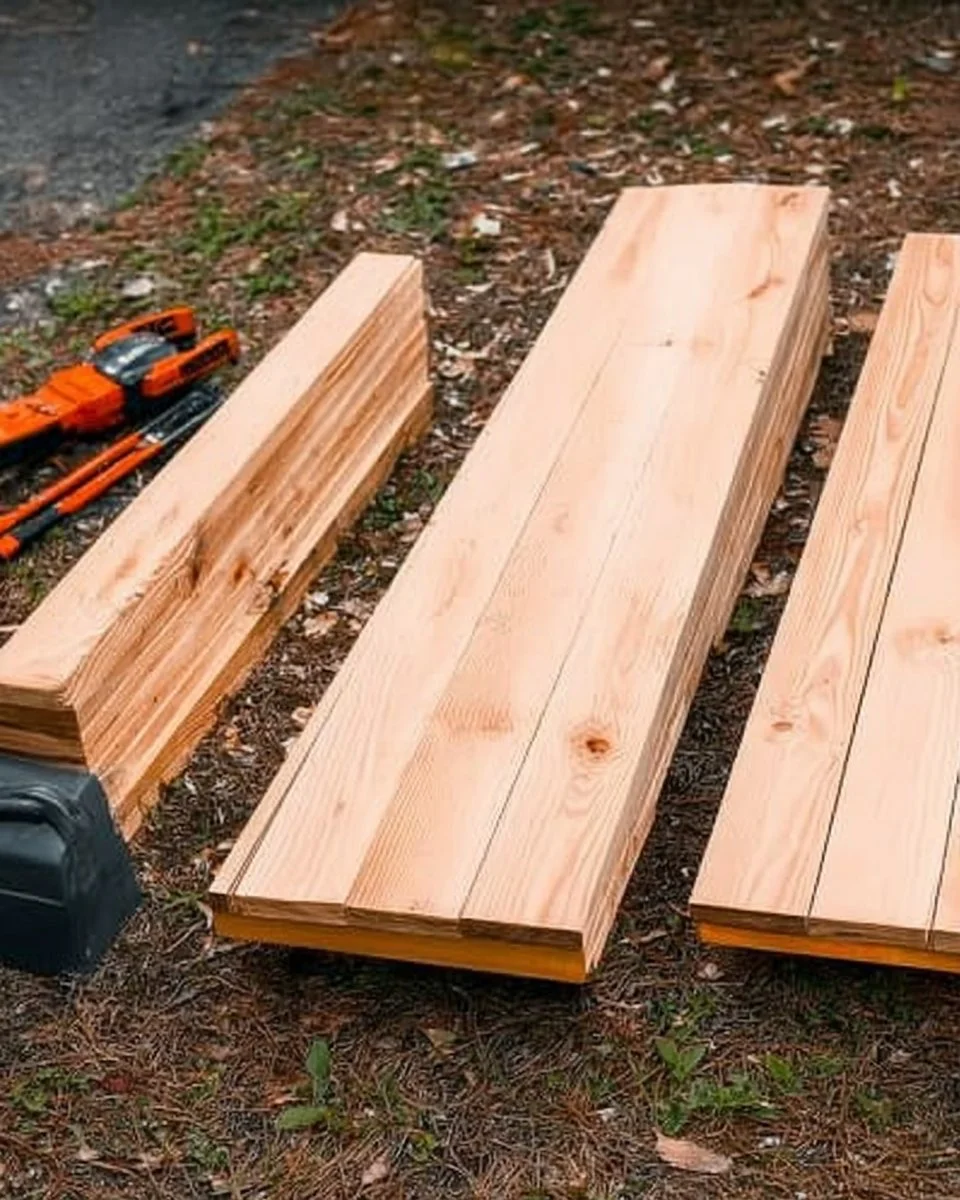
Step 2 – Cut and Label Pieces
Using your saw, cut the pressure-treated lumber into the desired lengths: four 4-foot pieces for the long sides and four 2-foot pieces for the short sides. Label them for easy identification during assembly.
Step 3 – Dry Fit and Mark Joinery
Before moving to assembly, lay out the pieces flat and do a dry fit to ensure everything fits well. Mark where you’ll drill pilot holes for attaching the corners. This helps to maintain accuracy when you screw the pieces together.
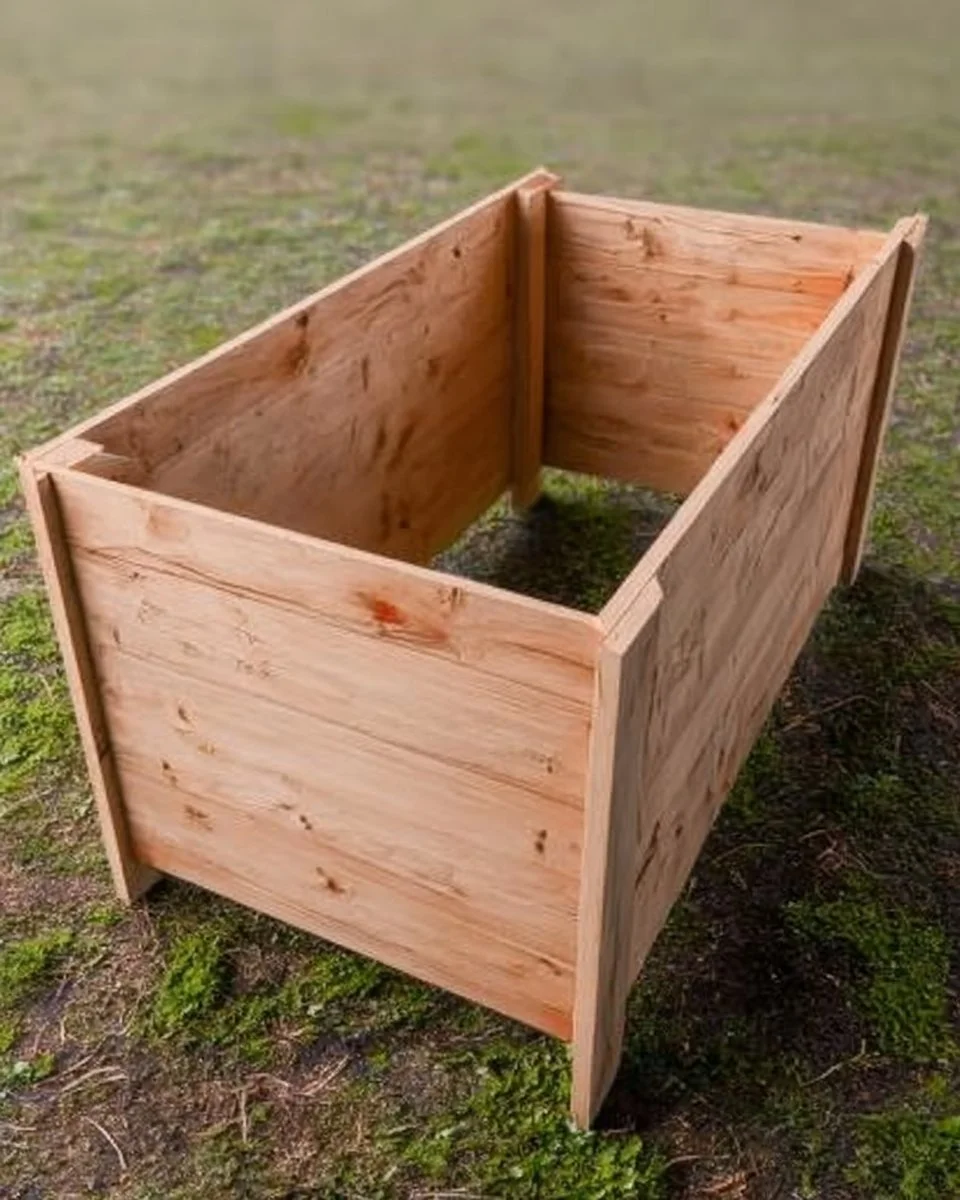
Step 4 – Assemble the Frame/Body
Start assembling the frame by positioning two of the long sides parallel to each other. Attach one of the short sides using wood screws at each end. Use a level to check that everything is even before securing the screws tightly.
Step 5 – Reinforce and Square
To reinforce the structure, attach the remaining short side. Use a square tool to check that the corners are at a 90-degree angle. Ensuring the frame is square will prevent any wobbling once it’s filled with soil.
Step 6 – Attach Surfaces or Panels
If you’re adding a bottom (not always necessary), use plywood panels cut to size to match the frame. Secure them with screws, spacing them every 12 inches. If using fabric instead, lay landscape fabric at the bottom to retain soil.
Step 7 – Sanding and Edge Treatment
Using sandpaper, sand the edges and surfaces to remove any splinters and rough spots. Start with a coarse grit and finish with a finer grit for a smooth surface. This will help protect your hands when handling the bed.
Step 8 – Finish Application
If desired, apply wood sealer or stain to protect against the elements. Allow the first coat to dry before applying a second coat. Check the weather for ideal conditions—mild temperatures and no rain for 24 hours are best.
FAQ About How to Build Raised Garden Bed Boxes
How deep should a raised garden bed be?
A depth of 12-18 inches is ideal for most plants, allowing ample root growth while enabling better drainage.
What type of wood is best for raised garden beds?
Cedar is excellent due to its natural rot resistance. Pressure-treated lumber is also suitable but ensure it’s safe for growing edible plants.
Can I build a raised garden bed on grass?
Yes, but it’s recommended to remove the grass first or cover it with landscape fabric to prevent it from growing through the soil.
How long will a raised garden bed last?
With proper care and quality materials, a raised garden bed can last 10 years or more. Regular treatment or sealing will prolong its life.
What kind of soil should I use?
A mix of topsoil, compost, and organic matter is perfect for raised garden beds. It provides nutrients and ensures good drainage.
Can I grow vegetables in a raised garden bed?
Absolutely! Raised garden beds are perfect for vegetables as they offer better soil quality and drainage, making it easier to grow a variety of plants.