
Introduction to Free DIY Trellis Booklet
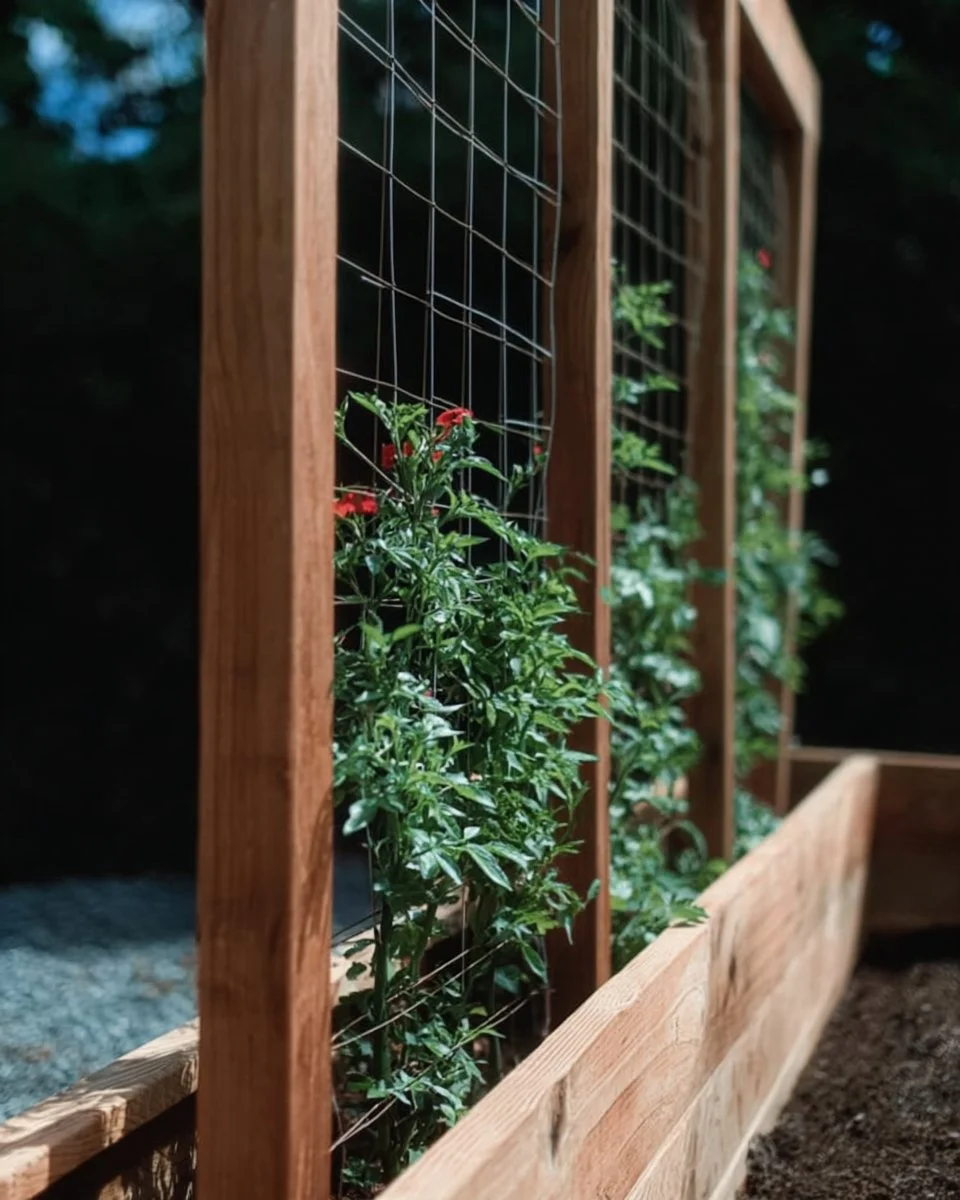
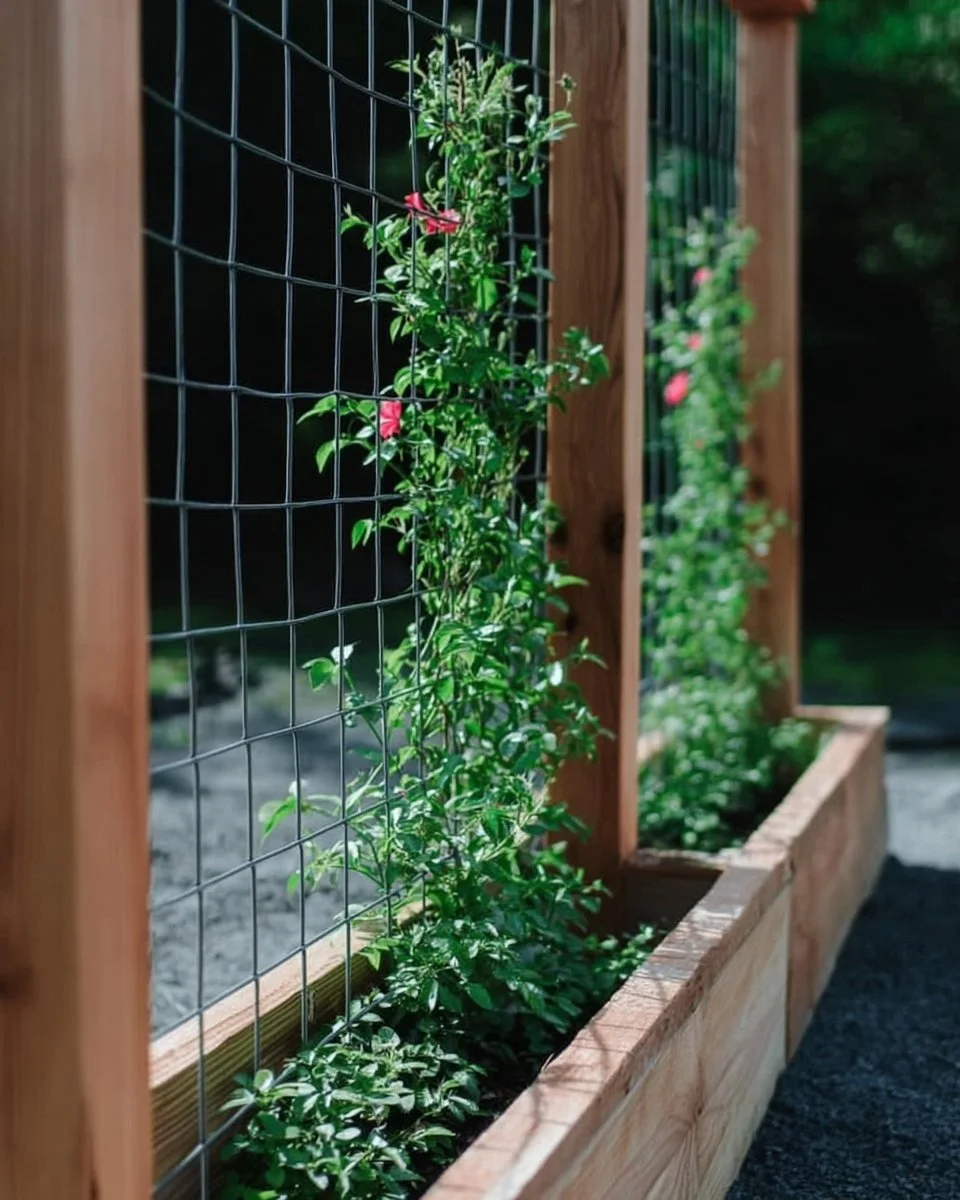
Are you ready to elevate your outdoor space? The Free DIY Trellis Booklet is your guide to creating a beautiful, functional trellis that adds depth and charm to your garden. Imagine growing climbing plants like roses, beans, or even cucumbers, all while enhancing your landscaping with a stunning structure. DIY projects like this one offer a unique sense of accomplishment and creativity. The best part? They can often be more affordable and customizable than store-bought alternatives.
This project is perfect for both seasoned DIYers and beginners. If you’re looking for something that you can accomplish in just a few hours, this trellis fits the bill perfectly. Plus, you can personalize it to match your yard’s aesthetic. With minimal materials and tools, you can create a structure that not only supports your plants but also transforms your space into an outdoor oasis.
Table of Contents
Key Benefits of Free DIY Trellis Booklet
Why You’ll Love This Build
- Durability: With the right materials, your trellis can withstand various weather conditions.
- Simplicity: The straightforward design makes this project accessible for everyone.
- Versatility: This trellis can accommodate a variety of climbing plants.
- Portability: Depending on your design, the trellis can be moved or rearranged easily.
- Cost Savings: Constructing your own trellis can be more budget-friendly than buying one.
- Space Efficiency: It maximizes vertical space in your garden, perfect for small areas.
What Makes It Stand Out
This DIY trellis is unique for its adaptability and simplicity. Unlike pre-manufactured products, you have the freedom to choose your materials and dimensions. With options to customize your design and finish, you can perfectly match the trellis to your existing landscaping. Compared to store-bought alternatives, building your own trellis allows for a more personal touch, both aesthetically and functionally, which makes it a great conversation piece in your garden.
Project Specs for Free DIY Trellis Booklet
At-a-Glance Details
- Skill Level: Beginner to Intermediate
- Estimated Time: 3-5 hours
- Estimated Cost: $50 – $100
- Dimensions: Varies (typically around 6 feet tall by 4 feet wide / 183 cm x 122 cm)
- Indoor/Outdoor Suitability: Outdoor
- Tools Needed at a Minimum: Saw, drill, screws, measuring tape, level
Materials and Tools for Free DIY Trellis Booklet
Complete Materials List with Measurements
- Wood (1×6 boards): Quantity: 4, Length: 6 feet (183 cm)
- Wood (2×2 posts): Quantity: 2, Length: 6 feet (183 cm)
- Wood Glue: 1 bottle, for added support.
- Exterior Wood Screws: 1 box, 2.5 inches (6.3 cm) long.
- Brackets: 4 L-brackets for added stability.
- Outdoor Stain or Paint: 1 quart for weatherproofing.
Complete Tools List
- Circular Saw: For cutting wood to the required lengths.
- Drill: For making pilot holes and fastening screws.
- Screwdriver: For securing screws.
- Measuring Tape: Essential for accurate measurements.
- Level: To ensure your trellis is perfectly straight.
Substitutes and Alternatives
If some of the materials are unavailable, consider using treated wood for weather resistance or choosing an alternative color of outdoor paint to match your style. For tools, budget alternatives such as a hand saw instead of a circular saw can achieve similar results, albeit with a bit more effort. Additionally, if you have any old furniture or pallets, these could serve as excellent sources of wood to recycle for your trellis.
Cut List and Measurements for Free DIY Trellis Booklet
- (4) 1×6 boards: 6 feet (183 cm) for the frame.
- (2) 2×2 posts: 6 feet (183 cm) for the vertical support.
- Ensure to cut all pieces with the grain direction for better strength.
- Drill pilot holes for screws 1/8 inch in diameter to prevent wood from splitting.
Safety and Prep for Free DIY Trellis Booklet
Always wear personal protective equipment (PPE) such as gloves and safety goggles during the building process. Set up a clean, well-ventilated workspace where you can lay out all your materials and tools. Accurate measurements are crucial, so double-check your dimensions before cutting. Using clamps ensures that your wood stays stable while you work, minimizing movement and improving safety.
How to Build Free DIY Trellis Booklet – Step-by-Step Directions
Step 1 – Prep and Layout
Begin by measuring the area where you want to position your trellis. Use stakes and string to lay out the size of the trellis, ensuring it fits your garden space. Accuracy is key, so make sure to check that each corner is 90 degrees.
Step 2 – Cut and Label Pieces
Using a circular saw, cut the 1×6 boards and 2×2 posts according to the measurements from your cut list. Label each piece as you cut to avoid confusion during assembly. A fine tooth blade will provide clean cuts.
Step 3 – Dry Fit and Mark Joinery
Before assembling, lay out all the cut pieces and do a dry fit to ensure everything aligns correctly. Mark where you will place the pilot holes for the screws and apply some wood glue to enhance the bond.
Step 4 – Assemble the Frame/Body
Start by attaching the horizontal 1×6 boards to the vertical 2×2 posts using screws. Make sure to use wood glue for extra stability between joins. Each screw should be spaced evenly, about every 12 inches (30 cm), for a secure build.
Step 5 – Reinforce and Square
Check that your structure is square by measuring the diagonals of your frame. Both measurements should be equal. If necessary, adjust the pieces until your trellis is square and secure everything tightly.
Step 6 – Attach Surfaces or Panels
If you’re adding slats or panels to the trellis, now is the time to attach them. Space them evenly, using brackets for added support if necessary. Let the adhesive cure according to the product instructions.
Step 7 – Sanding and Edge Treatment
Use a medium-grit sandpaper followed by fine-grit to smooth all edges and surfaces. This step is crucial since it enhances the finish and prevents splinters. Make sure to remove all dust before proceeding.
Step 8 – Finish Application
Apply a coat of stain or outdoor paint, ensuring even coverage. Depending on the product, you may need to apply multiple coats. Allow each coat to cure fully as per the manufacturer’s recommendations.
FAQ about Free DIY Trellis Booklet
What types of plants can I grow on a DIY trellis?
You can grow a variety of climbing plants such as climbing roses, cucumbers, beans, and peas.
How long will it take to build a trellis?
The estimated time for this project is around 3-5 hours, depending on your skill level and the complexity of your design.
Is wood treatment necessary for outdoor trellises?
Yes, treating wood with outdoor stains or sealants can significantly enhance its longevity and weather resistance.
What tools do I need to build a trellis?
Basic tools include a circular saw, drill, measuring tape, level, and a screwdriver.
Can I customize the design?
Absolutely! You can modify the dimensions, materials, and finishes to suit your personal style and preferences.
What should I do if I encounter issues while building?
Take a step back and review the instructions. It’s also helpful to seek advice from someone more experienced or check online resources for tips and troubleshooting.