
Introduction to DIY Watering System for Gardens – Easy & Inexpensive
Have you ever stood in your garden, watering can in hand, wishing for an easier way to take care of your plants? With the DIY Watering System for Gardens – Easy & Inexpensive, you can transform your watering routine into a more efficient and enjoyable process. Imagine strolling through your garden, knowing that your plants are being watered automatically, allowing you more time to relax and appreciate the beauty of your hard work. This project stands out for its practicality and affordability, allowing you to keep your garden vibrant without breaking the bank.
Creating your own watering system is not only a rewarding project but also a sustainable option for managing water usage effectively. You can set it up in a variety of outdoor spaces—from flower beds to vegetable patches—making it versatile for different gardening needs. Even if you’re a complete beginner, this project is approachable and can be completed in a few hours without any specialized skills.
The estimated cost for this DIY watering system is budget-friendly, allowing you to create a thoughtful garden while saving money compared to more complex store-bought systems. In just a weekend, you can have a fully functional watering solution that caters to your garden’s specific needs. Are you ready to dive into this exciting project? Let’s explore the incredible benefits and unique features that make this DIY watering system a must-try!
Table of Contents
Key Benefits of DIY Watering System for Gardens – Easy & Inexpensive
Why You’ll Love This Build
- Cost-Effective: Save money by using affordable materials.
- Durable: Designed to withstand outdoor conditions.
- Versatile: Adaptable for various garden layouts and plant types.
- Water Efficient: Promotes responsible water use through targeted watering.
- Easy to Install: Minimal skills required for setup and maintenance.
- Customizable: Tailor the system to meet specific garden needs.
What Makes It Stand Out
This DIY watering system is a game-changer for anyone looking to cultivate a thriving garden without the hassle of daily watering. Unlike expensive commercial systems, this build offers flexibility. You can easily customize it according to your garden’s layout and choose components that fit your specific watering needs.
Moreover, this project encourages creativity; you can repurpose materials or adjust the design for unique aesthetics. By setting up your system, you’re actively participating in gardening sustainability while gaining a sense of accomplishment. The combination of affordability, functionality, and ease of assembly makes this DIY project shine brightly against any store-bought option.
Project Specs for DIY Watering System for Gardens – Easy & Inexpensive
At-a-Glance Details
- Skill Level: Beginner
- Estimated Time: 3-5 hours
- Estimated Cost (USD): $30 – $50
- Dimensions: Varies based on garden size (adaptable)
- Indoor/Outdoor Suitability: Outdoor
- Tools Needed at a Minimum: Drill, PVC cutter, measuring tape
Materials and Tools for DIY Watering System for Gardens – Easy & Inexpensive
Complete Materials List with Measurements
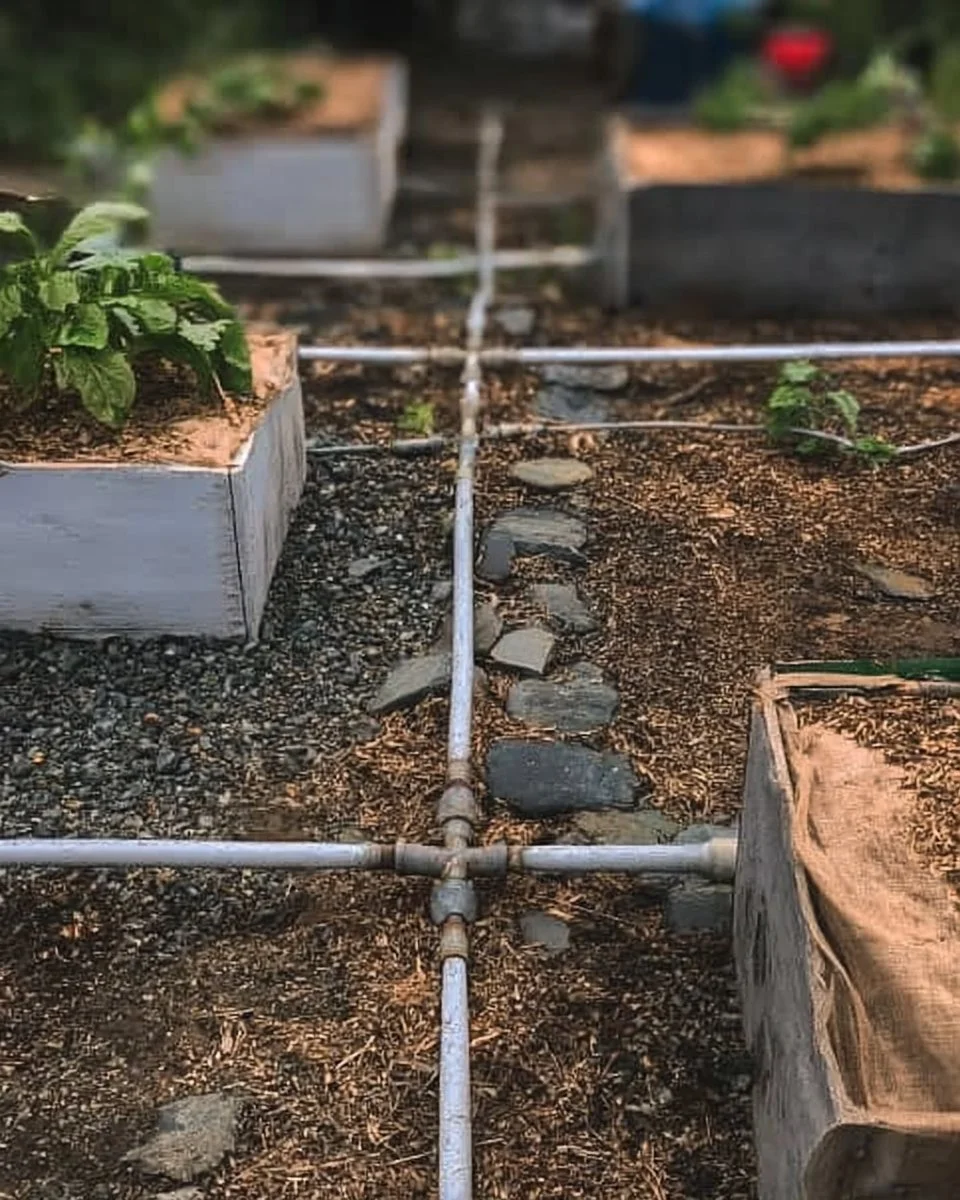
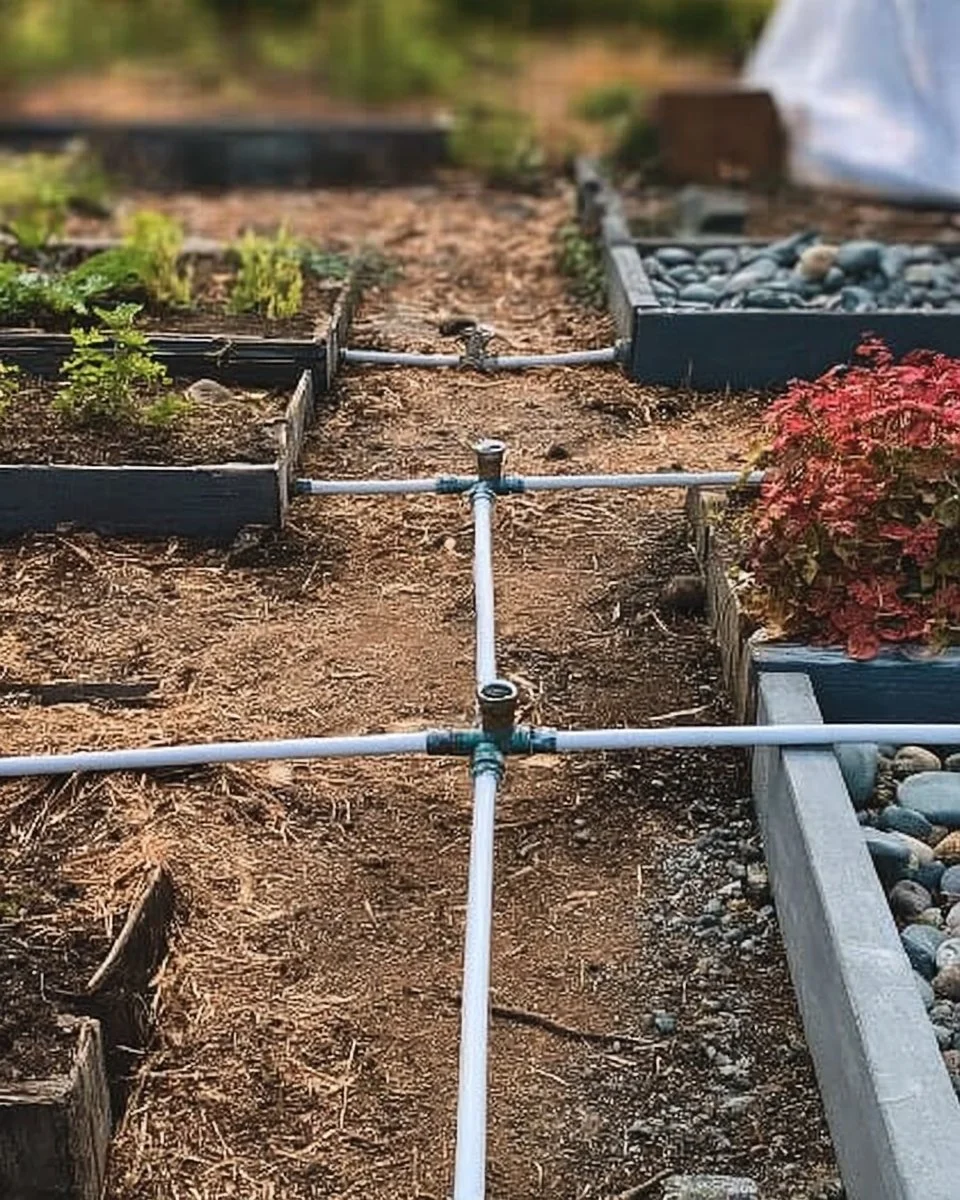
- PVC Pipes: 2 inches in diameter, lengths varying based on garden layout
- PVC Pipe Fittings: 90-degree elbows, T-joints (as needed)
- Drippers: Adjustable drippers (1-2 per plant for efficiency)
- Hose: ½ inch, garden hose length according to setup
- Timer: Battery-operated or hydraulic depending on preference
- Sealing Tape: For secure connections
Complete Tools List
- Drill: For making pilot holes
- PVC Cutter: To cut the pipes
- Measuring Tape: Ensure accurate measurements
- Marker/Pen: For labeling and marking cuts
- Clamps: To hold pieces while assembling
Substitutes and Alternatives
If you’re looking to switch out certain materials for budget reasons, you can substitute PVC pipes with flexible garden hoses. These hoses can easily be shaped and adjusted to fit your garden needs, although they may not last as long as PVC materials. Consider using recycled materials for connectors, reducing waste while staying within budget.
If you don’t have access to specific tools like a PVC cutter, hand tools or a hacksaw can also work, just be prepared for a little extra effort. The key is to use what you have available to you, making this project as accessible as possible.
Cut List and Measurements for DIY Watering System for Gardens – Easy & Inexpensive
- PVC Pipes:
- Lengths as required for each section of layout (suggested: 3 ft / 91 cm and 6 ft / 183 cm)
- Drip Line Sections:
- Cut sections according to plant spacing (recommended: 1 ft / 30 cm apart)
- Additional Connectors:
- As needed (consider 2-3 for T-joints and elbows)
Note: Ensure that the grain direction for any wood materials aligns with cuts for cutting efficiency. Pre-drill holes where needed to avoid splintering.
Safety and Prep for DIY Watering System for Gardens – Easy & Inexpensive
Before starting, put on appropriate personal protective equipment (PPE), like safety glasses and work gloves. Set up a clean workspace, ensuring it’s well-ventilated and clutter-free to avoid accidents. Measure and mark all cuts accurately, double-checking lengths against your plan. If using clamps, secure the pipes or fittings while you work. This simple preparation step can make a huge difference in your efficiency and accuracy, making your project easier and more successful.
How to Build DIY Watering System for Gardens – Easy & Inexpensive – Step-by-Step Directions
Step 1 – Prep and Layout
Begin by clearing a designated area in your garden. Think about how much space you’ll need and design the layout for your watering system. Take your measuring tape and outline where the PVC pipes will go. Make sure to include your plants and ensure that the distance is appropriate for watering.
Step 2 – Cut and Label Pieces
Using your PVC cutter, cut the pipes to the lengths you’ve planned. Be sure to label each piece according to its purpose (e.g., ‘main line,’ ‘drip line’) to avoid confusion later on. Accurate cutting will help ease assembly when you start connecting the pipes together.
Step 3 – Dry Fit and Mark Joinery
Before gluing any parts, perform a dry fit. Place all components together as intended to ensure everything fits properly. Make markings where the fittings will connect, and note any areas that may need pilot holes for screws.
Step 4 – Assemble the Frame/Body
Start assembling the main lines using the pipe fittings. Connect each piece securely, ensuring that pipes snap into fittings without significant gaps. Use the drill to create pilot holes if necessary, checking for correct alignment as you go along.
Step 5 – Reinforce and Square
Once the main structure is in place, check for square alignment by measuring diagonally across the frame. Adjust as necessary to ensure straight connections and prevent any wobbling. A stable frame is critical for the functionality of your system.
Step 6 – Attach Surfaces or Panels
If your system includes raised panels or surfaces, securely attach these to the main structure. Use appropriate fasteners, spacing them evenly throughout. Allow the adhesive used for connections to cure before moving on to the next step.
Step 7 – Sanding and Edge Treatment
Use a fine grit sandpaper to smooth any rough edges of the PVC pipes or connections. This will not only give a polished appearance but also prevent any potential injury when handling the system. Clean the work area of dust and debris.
Step 8 – Finish Application
Apply a sealant or paint suited for outdoor use, if desired. Follow the manufacturer’s recommendations regarding recoat times. This finish will help protect your system from environmental damage over time.
FAQ
How long will it take to install the DIY watering system?
Most projects can be completed in 3 to 5 hours, depending on your pace and garden size.
What tools are necessary for this project?
At a minimum, you’ll need a drill, PVC cutter, and measuring tape.
Can this system be adapted for raised garden beds?
Yes, absolutely! You can customize the layout to fit any garden structure.
What if I have a smaller garden?
The system can be scaled down easily, just adjust the lengths of pipe accordingly.
Is this watering system weather-resistant?
Yes, using quality PVC materials will ensure your system withstands various weather conditions.
How often should the system be used?
It depends on plant requirements and weather conditions; a timer can help manage watering times effectively.