
Introduction to 15 Cheap Garden Edging Ideas That Are Easy to Install
Have you ever gazed at your garden and thought it could use a little more charm? Garden edging can transform your space from ordinary to extraordinary without breaking the bank. If you’re looking for affordable and easy-to-install options, you’re in the right place with these 15 Cheap Garden Edging Ideas That Are Easy to Install. Whether you’re a seasoned gardener or just starting, these projects cater to all skill levels and budgets.
What makes these garden edging ideas so special is their versatility. You can create borders that define your garden beds, enhance pathways, or even protect your plants from pesky lawnmowers. Best of all, many of these options use recycled materials or cost-effective supplies, making them a sustainable choice. Expect to spend a few hours to complete any of these DIY projects, and none should exceed a modest budget. From stone to wooden pallets, the choices are endless!
Are you ready to elevate your garden’s aesthetics with these stylish yet functional edging solutions? Let’s dive into the key benefits of these projects!
Table of Contents
Key Benefits of 15 Cheap Garden Edging Ideas That Are Easy to Install
Why You’ll Love This Build
- Durability: Many materials, like stone or treated wood, can withstand the elements for years.
- Simplicity: Most of these projects are beginner-friendly and can be completed with minimal tools.
- Versatility: Choose from a variety of materials to suit your garden’s style.
- Cost Savings: Affordable materials make these projects budget-friendly.
- Weather Resistance: Opt for materials that withstand rain and sun for long-lasting results.
- Space Efficiency: Clearly defined edges help keep plants organized and looking tidy.
What Makes It Stand Out
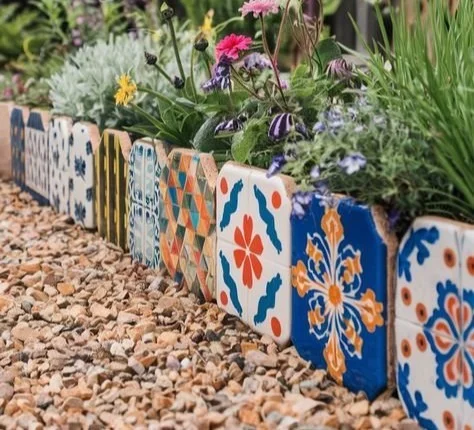
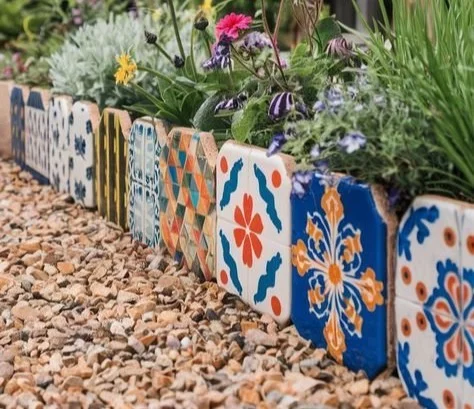
These garden edging ideas stand out due to their originality. You can personalize your space by integrating various materials that reflect your sense of style. Unlike ready-made options from the store, these DIY ideas allow for more creativity. Plus, many of these solutions can cleverly incorporate recycled or reclaimed materials, which not only saves money but also helps the environment.
The best part is, each of these garden edging designs serves a practical purpose. They do more than just look good; they help manage soil erosion, prevent weeds, and keep mulch in place. So, if you’re looking to customize your garden area while also adding functionality, these projects shine.
Project Specs for 15 Cheap Garden Edging Ideas That Are Easy to Install
At-a-Glance Details
- Skill Level: Beginner to Intermediate
- Estimated Time: 1-3 hours per project
- Estimated Cost (USD): $20-$100 per project
- Dimensions: Varies by project
- Indoor/Outdoor Suitability: Primarily outdoor
- Tools Needed at a Minimum: Shovel, hammer, saw
Materials and Tools for 15 Cheap Garden Edging Ideas That Are Easy to Install
Complete Materials List with Measurements
- Natural Stone: Various sizes for a rustic look. Quantity: 10-20 stones depending on the design and area size.
- Wooden Pallets: Disassemble and use the wood boards. Quantity: 1-2 pallets for multiple projects.
- Bricks: Standard size for a classic border. Quantity: 30-50 bricks based on your gardening area.
- Plastic Edging: Roll of flexible plastic edging. Length: 20 feet.
- Landscape Fabric: 3×50 feet to prevent weed growth under the edging.
- Mulch or Gravel: 2-3 bags (2 cubic feet each) for a finished look.
Complete Tools List
- Shovel: For digging trenches and placing materials.
- Hammer: For driving in stakes or bricks.
- Circular Saw or Handsaw: For cutting wood or pallets to size.
- Level: To ensure even edges.
- Measuring Tape: For accurate measurements.
Substitutes and Alternatives
If you’re on a tight budget or find certain materials hard to come by, there are numerous alternatives. For instance, if natural stone is expensive or unavailable, consider using bricks or pavers as an alternative. Wooden pallets can also often be obtained for free from local businesses. If you can’t find landscape fabric, newspaper or cardboard can serve a similar purpose for weed control.
When it comes to tools, if you don’t have a saw, many home improvement stores offer rental services where you can borrow one for a day. This can save you money while giving you access to the right tool for the job without the commitment of purchasing.
Cut List and Measurements for 15 Cheap Garden Edging Ideas That Are Easy to Install
- Natural Stone: Various sizes; each stone should be 8-12 inches (20-30 cm) thick.
- Wood from Pallets: Cut sections to 36 inches (91 cm) long.
- Bricks: Standard size of 7.5 x 3.5 x 2.25 inches (19 x 9 x 5.7 cm).
- Plastic Edging: No specific cutting needed; can be bent to shape.
- Landscape Fabric: Cut to the dimensions of your bordered area.
When cutting wood, always ensure the grain runs parallel to the longest edge for stability. Pre-drill holes if required to avoid splitting.
Safety and Prep for 15 Cheap Garden Edging Ideas That Are Easy to Install
Before starting your project, ensure you have the right personal protective equipment (PPE). Wear gloves to protect your hands from sharp edges and safety glasses when using saws to shield your eyes from debris. Additionally, make sure your workspace is well-ventilated and free from clutter. When measuring, double-check all dimensions to ensure an accurate fit. Use clamps to stabilize pieces while working, especially when cutting or drilling.
How to Build 15 Cheap Garden Edging Ideas That Are Easy to Install – Step-by-Step Directions
Step 1 – Prep and Layout
Start by marking the area where you want to install your garden edging. Use a measuring tape to determine the lengths needed and a garden spade to outline the desired shape. Ensure your layout is straight or curved to your liking, adjusting as necessary to ensure accuracy.
Step 2 – Cut and Label Pieces
If you’re using wood or pallets, now is the time to make your cuts. Use a saw to cut your sections to the required lengths. Ensure to label each piece if you have multiple cuts to avoid confusion during assembly.
Step 3 – Dry Fit and Mark Joinery
Before securing anything, do a dry fit. Arrange your materials on the ground as they will be positioned in the garden to visualize the final look. Mark any areas where you’ll need to drill pilot holes for screws or nails.
Step 4 – Assemble the Frame/Body
Start assembling your edging by attaching pieces together. If you’re using wood, apply wood glue and use screws to secure the joints, ensuring it is tight and stable. For stone or bricks, arrange them closely to keep a neat appearance.
Step 5 – Reinforce and Square
Check for squareness by measuring the diagonals of your layout. This step helps ensure that your edging doesn’t warp over time and remains sturdy. Adjust any needed areas before moving on to the next step.
Step 6 – Attach Surfaces or Panels
If you’re adding any panels to the edging, now is the time to attach them. Use the appropriate fasteners based on your materials, ensuring they are spaced out evenly for a professional finish.
Step 7 – Sanding and Edge Treatment
For any wood materials, sand the edges using coarse grit sandpaper to remove splinters. Transition to a finer grit for a smooth finish. Once sanded, clear away any dust with a damp cloth to prepare for the final application.
Step 8 – Finish Application
Last but not least, apply your chosen finish. If you’re staining or painting, ensure proper ventilation and follow the manufacturer’s instructions for drying times. Multiple coats may be necessary for durability, especially on wood.
FAQs about 15 Cheap Garden Edging Ideas That Are Easy to Install
Q: How long will the garden edging last?
A: The lifespan depends on the materials used. Treated wood can last up to 10 years, while stone and brick can last indefinitely.
Q: Can I use recycled materials?
A: Absolutely! Recycled wood, bricks, and stones not only save money but add character to your garden.
Q: Is this a good project for beginners?
A: Yes! Most of these projects require minimal skills and can be completed with basic tools.
Q: Will these edging ideas prevent weeds?
A: Not completely, but they can help control weeds when paired with landscape fabric or mulch.
Q: Can I change the design later?
A: Yes, many of these edging materials are removable, allowing for redesign whenever you like.
Q: How do I maintain my garden edging?
A: Regularly check for shifting materials, and clean any debris to keep it looking neat.
These 15 Cheap Garden Edging Ideas That Are Easy to Install will not only give your outdoor space a facelift but can also be a fun and engaging DIY experience. With minimal investment and effort, you’ll create a result that enhances your garden’s beauty and functionality.