
Introduction to How to Build a Budget Potting Bench with Sink
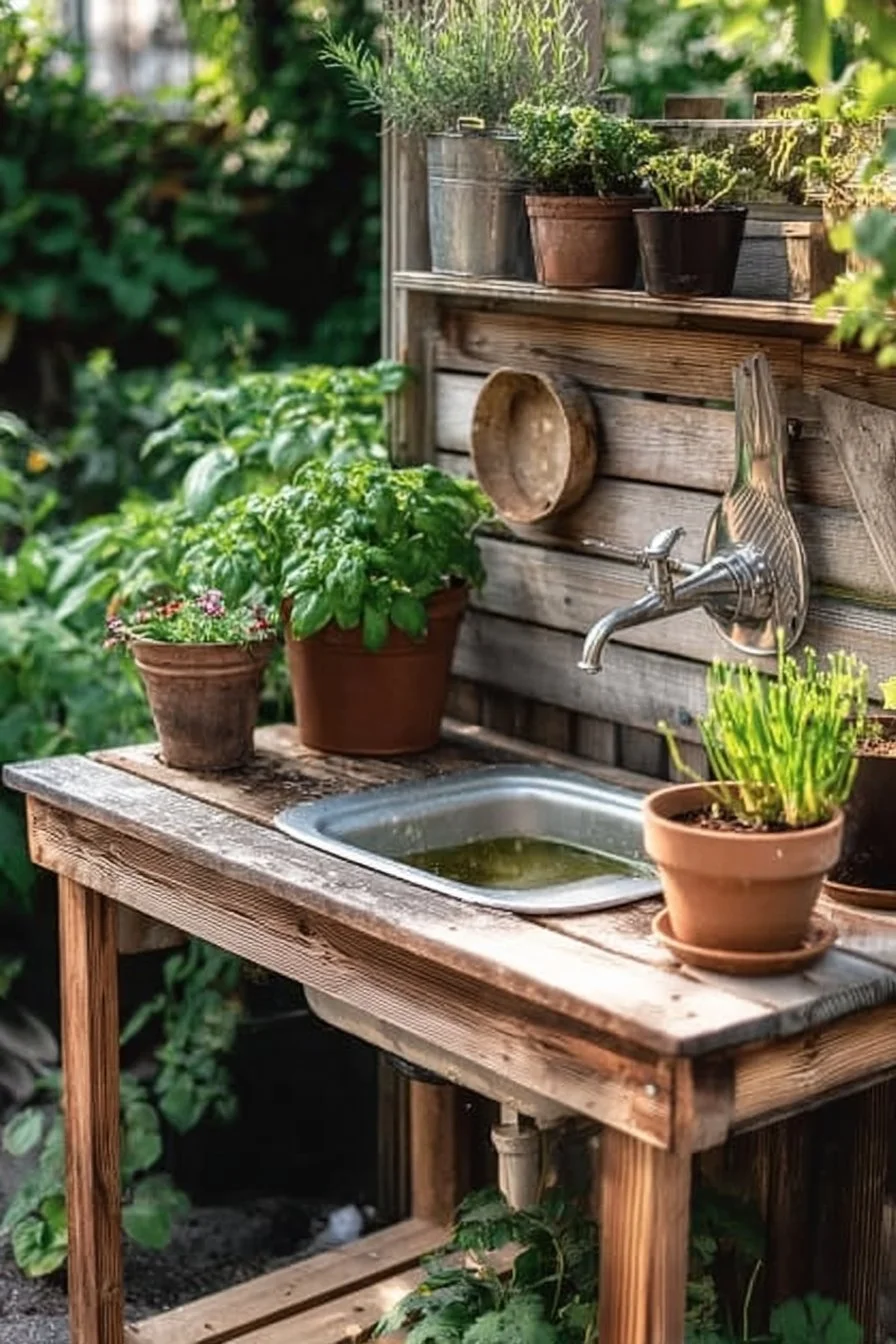
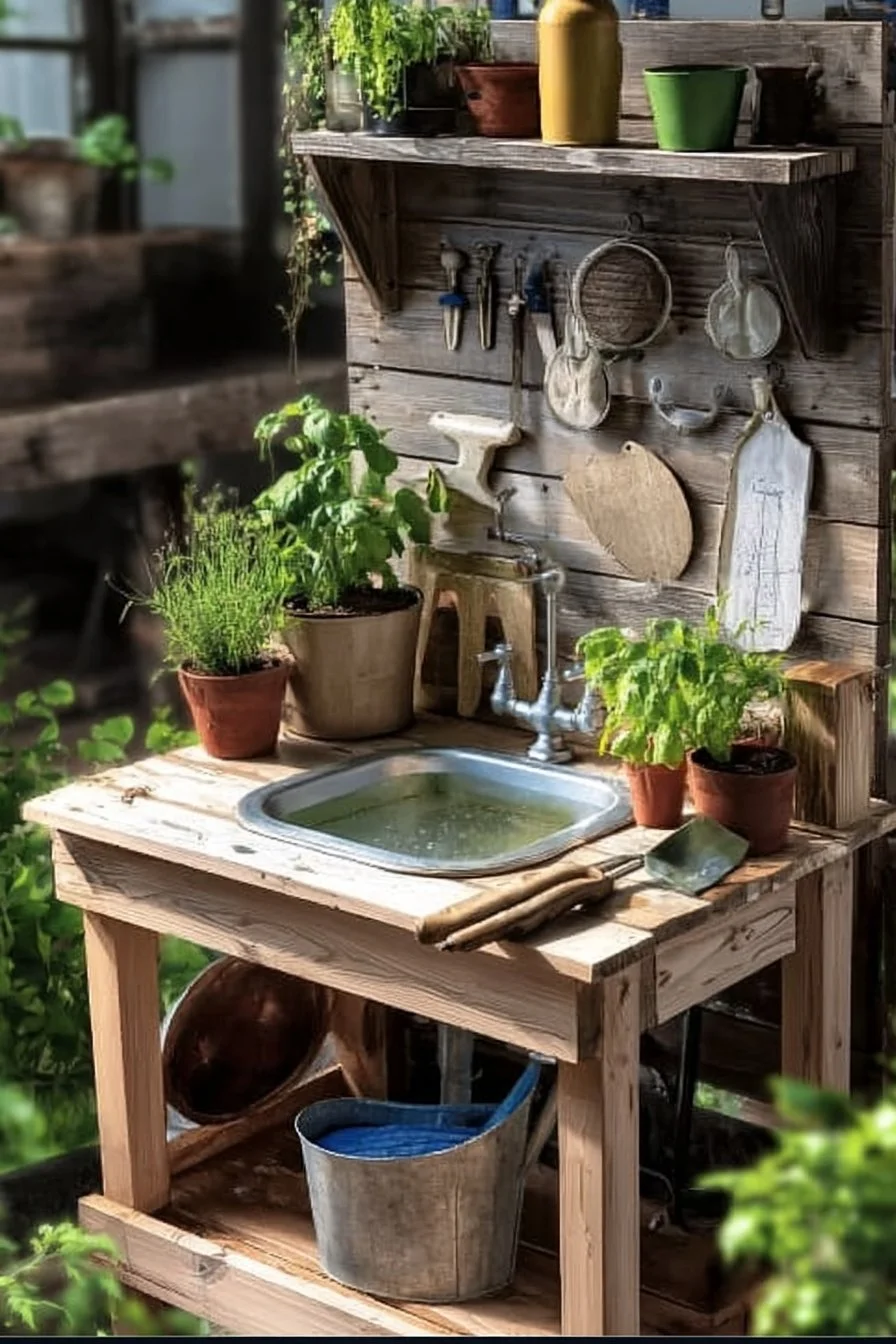
Are you looking to elevate your gardening game while maximizing your outdoor space? Building a potting bench with a sink might be just the project for you. Imagine having a dedicated workspace where you can pot your plants, mix your soil, and rinse off gardening tools, all in one place! A potting bench with a sink is practical, providing convenience while you work.
This DIY project is special because it combines functionality with affordability. You don’t need to break the bank to create a beautiful and effective potting area. Plus, building your own means you can customize it to fit your needs and the space available in your garden. Whether you’re a seasoned gardener or just getting started, this bench will transform your planting and gardening routine.
Expect to spend a weekend on this project, and with basic woodworking skills, you can create something truly unique. You’ll appreciate the durability of materials like treated wood, which makes this project great for outdoor use.
Table of Contents
Key Benefits of How to Build a Budget Potting Bench with Sink
Why You’ll Love This Build
- Durability: Made from sturdy materials, this potting bench will last for years.
- Simplicity: The straightforward design allows for an easy build.
- Versatility: The integrated sink makes it perfect for various gardening tasks.
- Portability: With the right materials, you can move it around your garden as needed.
- Weather Resistance: Using suitable finishes will ensure longevity against the elements.
- Cost Savings: Building it yourself is far cheaper than buying a comparable store-bought option.
What Makes It Stand Out
This project truly shines with its combination of a potting workspace and a sink, allowing you to wash tools without going back and forth indoors. Additionally, you can customize the dimensions and materials to fit your personal style and needs. Unlike store-bought versions that may lack efficient design or functionality, a homemade potting bench with a sink gives you total control over aesthetics and utility.
Project Specs for How to Build a Budget Potting Bench with Sink
At-a-Glance Details
- Skill Level: Beginner to Intermediate
- Estimated Time: Approximately 8 hours
- Estimated Cost (USD): $150 – $250
- Dimensions: 60 inches (152 cm) long x 24 inches (61 cm) wide x 36 inches (91 cm) high
- Indoor/Outdoor Suitability: Outdoor
- Tools Needed at a Minimum: Circular saw, drill, level, measuring tape, clamps
Materials and Tools for How to Build a Budget Potting Bench with Sink
Complete Materials List with Measurements
- 2 x 4 lumber (for the frame): 10 pieces, 8 feet (244 cm) long
- 1 x 6 lumber (for the top surface): 5 pieces, 6 feet (183 cm) long
- Plywood (for the sink base): 1 piece, 3/4 inch thick, 24 inches (61 cm) square
- Sink (stainless steel): 1 unit, 15-inch (38 cm) square
- Faucet: 1 unit
- Wood screws: varying lengths, 2.5 inches (6.35 cm) for frame, 1.25 inches (3.18 cm) for top surface
- Waterproof sealer or outdoor paint
- Sink drain kit
Complete Tools List
- Circular saw
- Drill with drill bits
- Level
- Measuring tape
- Clamps
- Safety goggles
- Work gloves
Substitutes and Alternatives
If treated lumber is not available, cedar is a great alternative, as it naturally resists rot. For the sink, consider using a plastic or composite option for even lower costs and lightweight handling. If you don’t own a circular saw, a miter saw can also work effectively to make accurate cuts.
Cut List and Measurements for How to Build a Budget Potting Bench with Sink
- 2 x 4 lumber for frame:
- 4 pieces at 36 inches (91 cm) for vertical legs
- 4 pieces at 24 inches (61 cm) for side rails
- 2 pieces at 60 inches (152 cm) for the top support
- 1 x 6 lumber for top surface:
- 5 pieces at 60 inches (152 cm)
- Plywood for the sink base:
- 1 piece at 24 inches (61 cm) square
The grain direction on the 1 x 6 lumber should run parallel to the length, ensuring strength. Pre-drill pilot holes for screws, typically 1/8 inch (3 mm) diameter, and use a countersink bit for smooth finishes.
Safety and Prep for How to Build a Budget Potting Bench with Sink
Safety is paramount. Always wear safety goggles and work gloves to avoid injuries. Set up your workspace in a well-ventilated area, using clamps to secure your materials for accuracy. Measure twice and cut once; precision is key to ensure everything aligns properly. Make sure to keep your tools organized to work efficiently and safely.
How to Build How to Build a Budget Potting Bench with Sink – Step-by-Step Directions
Step 1 – Prep and Layout
Start by measuring your designated area for the potting bench. Mark out the footprint using stakes and string to define the dimensions clearly. This step ensures that you have enough space and helps visualize the layout.
Step 2 – Cut and Label Pieces
Using the circular saw, cut all the lumber according to the cut list. Label each piece with its intended position (like “leg,” “top,” etc.) to make assembly easier later on.
Step 3 – Dry Fit and Mark Joinery
Before fastening, dry fit all the pieces together. Check that everything fits well and adjust as necessary. Mark where screw holes will be drilled to avoid confusion during assembly.
Step 4 – Assemble the Frame/Body
Begin assembling the frame using the labeled pieces. Use wood screws to attach the vertical legs to the side rails, creating a stable structure. Make sure to pre-drill holes to avoid splitting the wood.
Step 5 – Reinforce and Square
Once the frame is together, check for squareness by measuring diagonally across the rectangle. Adjust as necessary and reinforce the corners with additional screws for added strength.
Step 6 – Attach Surfaces or Panels
Attach the 1 x 6 boards to the top of the frame, spacing them evenly. Use 1.25-inch screws for this part. Ensure the panels are flush with the edges for a neat look.
Step 7 – Sanding and Edge Treatment
Using sandpaper, smooth all surfaces and edges. Start with a lower grit (like 80) and progress to a higher grit (up to 220) for a polished finish. Remove dust with a damp cloth.
Step 8 – Finish Application
Apply a weatherproof sealer or outdoor paint to protect the wood from the elements. Allow sufficient curing time as indicated on the product label before using the bench.
FAQ about How to Build a Budget Potting Bench with Sink
Q: What type of wood is best for outdoor use?
A: Treated lumber or cedar are both excellent choices due to their resistance to rot.
Q: Can this potting bench be built indoors?
A: Yes, but consider that the sink and plumbing will require access to water, so placement is key.
Q: How do I maintain the potting bench?
A: Regularly check for any signs of wear or damage and reapply sealer or paint as necessary to keep it protected.
Q: Is this project beginner-friendly?
A: Absolutely! The project is designed for beginners with some basic tools and skills.
Q: Can I customize the dimensions?
A: Yes, you can adjust the size to fit your space, just ensure the proportions remain functional.