
Introduction to Blooming Onion Recipe – Crispy, Golden Perfection at Home
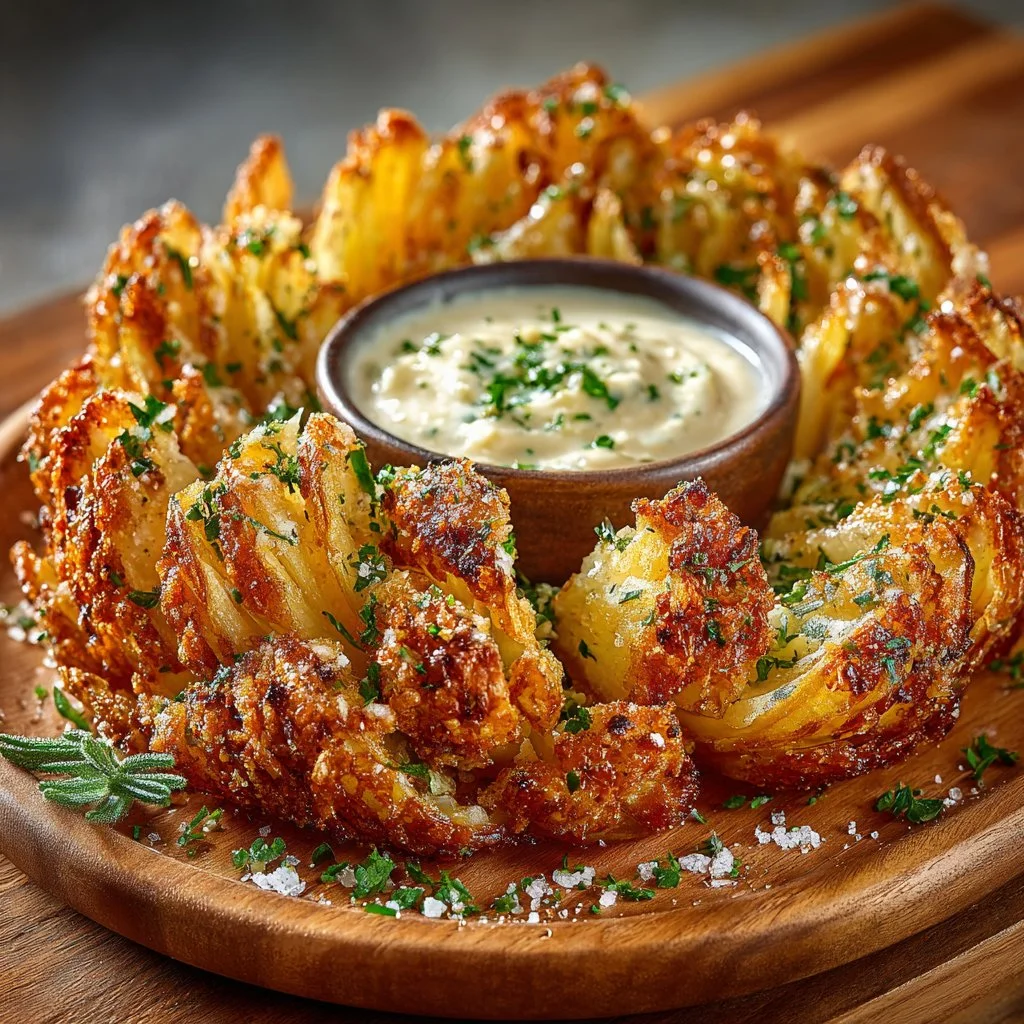
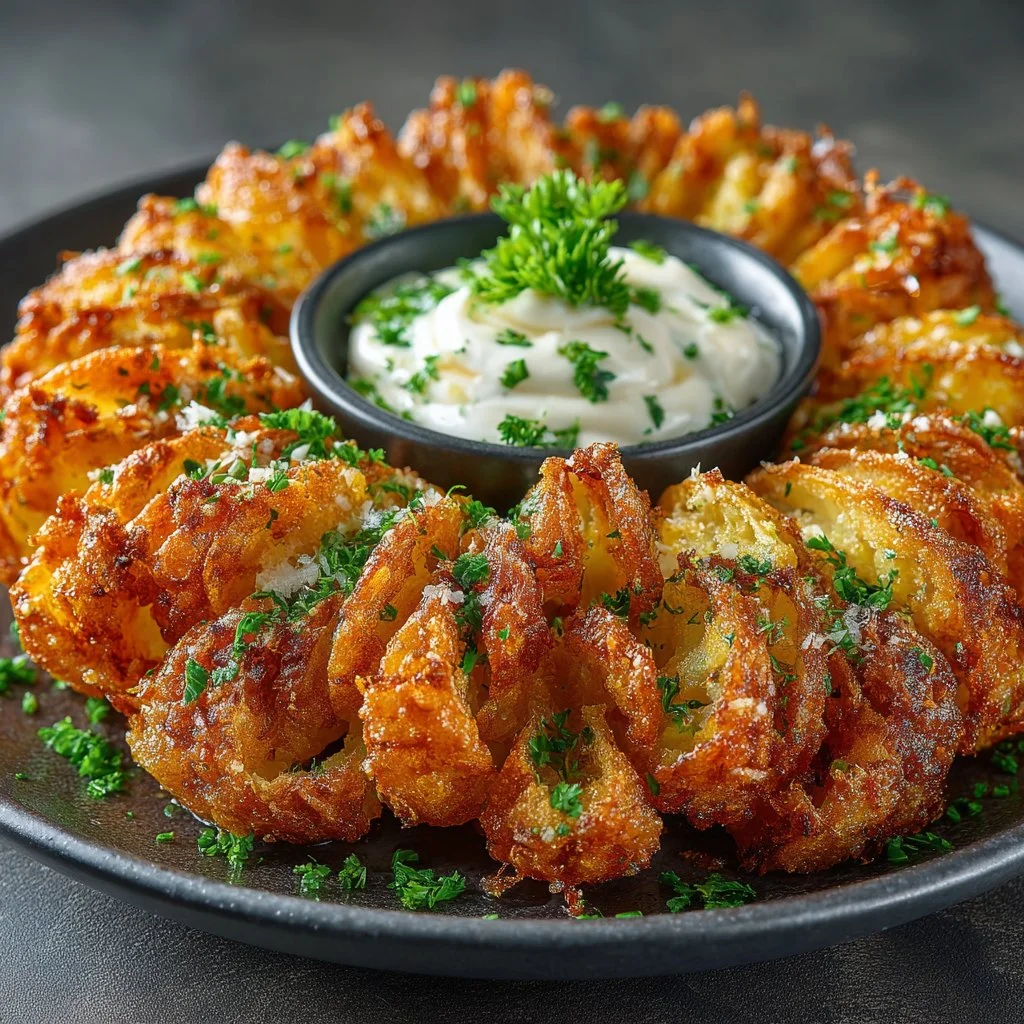
Are you craving a delicious appetizer that not only pleases the palate but also looks stunning on the plate? The Blooming Onion Recipe – Crispy, Golden Perfection at Home is the answer. This mouthwatering delicacy originates from Texas and has captured the hearts of many. Imagine a whole onion, artfully cut and fried to golden perfection, served with a zesty dipping sauce. It’s perfect for parties, game day, or even a cozy night in.
You might wonder what sets this recipe apart from the usual onion rings. The way the onion “blooms” emphasizes its unique presentation, making it a show-stopper at any gathering. The crispy, seasoned outer layer gives way to the sweet, tender onion inside, creating a delightful texture contrast. Each piece is like a little burst of flavor that begs you to take another bite.
What’s great about this Blooming Onion Recipe is its simplicity. While it may look complicated, with a little preparation, you can create this masterpiece right in your kitchen. Plus, you can customize the seasoning and sauces to suit your taste. This homemade version allows you to know exactly what’s going into your food, making it healthier compared to store-bought or restaurant options. So, let’s dive into the world of blooming onions and see why they deserve a spot on your table.
Table of Contents
Key Benefits of Blooming Onion Recipe – Crispy, Golden Perfection at Home
Why You’ll Love This Recipe
- It delivers incredible flavor with each golden crunch.
- The dish is versatile; customize it with different seasonings.
- It’s a fun dish that impresses friends and family.
- Easy to replicate the texture and taste of restaurant-bought versions.
- Great for gatherings, making it a popular crowd-pleaser.
- Allows for creativity in dipping sauces and pairings.
What Makes It Stand Out
What makes the Blooming Onion Recipe truly special is its visual appeal. When you place a perfectly fried blooming onion on the table, it draws everyone’s attention, inviting them to dig in. The unique cutting technique not only enhances presentation but also ensures that every bite is shared, making it a social dish.
Moreover, the recipe is easily customizable. You can adjust the spices based on what you have in your pantry or your guests’ preferences. Whether you prefer a subtle flavor profile or a spicy kick, the blooming onion can adapt to your needs, making it suitable for various occasions, from casual get-togethers to formal dinners.
Ingredients for Blooming Onion Recipe – Crispy, Golden Perfection at Home
Complete Ingredient List with Measurements
- 1 large onion (sweet or yellow)
- 1 cup all-purpose flour
- 1 cup breadcrumbs (panko works best for crunch)
- 2 large eggs
- 1 cup buttermilk
- 1 teaspoon paprika
- 1 teaspoon garlic powder
- 1 teaspoon onion powder
- 1 teaspoon salt
- ½ teaspoon black pepper
- Oil for frying (vegetable oil or canola oil)
Substitutes and Alternatives
If you’re allergic to gluten, you can use gluten-free flour and breadcrumbs as substitutes. For a dairy-free version, replace buttermilk with a plant-based milk and add a squeeze of lemon juice to achieve similar acidity. If you’re avoiding eggs, consider using a flax egg or a commercial egg substitute to bind the flour and breadcrumbs. This way, you can still enjoy this delicious dish without worrying about your dietary restrictions.
How to Make Blooming Onion Recipe – Crispy, Golden Perfection at Home – Step-by-Step Directions
Step 1 – Prepare Ingredients
Begin by selecting a large, firm onion. A sweet onion or yellow onion works best for flavor and tenderness. Remove the outer skin and trim the top of the onion to create a flat surface. Be careful not to cut off too much; you still need the root intact for the onion to “bloom.”
Step 2 – Slice the Onion
Position the onion root-side down and make four vertical cuts around the onion, cutting towards the center but not all the way through. Then, carefully slice in between the cuts made earlier to create petal-like sections. The goal is to leave the center intact while encouraging the petals to open as they fry.
Step 3 – Soak the Onion
Place the prepared onion in a bowl of cold water mixed with a bit of vinegar for about 30 minutes. This soaking step helps the layers separate and promotes blooming during frying. After soaking, be sure to dry it thoroughly with paper towels.
Step 4 – Prepare the Breading Station
In one bowl, combine all-purpose flour with paprika, garlic powder, onion powder, salt, and pepper. In another bowl, whisk the eggs and buttermilk to create a liquid batter. Place breadcrumbs in a third bowl.
Step 5 – Dredge the Onion
Start with the flour mixture, coating the onion evenly. Make sure to get some flour between the petals. Then dip it into the buttermilk mixture, allowing excess to drip off. Finally, roll the onion in the breadcrumbs until fully coated, ensuring all sections get a crispy layer.
Step 6 – Heat the Oil
In a deep pot or fryer, heat about 3 inches of oil to 375°F (190°C). The right oil temperature is essential for achieving that crispy exterior without soaking the onion in oil. Use a thermometer to maintain the accurate temperature.
Step 7 – Fry the Onion
Carefully lower the breaded onion into the hot oil, root side down. Fry for about 4-5 minutes, or until it turns a deep golden brown. It’s crucial to avoid overcrowding the pot; you might need to fry in batches to maintain oil temperature.
Step 8 – Drain and Cool
Once the onion is perfectly browned, remove it with a slotted spoon and allow it to drain on paper towels. This step helps to eliminate excess oil and keeps the onion crisp.
Step 9 – Serve with Dipping Sauce
While the onion cools slightly, prepare your favorite dipping sauce. A classic option is a simple mixture of mayonnaise, ketchup, and hot sauce, but feel free to get creative! Serve the Blooming Onion Recipe warm, pulling apart the crispy petals as you go.
Step 10 – Enjoy!
Sit back, relax, and enjoy your homemade blooming onion with friends or family. The satisfaction of making this dish from scratch will surely impress your guests.
Serving Suggestions for Blooming Onion Recipe – Crispy, Golden Perfection at Home
Best Occasions to Serve This Dish
The Blooming Onion Recipe is perfect for a variety of occasions. It shines during sports gatherings, adding a festive touch to your game day spread. It also works well for casual get-togethers like movie nights or potlucks, where finger foods are preferred. The impressive presentation makes it suitable for dinner parties or family celebrations, too, impressing your guests with both its appearance and flavor.
What to Serve With It
Pairing your blooming onion with complementary sides enhances the overall experience. Consider serving it alongside a refreshing salad or crispy fries. If you want to elevate the dish, try a spicy aioli or tangy ranch dressing as dipping options. A chilled beverage, like a light beer or citrusy soda, would also make a perfect match.
How to Store Blooming Onion Recipe – Crispy, Golden Perfection at Home Properly
Best Storage Practices
If you have leftovers, allow them to cool completely before storing. Place any uneaten pieces in an airtight container and refrigerate them for up to three days. Avoid placing the blooming onion in a sealed plastic bag, as this may compromise its crispiness.
Reheating and Freezing Tips
For reheating, preheat your oven to 375°F (190°C) and place the blooming onion on a baking sheet. Heat for about 10-15 minutes until crispy. Unfortunately, freezing is not recommended, as it significantly alters the texture once reheated. It’s best enjoyed fresh.
Tips & Tricks for Blooming Onion Recipe – Crispy, Golden Perfection at Home
Mistakes to Avoid
- Cutting too deep into the onion can cause it to fall apart during frying.
- Overcrowding the pot can lower the oil temperature, leading to soggy onion.
- Not drying the onion thoroughly after soaking can result in excess moisture, hindering the crispiness.
- Using old or cold oil may also lead to a less than perfect fry.
- Skipping the seasoning in the flour mixture can leave the dish bland.
Extra Tips for Better Results
For an even crispier onion, you can double-bread the onion by repeating the flour, buttermilk, and breadcrumbs process. Experimenting with spices can enhance the flavor profile, such as adding cayenne pepper for heat or Italian herbs for a fresh taste. For visual appeal, sprinkle chopped green onions on top before serving.
Recipe Variations of Blooming Onion Recipe – Crispy, Golden Perfection at Home
Creative Twists
- Cheesy Blooming Onion: Add shredded cheese to the flour mixture for a rich, cheesy flavor.
- Spicy Blooming Onion: Incorporate more spice by adding chopped jalapeños or using a spicy seasoning blend.
- Sweet and Sour Version: Serve with a homemade sweet and sour sauce for a unique flavor twist.
Dietary Adjustments
For a vegan version, replace the eggs and buttermilk with a flax egg and plant-based milk. You can also explore gluten-free alternatives by using a gluten-free flour and breadcrumb blend. These modifications ensure that everyone can enjoy this tasty dish regardless of dietary restrictions.
Conclusion about Blooming Onion Recipe – Crispy, Golden Perfection at Home
You don’t need to go out to enjoy a delicious blooming onion anymore. With this Blooming Onion Recipe – Crispy, Golden Perfection at Home, you can recreate this beloved appetizer in your own kitchen. The combination of a crispy outer layer with the sweet tender onion inside is nothing short of amazing.
The unique presentation makes it a perfect centerpiece for gatherings, ensuring it will be the talk of the table. Not only is it simple to make, but it’s also versatile, letting you explore flavors that resonate with you. By following this guide, you’ll become known as the person who brings joy and deliciousness to every event. Give it a try, and you might discover your new favorite recipe!
FAQs about Blooming Onion Recipe – Crispy, Golden Perfection at Home
How long can I store leftover blooming onion?
Store leftovers in an airtight container in the refrigerator for up to three days for the best quality.
Can I make this dish ahead of time?
While the blooming onion is best served fresh, you can prepare it in advance up to the frying step and refrigerate it until ready to fry.
What dipping sauces pair well with blooming onion?
Classic options include ranch dressing, spicy aioli, or a simple mixture of mayonnaise and ketchup for a traditional twist.
Can I freeze blooming onion?
Freezing this dish is not recommended, as it affects texture. It’s best enjoyed immediatel after frying.
What oil is best for frying blooming onions?
Vegetable or canola oil is ideal for frying due to their high smoke points and neutral flavors.
How do I reheat leftover blooming onion?
Reheat in a preheated oven at 375°F (190°C) for 10-15 minutes, ensuring it crisps up nicely.
Can I use a different onion variety?
Yes, while sweet and yellow onions work best, you can experiment with other varieties like red onions for a different flavor.
What can I use if I don’t have buttermilk?
You can create a buttermilk substitute by mixing regular milk with a squeeze of lemon juice or vinegar and letting it rest for 5 minutes.