
Introduction to DIY Gardening Ideas That Save Time & Money!
Are you looking to elevate your gardening game without breaking the bank or spending countless hours on maintenance? DIY gardening ideas that save time & money! are the perfect solution for gardening enthusiasts of all levels. Gardening can be a deeply rewarding hobby, but it often comes with its share of challenges—time, cost, and skill level can sometimes feel overwhelming. So, how do we tackle these hurdles while still enjoying the beauty of nature?
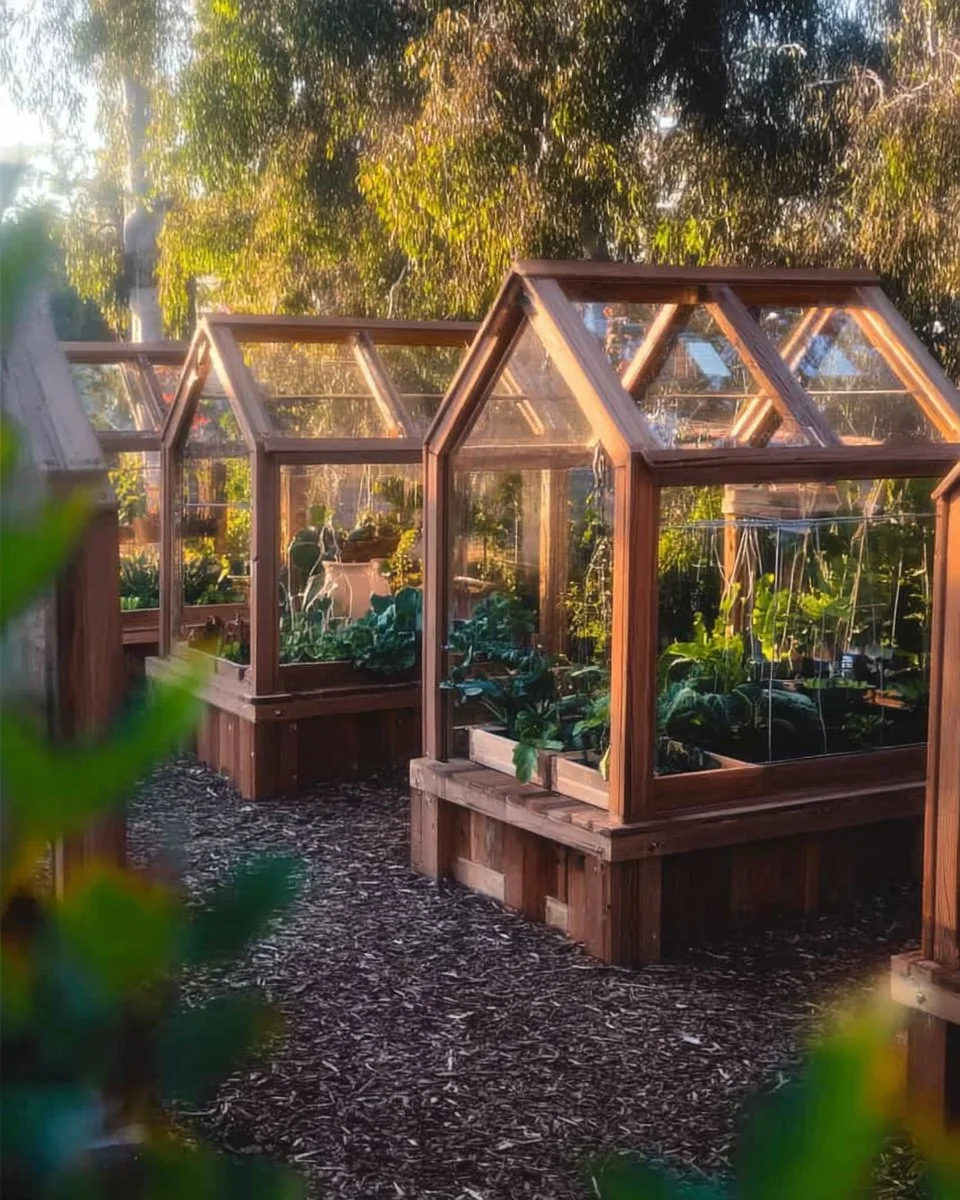
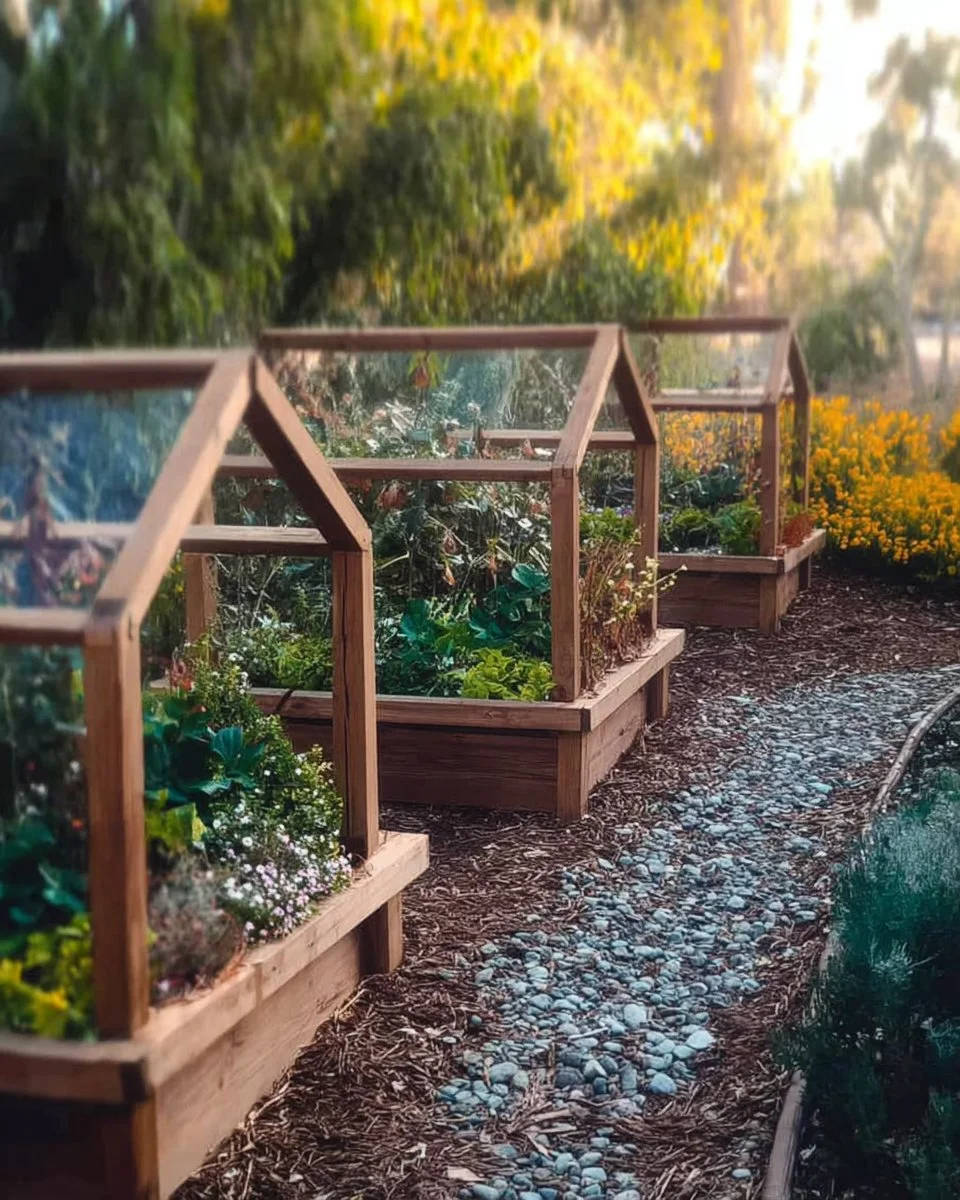
Imagine creating your own garden solutions that are not only affordable but also efficient. These DIY projects allow you to customize your space while saving you time and effort. Whether you’re planting a cozy herb garden in your kitchen, creating an outdoor oasis, or designing a vibrant flower bed, each idea is crafted to be practical and unique. Plus, many of these projects require just a few simple materials and tools, making them accessible even for those new to gardening.
The beauty of DIY gardening is that it can be done at your own pace and tailored to your specific preferences. With a focus on enhancing your gardening experience, these ideas allow you to express your creativity and save money on store-bought items that can often be overpriced. Best of all, many projects can be completed in a weekend, giving you instant gratification and visual results.
Join me as we explore some of the best DIY gardening ideas that save time & money! Get ready to dig in and discover practical solutions that make gardening enjoyable and efficient.
Table of Contents
Key Benefits of DIY Gardening Ideas That Save Time & Money!
Why You’ll Love This Build
- Cost-Effective: Save money by creating your own garden solutions instead of buying them.
- Time-Saving: Many ideas streamline gardening tasks, providing quick and efficient results.
- Customizable: Tailor projects to fit your space, style, and needs.
- Sustainable: Use recycled or repurposed materials to minimize waste.
- Versatile: Suitable for various gardening styles, from urban to suburban.
- Easy Maintenance: Designed with low-maintenance principles that reduce ongoing work.
What Makes It Stand Out
DIY gardening ideas that save time & money! distinguish themselves by offering practical solutions that are both easy to implement and strikingly effective. The originality of these projects lies in their ability to adjust to different gardening environments and personal tastes. Whether you live in a small apartment or have a spacious backyard, these ideas can transform any space into a flourishing garden.
Customization is a huge part of what makes DIY gardening enjoyable. You don’t just create a gardening solution—you create one that reflects your personality. You can experiment with colors, shapes, and materials, allowing your garden to become a true extension of yourself.
Compared to store-bought alternatives, DIY projects typically offer better quality while being more sustainable. Rather than settling for mass-produced items, crafting your own solutions ensures they are made to last, using materials that withstand the elements and give the best results.
Project Specs for DIY Gardening Ideas That Save Time & Money!
At-a-Glance Details
- Skill Level: Beginner to intermediate
- Estimated Time: 1—2 hours per project
- Estimated Cost (USD): $20—$100, depending on materials
- Dimensions: Varies by project (customizable)
- Indoor/Outdoor Suitability: Both
- Tools Needed at a Minimum:
- Hand saw or power saw
- Drill
- Measuring tape
- Level
- Safety goggles
Materials and Tools for DIY Gardening Ideas That Save Time & Money!
Complete Materials List with Measurements
- Wooden Planks: 1×6 inches (2.54×15.24 cm), quantities vary based on project
- Nails/Screws: 1.5–2 inches (3.81–5.08 cm) long, quantity as needed
- Wood Glue: for added strength
- Sandpaper: 80, 120, and 220 grit
- Paint or Stain: weather-resistant, quantity as needed
- Plastic Containers or Pots: size varies, based on plants
- Gardening Soil: 1 cu ft (28.3 L) per container
Complete Tools List
- Hand saw or miter saw: For cutting wood accurately
- Drill: With bits for screwing into wood
- Measuring tape: To ensure accurate measurements
- Level: To ensure surfaces are flat
- Safety goggles: Essential for eye protection
Substitutes and Alternatives
When embarking on DIY gardening projects, it’s important to know that there are often substitutes for materials and tools, making it easier to stick to your budget. Instead of investing in premium wood, you can use treated plywood or reclaimed wood. These alternatives provide the same aesthetic and functional benefits at a lower cost.
For tools, consider borrowing from friends or family if you’re just starting out. Alternatively, visit local tool libraries or rental services where you can find what you need without committing to a purchase. Similarly, materials such as old crates or pallets can serve as excellent alternatives for planting containers.
Cut List and Measurements for DIY Gardening Ideas That Save Time & Money!
- Wooden Planks:
- 2 pieces at 24 inches (61 cm) for sides
- 2 pieces at 36 inches (91.5 cm) for the ends
- 1 piece at 48 inches (122 cm) for the bottom
- Note: Cut with the grain direction for better strength.
Safety and Prep for DIY Gardening Ideas That Save Time & Money!
Safety should always be your top priority. Wear safety goggles when cutting or drilling and ensure your workspace is clean and organized. Measuring and marking accurately is crucial—taking the time to double-check your dimensions before cutting will save you material and effort in the long run.
Set up in a well-ventilated area if you’ll be using any paints, stains, or glues. Clamping your materials during assembly helps to ensure they fit snugly together and adds an extra measure of safety while you work.
How to Build DIY Gardening Ideas That Save Time & Money! – Step-by-Step Directions
Step 1 – Prep and Layout
Start by choosing a suitable workspace. Lay out your materials and tools for easy access. Use your measuring tape to plan out the dimensions of your garden project. Mark measurements on each piece of wood clearly.
Step 2 – Cut and Label Pieces
Using your saw, cut the wooden planks according to your cut list. Label each piece with a marker to keep track of what goes where during assembly.
Step 3 – Dry Fit and Mark Joinery
Dry fit the pieces together without any glue or screws to ensure they align properly. Mark the spots for pilot holes where you will insert screws, ensuring a strong connection.
Step 4 – Assemble the Frame/Body
Begin assembling the frame of your project. Use your drill to insert the screws at each of the marked pilot holes. Make sure to tighten the screws firmly for stability.
Step 5 – Reinforce and Square
Once the frame is assembled, check the diagonals to ensure that it is square. This is crucial for a professional finish. If it appears out of shape, adjust before moving on.
Step 6 – Attach Surfaces or Panels
Position any additional panels to create surfaces for your gardening supply or planting area. Use the appropriate fasteners spaced evenly along the edge for strength.
Step 7 – Sanding and Edge Treatment
Using sandpaper, smooth all surfaces, beginning with the 80 grit and working your way up to the 220 grit for a refined finish. Clean off any dust with a cloth before proceeding to painting.
Step 8 – Finish Application
Apply your chosen paint or stain according to the manufacturer’s instructions. Allow adequate drying time and consider multiple coats for enhanced weather resistance and durability.
FAQ
What kind of plants can I grow using these ideas?
You can grow herbs, vegetables, and flowers. The choice depends on your space and sunlight.
Can I use recycled materials for these projects?
Absolutely! Reclaimed wood, old crates, and even pallets work great for DIY gardening solutions.
How much maintenance do these projects require?
These DIY gardening ideas typically require low maintenance. Choose the right plants for your environment for the best results.
How long will these DIY projects last?
With proper care and the right materials, these projects can last many years. Protecting them from the weather can help extend their lifespan.
Are these projects suitable for beginners?
Yes, they are designed with simplicity in mind and are accessible for anyone looking to dive into gardening.
Can I modify the projects to fit my specific needs?
Definitely! Feel free to customize materials, dimensions, and finishes to suit your taste and gardening goals.