
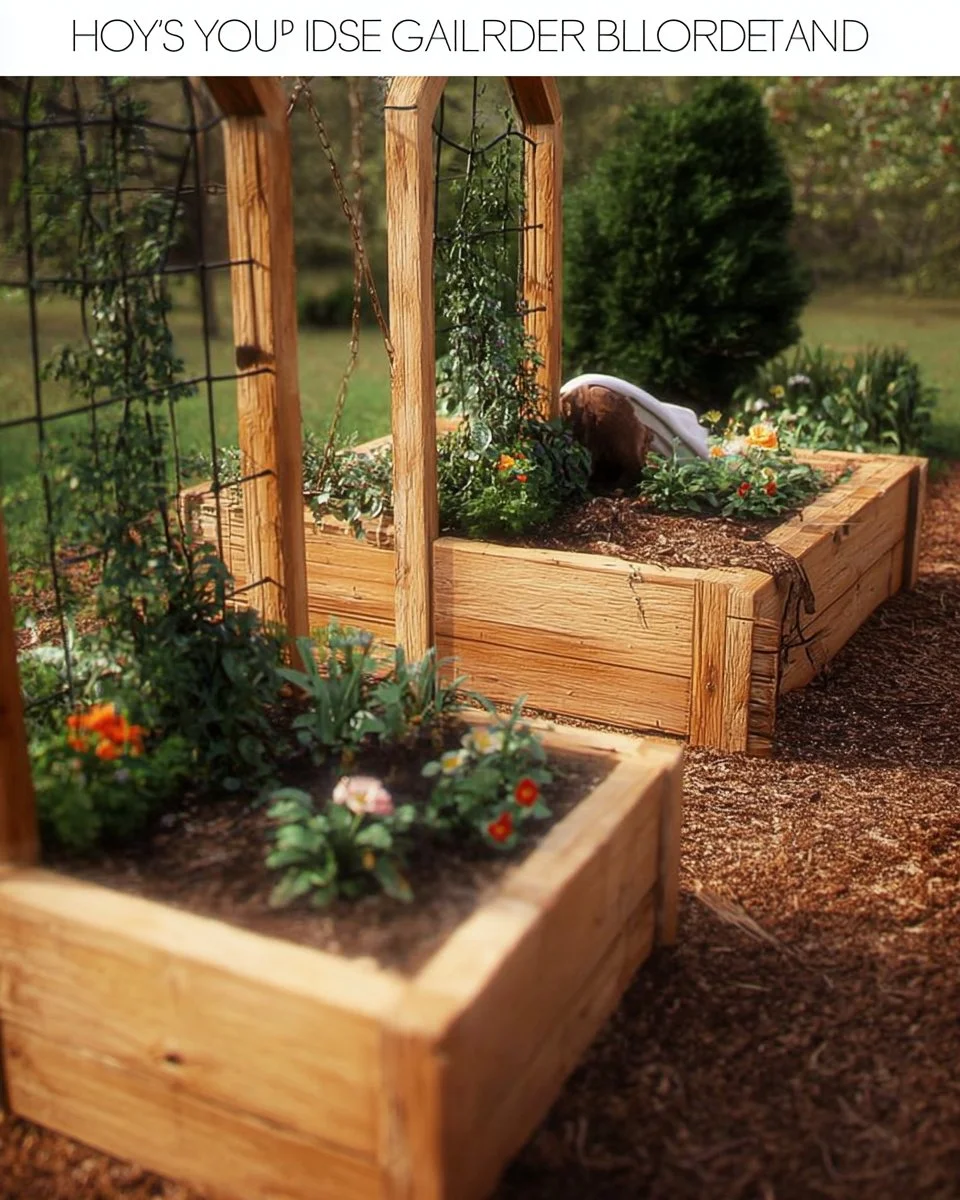
Introduction to DIY Raised Garden Bed Planters
Are you tired of struggling with weedy lawns and inadequate garden space? Have you ever thought about growing your own vegetables but felt that your soil just isn’t up to the task? If so, the DIY Raised Garden Bed Planters might just be your solution. This project allows you to create a personal oasis for growing your favorite plants while also enhancing your outdoor space.
Raised garden beds offer numerous benefits that make gardening easier and more fun. Not only do they provide excellent drainage and soil aeration, but they also reduce the strain on your back, allowing you to garden at a comfortable height. The best part? Building these planters doesn’t require advanced woodworking skills. Whether you’re an amateur gardener or a seasoned pro, this project is practical, affordable, and highly customizable.
You can find various plans and designs online, but creating your own DIY Raised Garden Bed Planters lets you tailor it to your specific needs. With a time commitment of only a few hours and a modest budget, you’ll not only improve your gardening experience but also enhance the visual appeal of your yard. It’s a rewarding project that brings both immediate satisfaction and long-term benefits as you watch your plants thrive.
Table of Contents
Key Benefits of DIY Raised Garden Bed Planters
Why You’ll Love This Build
- Durability: Made from robust materials like wood or composite, these planters withstand the elements.
- Simplicity: The design is straightforward, making it accessible for novice builders.
- Versatility: Customize size, design, and plant choices to meet your specific gardening needs.
- Portability: Relocate to different spots in your yard as your gardening strategy evolves.
- Weather Resistance: Choose materials that withstand moisture and decay, ensuring longevity.
- Cost Savings: Building your own planters is often cheaper than purchasing pre-made options.
What Makes It Stand Out
The DIY Raised Garden Bed Planters stand out from store-bought alternatives primarily due to their customizability. You can choose the height, width, and depth that work best for your gardening space and personal preference. Additionally, building these planters allows you to select the materials that suit your climate and aesthetic. While commercial options may be limited in design, your creativity is the only limit with a DIY approach.
These planters also support organic gardening practices. You can fill them with high-quality soil and compost, ensuring your plants receive the best nutrition. As an added benefit, raised beds can prevent soil compaction and make it easier to manage pests.
Project Specs for DIY Raised Garden Bed Planters
At-a-Glance Details
- Skill Level: Beginner to Intermediate
- Estimated Time: 4-6 hours
- Estimated Cost: $100 – $300 (USD)
- Dimensions: Customize to fit your space, ideally 4 feet wide (120 cm), 6-8 feet long (180-240 cm), and 12-24 inches (30-60 cm) deep.
- Indoor/Outdoor Suitability: Outdoor
- Tools Needed at a Minimum: Drill, saw, level
Materials and Tools for DIY Raised Garden Bed Planters
Complete Materials List with Measurements
- Pressure-treated lumber (e.g., 2×6 or 2×4): 8 pieces, 4 feet long (120 cm)
- Wood screws (2.5 inches/6.35 cm): 1 box
- Landscape fabric: 1 roll (enough for the bottom)
- Wood sealant (optional): 1 can (for weatherproofing)
- Soil and compost mix: Enough to fill the bed (approximately 1 cubic yard)
Complete Tools List
- Drill: For making pilot holes and driving screws
- Saw (circular or miter): For cutting lumber to size
- Level: To ensure your structure is flat and even
- Tape measure: For accurate measurements
- Clamps (optional): To hold pieces in place while assembling
Substitutes and Alternatives
You can substitute pressure-treated lumber with cedar or redwood, which are naturally resistant to decay and insects. For a budget-friendly option, consider using reclaimed wood or pallets, although you’ll need to ensure they are safe for planting. If you lack certain tools, renting from a local hardware store can be a cost-effective alternative. Additionally, for those without access to a drill, screws could be replaced with heavy-duty nails, though they may require more brute force to install.
Cut List and Measurements for DIY Raised Garden Bed Planters
- Lumber for Sides: 4 pieces at 48 inches (120 cm)
- Lumber for Ends: 4 pieces at 24 inches (60 cm)
- Pilot holes: Pre-drill holes 1 inch from the edges to avoid splitting.
- Landscaping fabric: Cut to size based on the interior dimensions of the bed.
Safety and Prep for DIY Raised Garden Bed Planters
Before starting, ensure your workspace is safe and organized. Wear protective glasses and gloves to keep your hands and eyes safe. Measure and mark your cuts accurately to avoid mistakes. Use a square to ensure straight cuts and angles. Ventilation is important, especially when using wood sealants; consider working outside or in a well-ventilated garage.
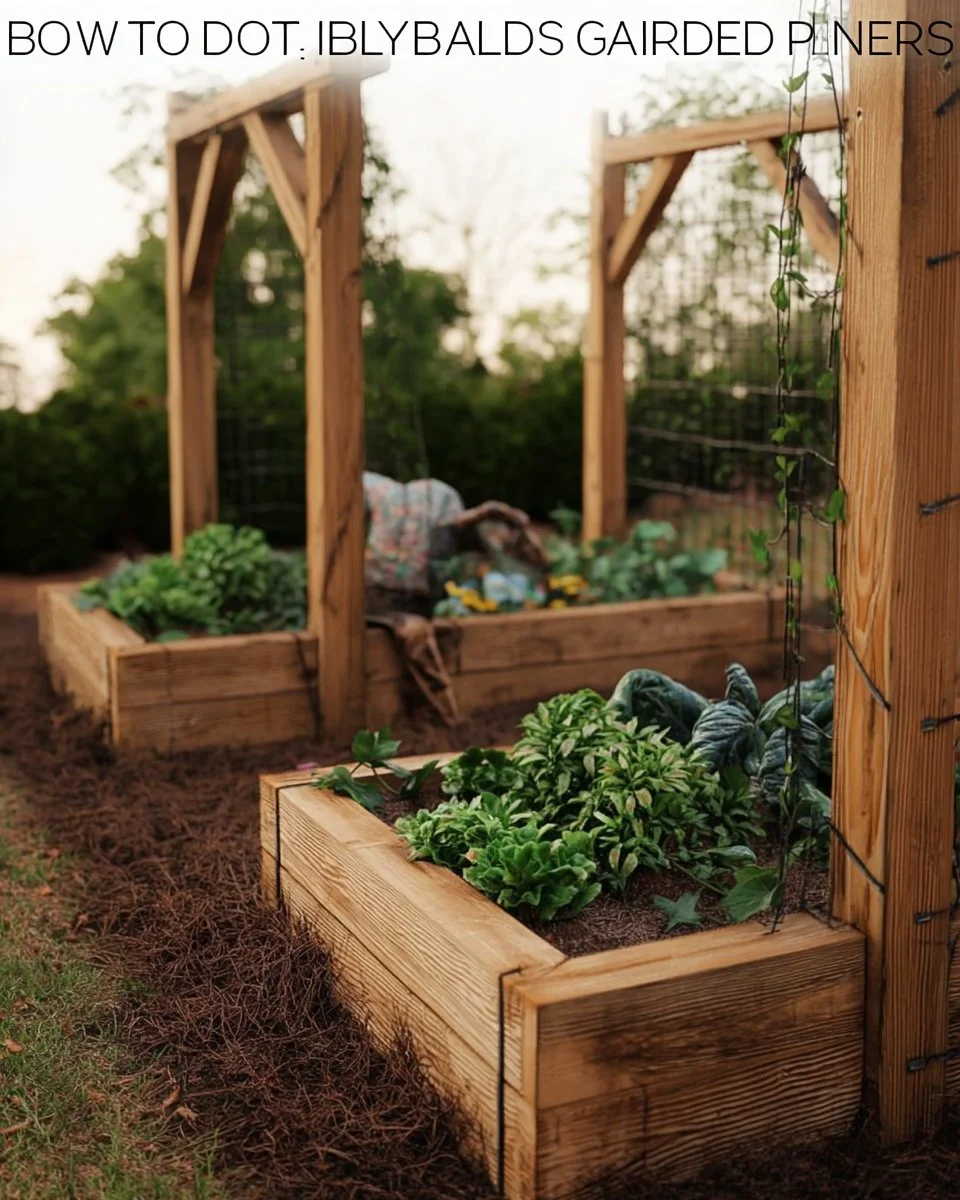
How to Build DIY Raised Garden Bed Planters – Step-by-Step Directions
Step 1 – Prep and Layout
Begin by selecting a level area in your yard for the garden bed. Use a tape measure to mark out the dimensions, ensuring it fits well within your space and won’t interfere with other yard elements.
Step 2 – Cut and Label Pieces
Cut your lumber according to the cut list. Label each piece to make assembly easier later on. Make sure the edges are smooth for safety and aesthetics.
Step 3 – Dry Fit and Mark Joinery
Before attaching anything, lay out your pieces to ensure they fit well together. Mark where you will drill pilot holes to prevent the wood from splitting when screws are added.
Step 4 – Assemble the Frame/Body
Start assembling the sides by attaching the end pieces to the side pieces using wood screws. Ensure the screws are evenly spaced about 12 inches (30 cm) apart for strong connections.
Step 5 – Reinforce and Square
Check that the frame is square by measuring the diagonals. Adjust as necessary, and add screws for added stability. Consider using corner brackets for enhanced support.
Step 6 – Attach Surfaces or Panels
Secure the landscape fabric inside the frame, ensuring it covers the bottom entirely. This prevents weeds from growing into your planter and helps with drainage.
Step 7 – Sanding and Edge Treatment
Sand the edges of your planter to prevent splinters. Start with a coarser grit and gradually move to a finer grit for a smooth finish.
Step 8 – Finish Application
If desired, apply a sealant to the exterior of the planter to enhance durability and weather resistance. Follow the manufacturer’s instructions regarding recoat times.
FAQ Section
What type of wood should I use for my raised garden bed? Pressure-treated lumber is commonly used, but cedar and redwood are great alternatives due to their natural resistance to decay.
How deep should my raised garden bed be? A depth of 12-24 inches (30-60 cm) is ideal, allowing enough soil for root growth while maintaining good drainage.
Can I use untreated wood for my garden? While it’s possible, untreated wood may rot quickly in wet conditions. Consider using rot-resistant wood or applying a safe sealant.
How do I prevent wildlife from eating my plants? You can add a fence around the garden bed or use netting to protect your plants from hungry critters.
How often should I water my raised garden bed? It depends on your climate and the plants you are growing, but raised beds typically require more frequent watering due to faster drainage.
Is it necessary to line my raised garden bed? Lining helps prevent soil leaching and weed growth but is not mandatory. You can opt for a fully organic approach if desired.