
Introduction to 70 Best Seeds For Winter Sowing (By Category)
Are you tired of waiting for spring to plant your garden? What if you could get a head start, enjoying vibrant blooms and delicious produce long before the last frost? Winter sowing is a fantastic method that allows you to do just that. The process involves sowing seeds outdoors in a controlled environment, using containers that mimic a greenhouse effect. With the right seeds, you can take advantage of the winter months, and the best part is that they’re often cold-tolerant varieties.
The unique aspect of winter sowing is its simplicity and cost-effectiveness. You don’t need extensive gardening experience or a greenhouse; a few plastic containers and some seeds are all you need. This method can be done for minimal investment; in fact, many gardeners find they can grow an array of plants without breaking the bank. It’s ideal for those looking to expand their gardening horizons both indoors and outdoors.
Understanding which seeds to sow during winter can significantly impact your garden’s early growth. In this guide, we present the 70 best seeds for winter sowing categorized for your convenience. Whether you’re keen on colorful flowers, robust herbs, or nutritious vegetables, there’s something here for everyone.
Table of Contents
Key Benefits of 70 Best Seeds For Winter Sowing (By Category)
Why You’ll Love This Build
- Durability: Many cold-tolerant seeds thrive even in freezing temperatures.
- Simplicity: Easy to start and maintain, making it perfect for beginners.
- Versatility: A variety of plants can be grown, from herbs to perennials.
- Portability: Containers can be moved or relocated according to sunlight.
- Cost Saving: Utilize recycled materials for containers, reducing waste and expense.
- Space Efficiency: Perfect for small gardens or balconies, maximizing your gardening area.
What Makes It Stand Out
Winter sowing stands out because of its efficient use of time and resources. Unlike traditional sowing, where you wait for the last frost to pass, this method allows you to start your garden early. You can customize your selections, choosing from different categories like vegetables, flowers, and herbs, ensuring that your garden reflects your preferences.
Additionally, winter sowing fosters a sense of adventure in gardening. Watching seeds germinate outdoors, resilient against the cold, can be a thrilling experience. Compared to store-bought plants, which can be costly and limited in variety, this approach allows you the freedom to cultivate a diverse range of species.
Project Specs for 70 Best Seeds For Winter Sowing (By Category)
At-a-Glance Details
- Skill Level: Beginner to Intermediate
- Estimated Time: Varies (initial setup takes about 1–2 hours)
- Estimated Cost: $20–$50 (depending on seed selection and materials)
- Dimensions: Container sizes can vary (e.g., 2-gallon (7.5L) containers)
- Indoor/Outdoor Suitability: Primarily Outdoors
Tools Needed at a Minimum
- Scissors or utility knife
- Drill (for drainage holes)
- Garden trowel
- Marker (for labeling)
- Plastic containers (e.g., milk jugs, soda bottles)
Materials and Tools for 70 Best Seeds For Winter Sowing (By Category)
Complete Materials List with Measurements
- Containers:
- 2-gallon (7.5L) plastic milk jugs (1 per seed type)
- Clear plastic containers with lids (optional alternative)
- Soil:
- Seed-starting mix (enough to fill your containers)
- Seeds:
- 70 best seeds chosen for winter sowing (varieties listed in categories)
- Labels:
- Waterproof garden labels or tape (one for each seed type)
Complete Tools List
- Scissors or utility knife
- Drill with a 1/4 inch (6mm) bit
- Trowel (for scooping soil)
- Marker
- Plastic containers (recycled options preferred)
Substitutes and Alternatives
If you’re looking for substitutes, consider using any plastic containers available around your home. Large food containers, for example, can work well. As for soil, instead of buying prepackaged seed-starting mix, you can often make your own by mixing potting soil with perlite or vermiculite for better drainage.
For labeling, if official garden labels aren’t on hand, simple tape or even scrap paper can suffice. Just be sure to use a permanent marker to prevent fading.
Cut List and Measurements for 70 Best Seeds For Winter Sowing (By Category)
- Containers:
- Cut milk jugs or plastic containers (each cut in half along the side, allowing for easy access)
- Drainage:
- Drill 6-8 small holes in the bottom of each container to facilitate proper drainage.
Safety and Prep for 70 Best Seeds For Winter Sowing (By Category)
Always prioritize safety. While working with your tools, wear protective eyewear and gloves to avoid injury from sharp objects. Aim for a clean, clutter-free workspace so you can focus entirely on your project without distractions. Before starting, ensure you have accurate measurements.
Prepping your containers includes cleaning them thoroughly to remove any residues from their previous use. During the assembly phase, take care to avoid any sharp edges from cutting, and remember to ventilate your workspace if you’re working with soil and using adhesives for tagging.
How to Build 70 Best Seeds For Winter Sowing (By Category) – Step-by-Step Directions
Step 1 – Prep and Layout
Start by gathering all your materials and tools. Choose a suitable outdoor location where the containers can receive ample sunlight. Ensure that the area is flat for optimal drainage and visibility.
Step 2 – Cut and Label Pieces
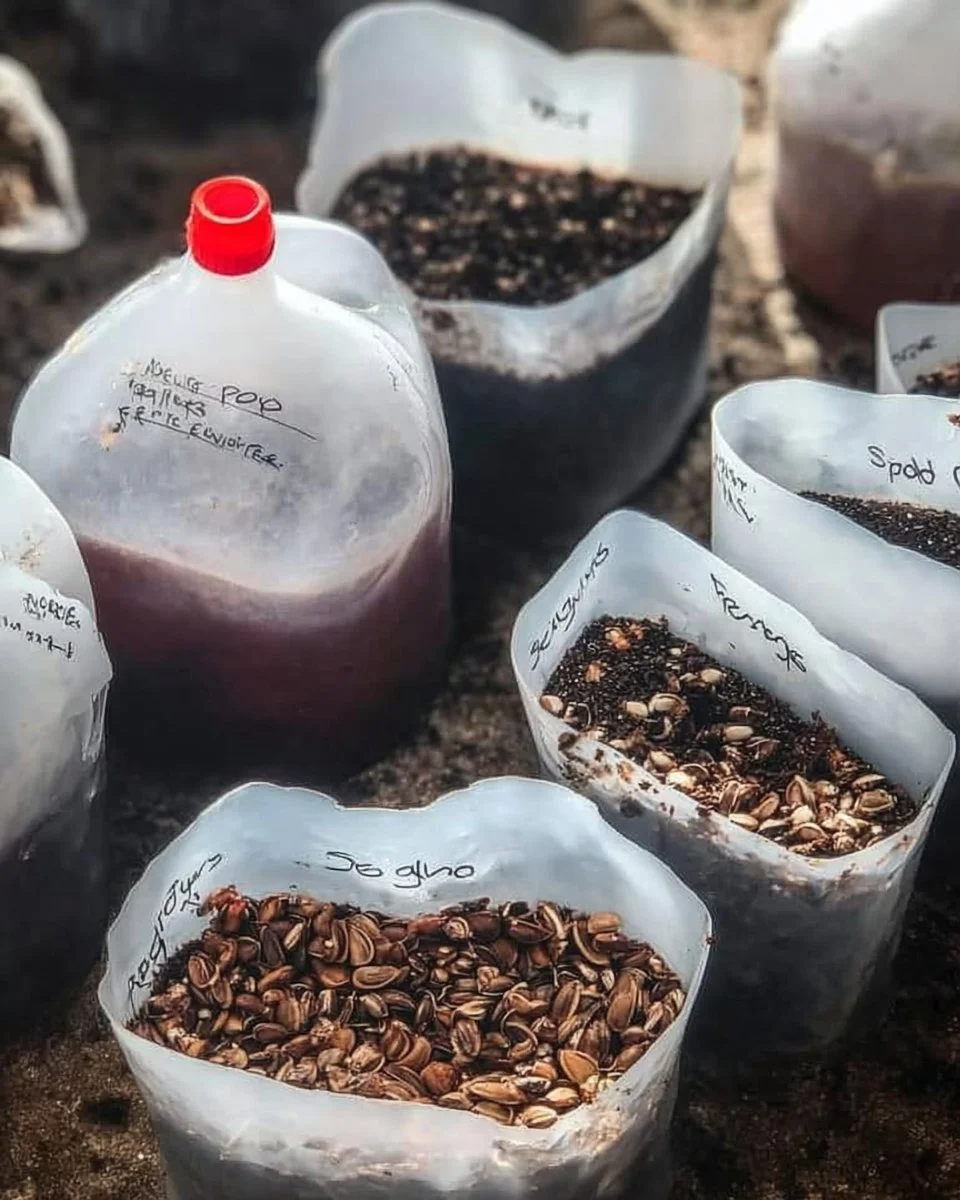
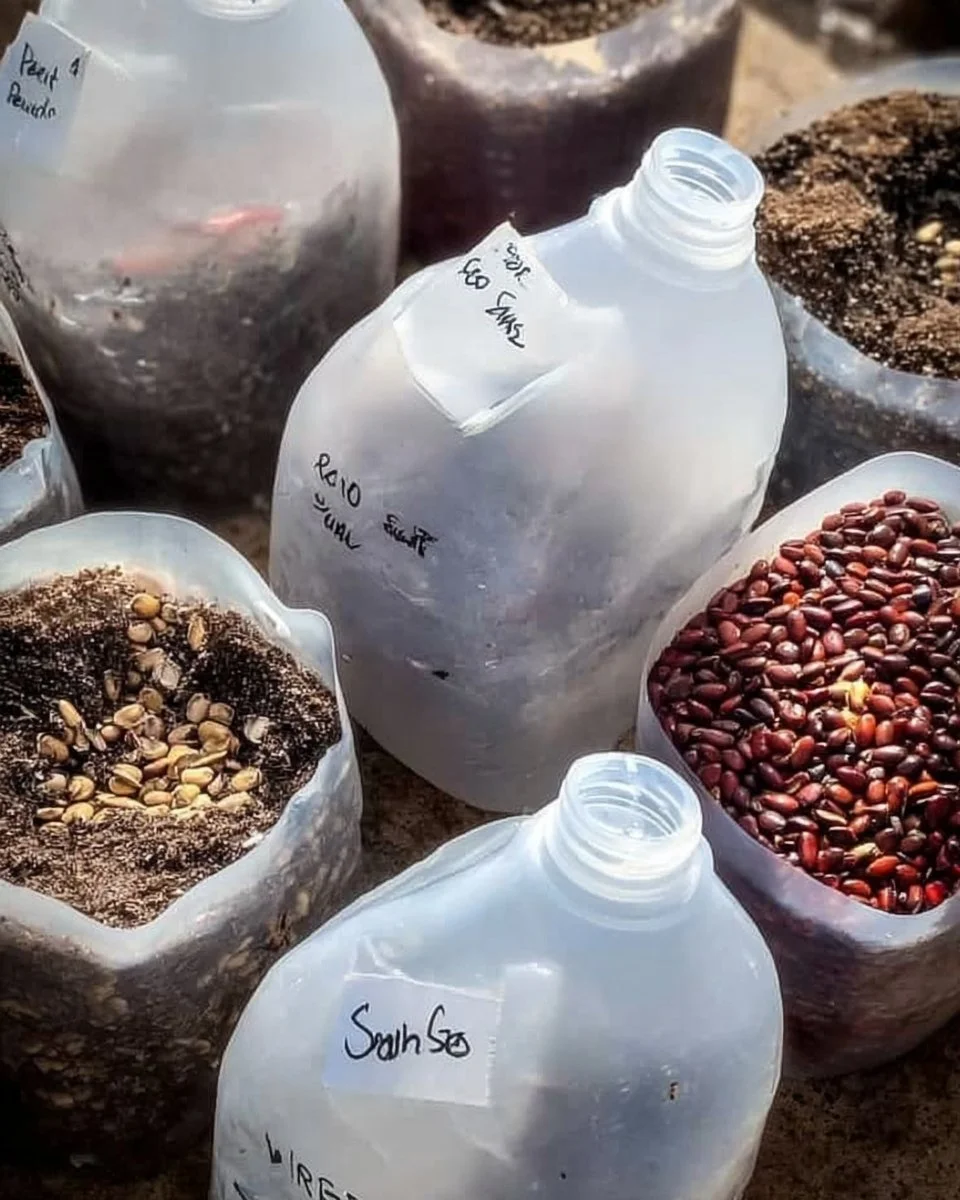
Using scissors or a utility knife, carefully cut the plastic containers in half. Drill small holes in the bottom of each container for drainage. Ensure you have as many containers as different seeds you plan to sow. Label each container clearly using your waterproof labels or tape.
Step 3 – Dry Fit and Mark Joinery
Before adding soil, do a dry fit of the containers to ensure proper spacing. This helps visualize how they will look in your garden. Mark where you’ll position each one for easy identification later on.
Step 4 – Assemble the Frame/Body
Fill each container with the seed-starting mix. Leave about an inch of space at the top. Gently tamp down the soil to remove air pockets but avoid compacting it too much, which can hinder root growth.
Step 5 – Reinforce and Square
Make sure your containers are stable on the ground. Check that they sit level and adjust if necessary. This ensures they won’t tip over during windy or rainy conditions.
Step 6 – Attach Surfaces or Panels
Now that your containers are filled, it’s time to plant your seeds. Follow the recommended planting depth for each seed type, which varies, and sprinkle them evenly. Cover them lightly with soil and water gently.
Step 7 – Sanding and Edge Treatment
If your cut edges are sharp, lightly sand them to prevent cuts when handling. Ensure there are no protruding edges that might harm surrounding plants or yourself during maintenance.
Step 8 – Finish Application
Place the containers back together. Depending on the specific seeds chosen, ensure they are sealed to retain warmth but can still breathe. Consider covering them with an additional layer of plastic if extremely cold temperatures are expected.
Step 9 – Care & Monitor
Keep an eye on your containers. Water them as required, ensuring moisture without over-saturation. Adjust their location if necessary to receive optimal sunlight.
Step 10 – Enjoy the Growth
As spring approaches, you’ll begin to see seedlings emerging. Enjoy the fruits of your labor—and feel free to monitor the growth and make any adjustments if required.
Frequently Asked Questions
What are the best seeds for winter sowing?
Cold-weather seeds like pansies, spinach, and kale are great for winter sowing.
Can I use any container for winter sowing?
Yes, any clear plastic container with drainage holes will work well.
How do I know when to plant?
Check your local frost dates and plan to sow seeds a few weeks before the last expected frost.
Is winter sowing suitable for all plants?
No, it’s best for hardy and cold-tolerant varieties.
How do I ensure good germination rates?
Use a good quality potting mix, ensure proper drainage, and monitor moisture levels.
What if I have limited space?
Use smaller containers and vertical arrangements to maximize your planting area.