
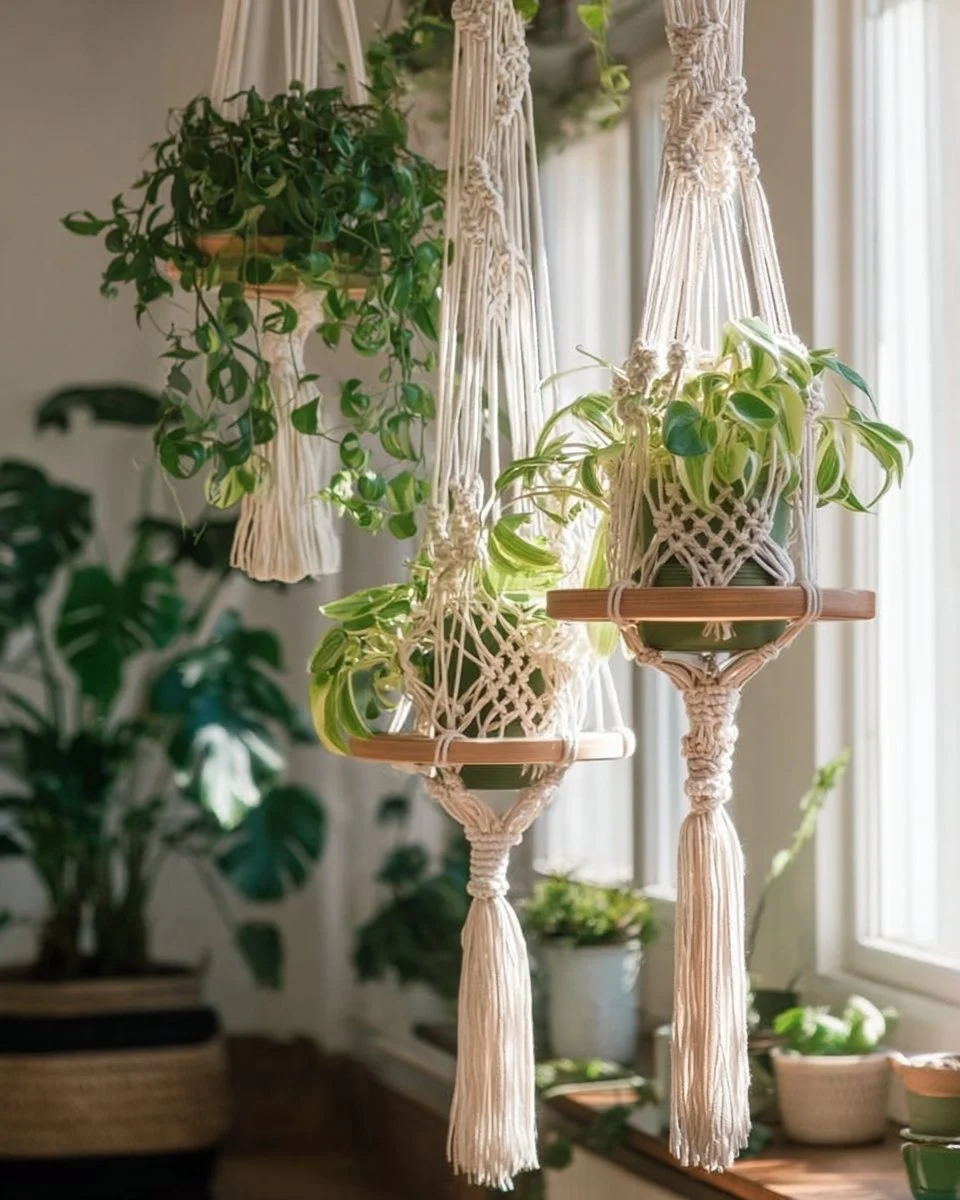
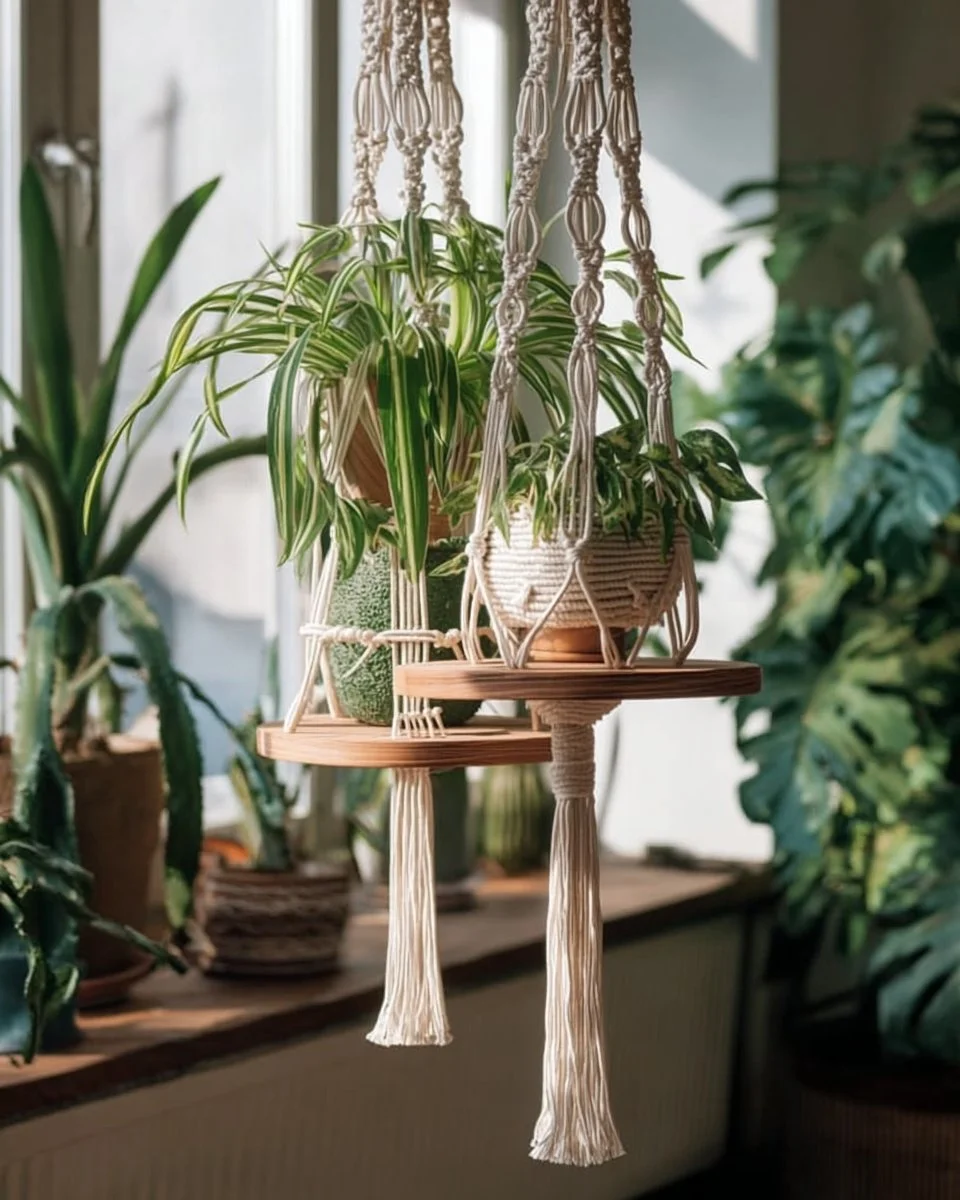
Introduction to Macrame Shelf Plant Hanger Patterns – 9 Free DIY Ideas
Are you looking for a unique way to display your plants while also adding a bit of artistic flair to your home or garden? The Macrame Shelf Plant Hanger Patterns – 9 Free DIY Ideas might just be the perfect solution. Imagine a beautiful hanging shelf showcasing your vibrant plants, creating an ambiance filled with natural beauty. This build is not just practical; it’s an opportunity to express your creativity while enhancing your living space.
What makes this project special is its versatility. Macrame allows you to incorporate various shapes, styles, and colors that can fit any décor. Whether you want a minimalist style or a boho-chic aesthetic, you can customize your hanger to suit your tastes. The best part is that it’s budget-friendly, with most materials available at your local craft store or online. It’s suitable for both indoor and outdoor settings, making it a hardy addition to your home.
The estimated time to craft these plant hangers can range from a few hours to a weekend, depending on the complexity of the pattern you choose. With minimal costs and suitable for crafters of all skill levels—from beginners to pros—this project is an excellent way for anyone to dive into the world of DIY macrame.
Table of Contents
Key Benefits of Macrame Shelf Plant Hanger Patterns – 9 Free DIY Ideas
Why You’ll Love This Build
- Durability: Crafted from strong materials, these hangers can support the weight of your plants.
- Simplicity: Easy-to-follow patterns make it accessible for all skill levels.
- Versatility: Customize sizes, colors, and styles to fit any space.
- Portability: Hanging designs can be moved around easily, adjusting the arrangement as needed.
- Weather Resistance: Perfect for both indoor displays and outdoor settings.
- Cost Savings: Creating your own hangers is often cheaper than store-bought options.
What Makes It Stand Out
The originality of the Macrame Shelf Plant Hanger Patterns shines in the intricate designs you can create. The skill of knotting rope has its roots in various cultures, allowing a touch of history to grace your home. Customization options are limitless; you can choose different types of knots, colors, and shelf materials to make the piece truly yours.
Additionally, this project is a sustainable choice, as you can use repurposed materials or eco-friendly alternatives. Compared to store-bought hangers, these DIY options not only provide a personal touch but also allow you to control the quality and craftsmanship, ensuring your plants have the best home.
Project Specs for Macrame Shelf Plant Hanger Patterns – 9 Free DIY Ideas
At-a-Glance Details
- Skill Level: Beginner to Intermediate
- Estimated Time: 2-8 hours (depending on complexity)
- Estimated Cost: $20-$50
- Dimensions: Varies based on design; typical shelf size is around 12×36 inches (30.5×91.4 cm)
- Indoor/Outdoor Suitability: Suitable for both
- Tools Needed at a Minimum: Scissors, tape measure, and a wooden dowel or greeting board.
Materials and Tools for Macrame Shelf Plant Hanger Patterns – 9 Free DIY Ideas
Complete Materials List with Measurements
- Cotton macrame cord: Approximately 50 yards (46 meters), 3-5mm thick.
- Wooden shelf: 1 shelf, size varies based on design (12×36 inches/30.5×91.4 cm recommended).
- Wooden dowel or board: 1 piece, 36 inches (91.4 cm), for the hanger.
- Optional paint or wood stain: For finishing the shelf, if desired.
Complete Tools List
- Scissors: For cutting the macrame cord.
- Tape measure: For accurate measurements.
- Ruler: To keep your knots even and straight.
- Drill with bits: To create holes in the shelf for hanging cords, if needed.
- Clamps: Optional, but helpful for holding the shelf in place while you’re working.
Substitutes and Alternatives
If you find that the specific type of macrame cord is unavailable, consider natural jute or hemp rope as alternatives. Both materials offer durability and a rustic look but may differ in texture. For tool replacements, a handheld drill can be substituted with a manual screwdriver in some instances, though it may require more effort. Similarly, if you prefer not to paint the wooden shelf, leaving it in its natural state can create a lovely, raw aesthetic.
Cut List and Measurements for Macrame Shelf Plant Hanger Patterns – 9 Free DIY Ideas
- Macrame Cord: Cut into 8 lengths of 10 feet (3.05 meters) each for a basic design.
- Wooden Shelf: 1 rectangular piece, typically 12×36 inches (30.5×91.4 cm).
- Dowel: 1 piece, 36 inches (91.4 cm) long.
Make sure to mark your cord lengths accurately, as uneven lengths can affect the balance and overall look of your hanger. If using pilot holes for the dowel, pre-drill holes with a 1/4-inch (0.6 cm) bit.
Safety and Prep for Macrame Shelf Plant Hanger Patterns – 9 Free DIY Ideas
When beginning your project, personal protective equipment (PPE) like safety goggles is recommended, especially if you’re using tools that create dust or shavings. Ensure your workspace is well-organized and free of obstacles. Taking measurements accurately is crucial to the success of your overall design. Always double-check your measurements before cutting, and clear your workspace of any clutter to maintain focus. Consider clamping your materials during assembly, as this provides added stability and accuracy.
How to Build Macrame Shelf Plant Hanger Patterns – Step-by-Step Directions
Step 1 – Prep and Layout
Start by laying out all your materials on a flat and clean surface. Measure and mark the desired lengths of your macrame cords. You can use a tape measure to ensure precision. Decide on the length the shelf will hang from the ceiling, factoring in the overall aesthetic you want.
Step 2 – Cut and Label Pieces
Using scissors, cut the macrame cords according to your planned layout. Label each piece to keep track of which lengths correspond to different portions of the project. This will help avoid confusion later during assembly.
Step 3 – Dry Fit and Mark Joinery
Next, gather the cut pieces and dry fit them to see how they align with the wooden shelf and dowel. Mark where each knot or connection will go, paying special attention to how the cords will transition across the shelf supports. This step is essential for ensuring accuracy in your final design.
Step 4 – Assemble the Frame/Body
Begin by tying the macrame cords in the chosen knot style. For a beginner, the square knot is a fantastic place to start. Make sure the knots are tight and secure. Position the dowel through the top knots, allowing the cords to drape down to support the shelf properly.
Step 5 – Reinforce and Square
After tying the main knots, check that everything is square. Measure diagonally from corner to corner of the shelf to ensure evenness. Reinforce knots with additional ties if necessary to add strength. This step is vital for the stability of your plant hanger.
Step 6 – Attach Surfaces or Panels
Once your base is stable, attach the actual shelf to the cords. Use the pre-drilled holes if your design incorporates them. Make sure the fasteners are evenly spaced to distribute the weight evenly across the shelf.
Step 7 – Sanding and Edge Treatment
Use sandpaper to smooth any rough edges on the wooden shelf. Start with a coarse grit and work your way to a finer grit for a polished finish. Always remember to clean up any dust particles after sanding, as this will give you a fresh surface to work on for any finishing touches.
Step 8 – Finish Application
After sanding, you can apply a stain or sealant if desired. This will protect the wood from moisture and enhance its appearance. Allow for adequate drying time between coats, and always check the manufacturer’s recommendations.
FAQ about Macrame Shelf Plant Hanger Patterns – 9 Free DIY Ideas
Q: How do I care for my macrame shelf plant hanger?
A: Wipe it down occasionally with a damp cloth. If it gets too dirty, you can spot-clean it.
Q: Can I use other materials instead of wood for the shelf?
A: Yes, you can use metal, glass, or even recycled materials, as long as they can support your plants.
Q: How much weight can my macrame shelf hanger support?
A: This largely depends on your knots and materials used, but a well-constructed hanger can typically hold 10-20 pounds (4.5-9 kg) comfortably.
Q: Is this project suitable for beginners?
A: Absolutely! With proper guidance and patience, even beginners can succeed with this project.
Q: How long will it take to complete the project?
A: It can take anywhere from a couple of hours to a weekend to finish based on your chosen design and skill level.
Q: Can I make this design with children?
A: Yes, it’s a family-friendly project, but consider supervision and providing age-appropriate tools.