
Introduction to 20 Cinder Block Garden Hacks: Transform Your Space on a Budget
Have you ever looked at your backyard or garden and felt it lacked something special? Do you want to transform that space without breaking the bank? If so, the 20 Cinder Block Garden Hacks project is for you. This build can completely rejuvenate your outdoor area, all while being friendly to your wallet and simple enough for beginners.
What makes cinder blocks the perfect solution? They are incredibly durable, weather-resistant, and surprisingly versatile. Whether you’re crafting planters, garden beds, or even outdoor furniture, cinder blocks can handle it all. With just a small investment of time and materials, you’ll find that you can create functional, beautiful, and personalized spaces that showcase your gardening skills and creativity.
Typically, this project will take a few hours to complete, depending on how many hacks you choose to try out. In terms of cost, cinder blocks are generally inexpensive, with prices averaging just a couple of dollars each. You won’t need specialized skills, making it a great project for anyone, even if you’re just getting started. Plus, these ideas can be executed outdoors, giving your garden a fresh, updated look.
Table of Contents
Key Benefits of 20 Cinder Block Garden Hacks: Transform Your Space on a Budget
Why You’ll Love This Build
- Durability: Cinder blocks stand up to the elements and won’t easily crack or chip.
- Simplicity: No complicated techniques needed—just stack and arrange.
- Versatility: Perfect for creating everything from seating to plant stands.
- Cost-Effective: Save money while adding value and aesthetics to your garden.
- Space-Efficient: Utilize vertical space or defined rows for a tidy garden layout.
- Weather Resistance: Ideal for outdoor projects that will endure various weather conditions.
What Makes It Stand Out
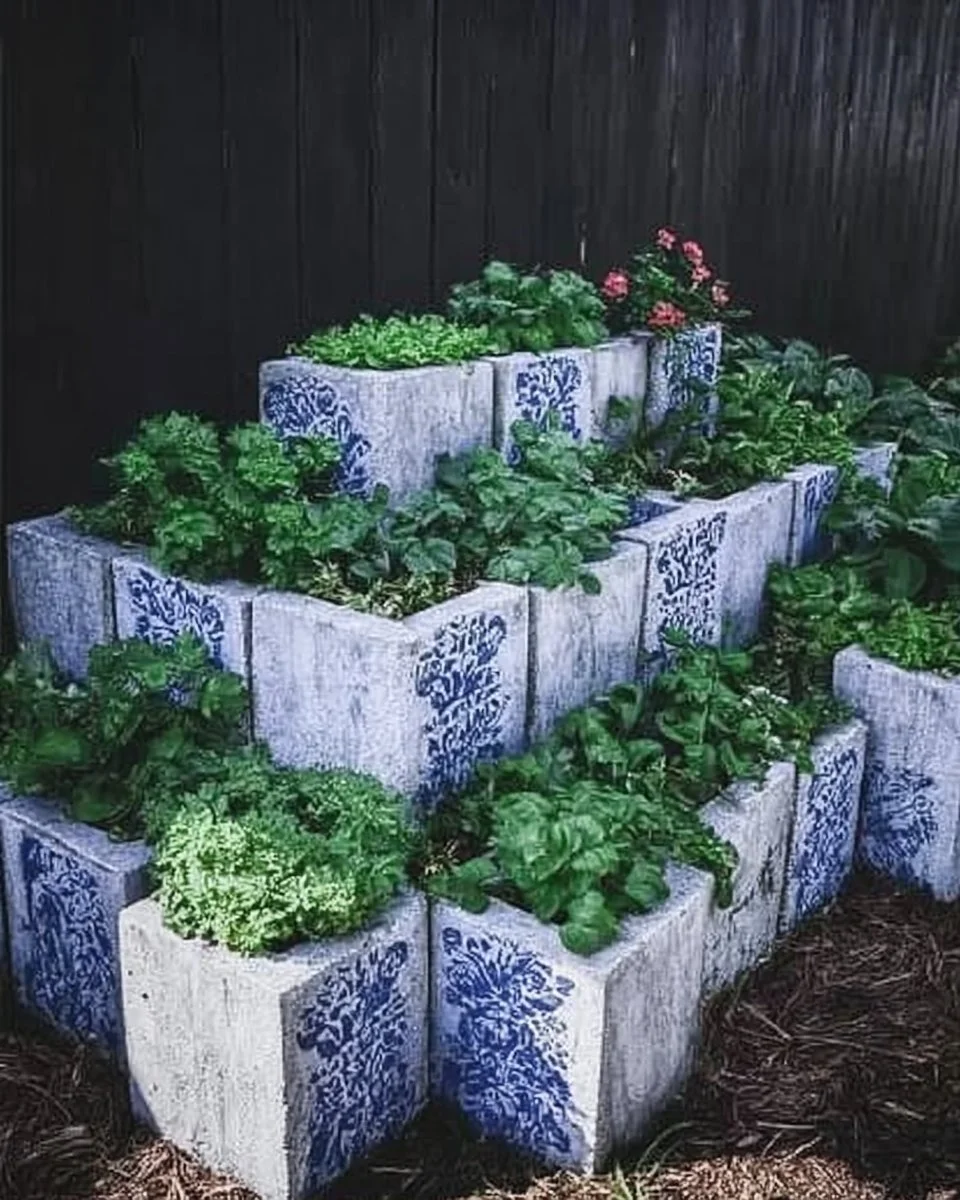
Cinder block garden projects offer a unique touch that sets them apart from traditional garden furniture or planters. Their concrete structure lends an industrial chic vibe that can complement various design aesthetics. Moreover, the ability to customize your cinder block designs means you can showcase your personality. Opt for paint, plants, or even stain to make each piece one-of-a-kind.
Unlike store-bought solutions, DIY cinder block structures can be tailored to your specific needs. From adjusting the height of a raised garden bed to designing a seating area that fits your outdoor space perfectly, the sky is the limit. With cinder blocks, you’re not just adding functionality; you’re creating a garden story that reflects who you are.
Project Specs for 20 Cinder Block Garden Hacks: Transform Your Space on a Budget
At-a-Glance Details
- Skill Level: Beginner
- Estimated Time: 1-5 hours (depending on chosen hacks)
- Estimated Cost: $50-$100 (for multiple projects)
- Dimensions: Varies by project
- Indoor/Outdoor Suitability: Outdoor
- Tools Needed: Utility knife, rubber mallet, level, measuring tape, waterproof adhesive
Materials and Tools for 20 Cinder Block Garden Hacks: Transform Your Space on a Budget
Complete Materials List with Measurements
- Cinder Blocks: Quantity varies by project (standard size: 16” x 8” x 8” or 40 cm x 20 cm x 20 cm)
- Potting Soil: 2-3 bags for planting projects
- Plants or Seeds: Choice based on your garden design
- Landscape Fabric: 1-2 rolls for drainage if needed
- Paint or Stain (Optional): For finishing touches on cinder blocks
Complete Tools List
- Utility Knife: For cutting fabric or cord
- Rubber Mallet: To gently knock blocks into place
- Level: For ensuring your structures are even
- Measuring Tape: To help you get precise dimensions
- Waterproof Adhesive: For any joining needs, particularly for structures exposed to moisture
Substitutes and Alternatives
If cinder blocks are hard to find in your area, consider alternatives such as concrete pavers or reclaimed bricks. Both materials are similarly durable and can provide that rustic look you’re aiming for. For tools, if a rubber mallet isn’t available, you could use a regular hammer, taking care to protect the surfaces you’re working with.
When selecting plants or seeds, think of native species or drought-resistant options if you live in a specific climate. Reusing old pots or container gardens can be viable substitutes to give your garden that unique flair.
Cut List and Measurements for 20 Cinder Block Garden Hacks: Transform Your Space on a Budget
- Cinder Blocks: No cutting required; use full-sized blocks (16” x 8” x 8”)
- Landscape Fabric: Cut to fit inside planters or between blocks—measure based on block configuration
- Optional Wood Panels: 1″ thick, sized to fit your design needs; dimensions vary
Safety and Prep for 20 Cinder Block Garden Hacks: Transform Your Space on a Budget
Before beginning your project, ensure you wear proper Personal Protective Equipment (PPE). At minimum, use gloves and closed-toe shoes. If you’re working with any cutting tools, a dust mask is advisable too. Setting up your workspace in a flat, open area will aid both safety and efficiency.
Measuring accurately is crucial for every project. Use a level to double-check that blocks are even when stacking or arranging them. Consider clamping any sections you might be joining for improved stability as you work through the different hacks.
How to Build 20 Cinder Block Garden Hacks: Transform Your Space on a Budget – Step-by-Step Directions
Step 1 – Prep and Layout
Start by choosing the area in your garden where you want to work. Mark out dimensions for your first project with string or stakes. Ensure your layout is level and visually appealing.
Step 2 – Cut and Label Pieces
If your project requires landscape fabric, measure the necessary pieces now. There’s no cutting needed for cinder blocks, but if you’re using wood in any part of your design, take measurements and cut to size.
Step 3 – Dry Fit and Mark Joinery
Before adhering or stacking blocks, do a dry fit. This step allows you to visualize the final product and make any adjustments. If you’re using adhesive, now is the time to mark where it will go.
Step 4 – Assemble the Frame/Body
Begin stacking your blocks to create the initial frame or body of your project. Use the level frequently to ensure everything is squared off. For added support, use waterproof adhesive between blocks.
Step 5 – Reinforce and Square
Double-check your diagonals by measuring from corner to corner to ensure squareness. This will prevent any racking as the structure develops.
Step 6 – Attach Surfaces or Panels
If your design includes additional surfaces like wood panels, secure them now. Use proper fasteners appropriate for outdoor use to ensure longevity.
Step 7 – Sanding and Edge Treatment
If using wood, lightly sand outside edges to smooth any rough surfaces. Ensure there’s no dust or debris left before applying any finishes.
Step 8 – Finish Application
Now’s your chance to enhance the appearance. If you’re using paint or stain, apply one coat and allow it ample time to cure. Weatherproofing is essential if your project will be exposed to the elements.

FAQ about 20 Cinder Block Garden Hacks: Transform Your Space on a Budget
Can I paint cinder blocks?
Yes, cinder blocks can be painted, and this is a great way to customize your project.
How do I make sure my blocks stay in place?
Using adhesive and a level while stacking is crucial to ensuring your design doesn’t shift.
Are cinder blocks safe for planting?
Yes, they are safe for planting and can provide excellent drainage for most plants.
Can I use cinder blocks indoors as well?
While they are primarily designed for outdoor use, you can certainly use them indoors for creative design projects.
How do I clean cinder blocks?
You can clean them with water and a brush. For tougher stains, a mild detergent works well.