

Introduction to 2′ x 8′ Arch Trellis for Planter Boxes
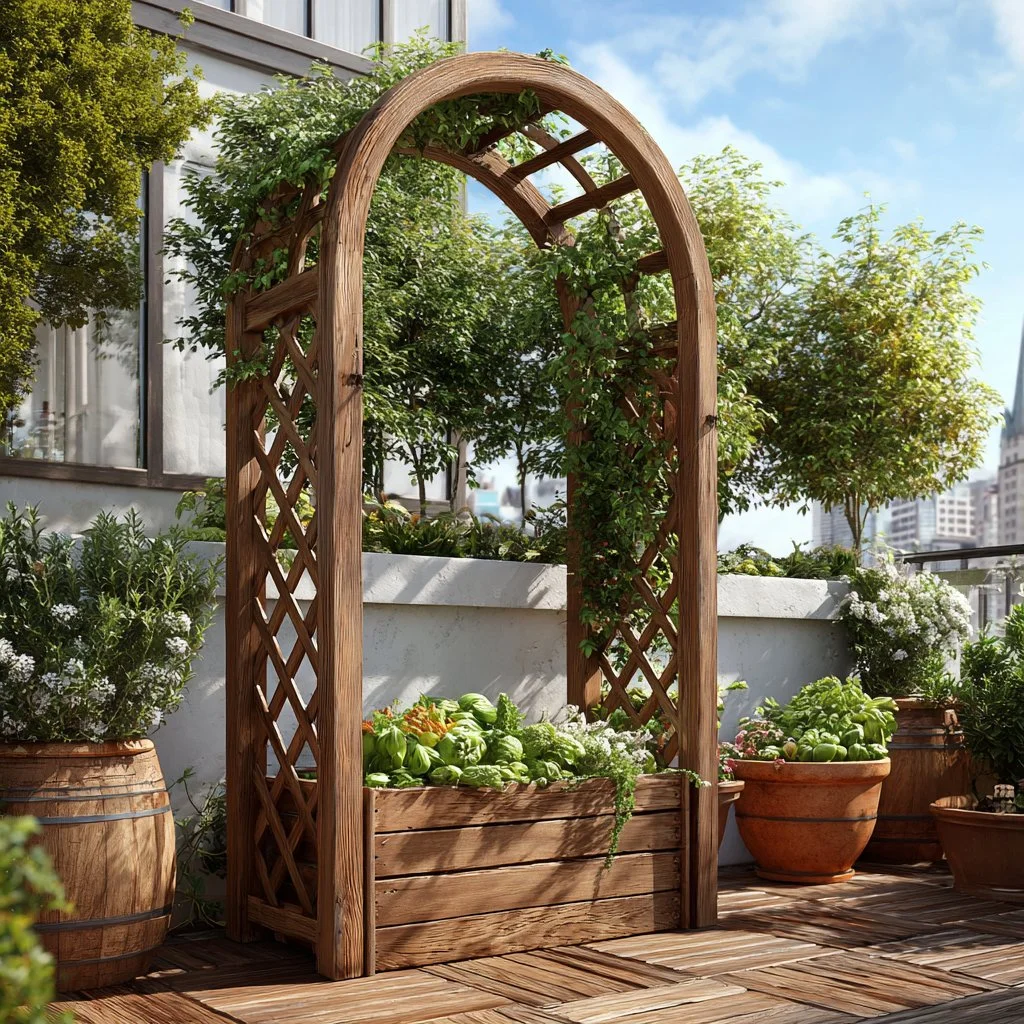
Have you ever looked at your garden and felt that something was missing? A bit of height or character, perhaps? Introducing the 2′ x 8′ Arch Trellis for Planter Boxes! This DIY project could be your ticket to transforming your ordinary garden into an extraordinary space. The trellis not only serves as a support structure for climbing plants but also as a stunning focal point that adds elegance and whimsy to your outdoor oasis.
Imagine standing in your garden, surrounded by lush greenery, with vibrant flowers cascading down an arch trellis. This beauty can certainly be yours! The build is straightforward, surprisingly affordable, and can be completed in a weekend. Best of all, no advanced carpentry skills are necessary. If you can measure and use a saw, you’re likely ready to tackle this project.
The best part about creating your own trellis is the opportunity for personalization. You can choose your wood type, paint color, and even the design, ensuring it perfectly matches your existing garden decor. Moreover, this structure is versatile enough to be used indoors for potted plants if you prefer a touch of nature within your home. The possibilities are endless!
Key Benefits of 2′ x 8′ Arch Trellis for Planter Boxes
Why You’ll Love This Build
- Durability: Made from sturdy materials, this trellis will withstand years of use.
- Simplicity: Easy-to-follow steps make this project accessible for all skill levels.
- Versatility: Suitable for a wide range of climbing plants, from flowers to vegetables.
- Portability: Lightweight materials allow for easy relocation within your garden.
- Weather Resistance: Choose rot-resistant wood for longevity, especially outdoors.
- Cost Savings: Building your own trellis is often significantly cheaper than buying one pre-made.
What Makes It Stand Out
One of the main advantages of a DIY 2′ x 8′ Arch Trellis for Planter Boxes is the level of customization. Store-bought options often come in fixed designs and sizes that may not suit your garden. By making your own trellis, you can adjust the dimensions, choose different wood types, and even incorporate decorative elements that reflect your taste.
Additionally, building this trellis allows you to use reclaimed wood or eco-friendly materials, aligning your garden project with sustainable practices. This personal touch enhances the overall charm of your garden while allowing you to showcase your creativity.
Project Specs for 2′ x 8′ Arch Trellis for Planter Boxes
At-a-Glance Details
- Skill Level: Beginner
- Estimated Time: 8-10 hours
- Estimated Cost: $75-$150
- Dimensions: 2′ x 8′ (60.96 cm x 243.84 cm)
- Indoor/Outdoor Suitability: Outdoor
- Tools Needed at a Minimum: Circular saw, drill, measuring tape, square, level.
Materials and Tools for 2′ x 8′ Arch Trellis for Planter Boxes
Complete Materials List with Measurements
- 4 pieces of 2″x4″x8′ lumber (59mm x 89mm x 2438mm) for the vertical posts
- 4 pieces of 1″x4″x8′ lumber (19mm x 89mm x 2438mm) for the horizontal supports
- 2 pieces of 1″x2″x8′ lumber (19mm x 51mm x 2438mm) for the arch curve
- 1 box of wood screws (2.5″ / 64mm)
- 1 bottle of wood glue (optional)
- Stain or outdoor wood sealant (for finishing)
Complete Tools List
- Circular saw or miter saw
- Cordless drill with bits
- Measuring tape
- Carpenter’s square
- Level
- Clamps (optional)
- Sandpaper (various grits)
Substitutes and Alternatives
If the suggested lumber isn’t available, consider using cedar or pine for the vertical posts as they are both sturdy and weather-resistant. MDF or plywood may be used for a lightweight option but may require more finishing work to ensure durability outdoors. For tools, a hand saw can work in place of a circular saw, though it will require more effort and time.
Cut List and Measurements for 2′ x 8′ Arch Trellis for Planter Boxes
- Vertical Posts: 4 pieces – 2″x4″x8′ (59mm x 89mm x 2438mm)
- Horizontal Supports: 4 pieces – 1″x4″x8′ (19mm x 89mm x 2438mm)
- Arch Curve: 2 pieces – 1″x2″x8′ (19mm x 51mm x 2438mm); curve shape to be cut as per design
- Pilot Holes: Pre-drill all screw holes with 1/8” (3mm) size for easier assembly, particularly in the vertical posts.
Safety and Prep for 2′ x 8′ Arch Trellis for Planter Boxes
Prior to starting your project, invest in personal protective equipment (PPE) such as safety goggles and dust masks. A clean workspace is critical; clear debris and arrange tools for easy access. Pay close attention to measuring and marking your lumber accurately, as precision is key to a successful build. Using clamps will help hold pieces in place, ensuring accuracy during assembly. Adequate ventilation is necessary when applying finishes, so work in an open space or garage.
How to Build 2′ x 8′ Arch Trellis for Planter Boxes – Step-by-Step Directions
Step 1 – Prep and Layout
Begin by determining where you want your trellis to be positioned. Use stakes to outline the dimensions, ensuring it fits your planter boxes perfectly. Mark out the position of the vertical posts on the ground as well, ensuring symmetry.
Step 2 – Cut and Label Pieces
With your circular saw, cut the wood according to your cut list. Label each piece after cutting so that you can easily identify them during assembly. This will prevent confusion when you begin constructing the trellis.
Step 3 – Dry Fit and Mark Joinery
Before assembling the trellis, perform a dry fit of all components. Check that everything lines up properly and that there are no gaps. Mark where you will drill pilot holes for screws, especially in the vertical posts.
Step 4 – Assemble the Frame/Body
Using wood screws, start assembling the frame by attaching the horizontal supports to the vertical posts. Use a level to ensure everything is straight and even.
Step 5 – Reinforce and Square
After the frame is looking good, check your diagonals to ensure everything is square. Tighten screws if necessary and add additional screws for reinforcement, ensuring the structure holds firmly.
Step 6 – Attach Surfaces or Panels
Next, attach the curved arches using wood screws. Ensure they fit snugly against the vertical posts. Make adjustments if necessary, measuring for uniformity along both sides.
Step 7 – Sanding and Edge Treatment
Smooth all edges using sandpaper, progressing from coarse to fine grit. This will remove any splinters and ensure safe handling. Remember to clean off the dust before applying the finish.
Step 8 – Finish Application
Apply your chosen stain or sealant to protect the wood from moisture and UV rays. Follow the manufacturer’s instructions regarding drying and recoat times to achieve a professional finish.
FAQ about 2′ x 8′ Arch Trellis for Planter Boxes
What type of wood is best for outdoor use?
Cedar and redwood are excellent choices due to their natural resistance to rot.
How long should I wait before planting on the trellis?
It’s best to wait until the finish is fully cured, usually 48-72 hours.
Can I modify the design for a smaller garden?
Yes! You can adjust sizes to fit your space while keeping the overall design principles.
Will this trellis support heavy plants?
Yes, if properly constructed with sturdy materials, it can support climbing plants like tomatoes or cucumbers.
How do I maintain the trellis?
Regularly inspect for any signs of wear or rot. Reapply stain or sealant every couple of years to prolong its life.