
Indoor gardening provides a fantastic way to enjoy fresh herbs and vegetables without the need for a traditional soil garden. Hydroponics helps circumvent space limitations, giving you the chance to grow greenery even in small apartments! Let’s embark on a journey where you can create your very own hydroponic garden.
Project Overview
What this DIY project is:
Crafting simple hydroponic systems that fit any indoor space!
Skill level: Beginner
Estimated time: 1-3 hours (depending on the project)
Estimated cost: $20 – $100 per project
Tools required:
- Drill
- Measuring tape
- Scissors
- Craft knife
Materials required:
- Plastic containers or buckets
- Net pots
- Hydroponic grow medium (like clay pellets or rock wool)
- Reservoir for water
- Hydroponic nutrient solution
- Air pump (optional)
BEFORE THE PROJECT
Picture your indoor space lacking any greenery, perhaps holding dusty plants that didn’t quite thrive. With limited sunlight and soil-based growing challenges, it feels like indoor gardening isn’t feasible.
Common Issues or Limitations:
- Limited space
- Low light conditions
- Poor soil quality
- Inability to control nutrients
STEP-BY-STEP DIY PROCESS
Step 1: Preparation
- Choose Your Space: Select a sunny location or consider using grow lights.
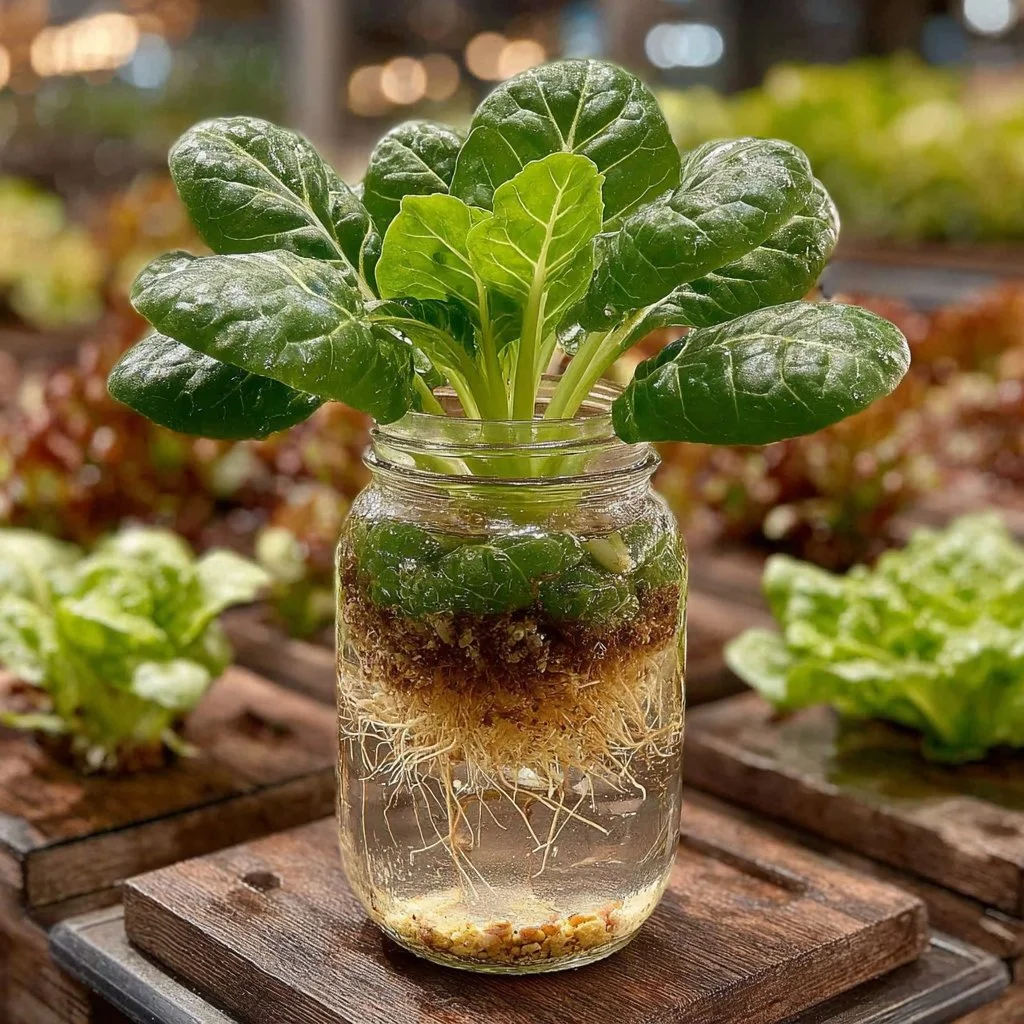
- Decide on the Design: Choose a hydroponic system; Deep Water Culture (DWC) is beginner-friendly.
Step 2: Execution
Build the Reservoir:
- Use a plastic container as your water reservoir.
- Cut holes in the lid for net pots, ensuring they fit snugly.
Prepare the Net Pots:
- Fill net pots with your chosen hydroponic growing medium, leaving space for seeds.
Step 3: Assembly / Transformation
Setup the Container:
- Fill the reservoir with water, and add your hydroponic nutrient solution as per package instructions.
- Place the net pots into the holes of the reservoir lid.
Aeration (optional):
- If using an air pump, place it in the reservoir to oxygenate the water.
Step 4: Finishing Touches
Plant Your Seeds:
- Plant seeds in the medium of each net pot.
- Water lightly and allow germination.
Positioning:
- Make sure the system gets sufficient light for at least 12-16 hours daily.
Practical Tips & Common Mistakes to Avoid
- Ensure the water level is always above the bottom of the net pots for adequate moisture.
- Avoid over-fertilizing; follow instructions on nutrient packages.
AFTER THE PROJECT
Now, visualizing a flourishing hydroponic garden with vibrant greens, you’ll appreciate the transformation. The air is fresher, the colors brighter, and most importantly, you are growing food at home!
Highlight Improvements:
- Space is utilized efficiently with greenery.
- No soil means no mess – just clean, easy maintenance.
- Fresh herbs and veggies are at your fingertips!
Pro Tips & Customization Ideas
- Personalize Your Garden: Add labels to net pots with plant names.
- Optional Upgrades: Consider vertical setups to save floor space.
- Budget-Friendly Alternatives: Upcycle old containers instead of buying new ones.
Safety & Maintenance Tips
Basic Safety Precautions:
- Wear gloves when handling hydroponic solutions.
- Use sharp tools carefully and keep away from children.
Maintenance Tips:
- Regularly check water levels and top off with nutrient solutions as needed.
- Monitor plants for pests and signs of disease.
Conclusion
Creating your own hydroponic garden is a rewarding project that anyone can tackle! Every new leaf and sprouting seed will fill you with pride. Dive into the world of indoor gardening—bring your green thumb to life and enjoy growing fresh food right in your own home. You’ve got this! 🌱