
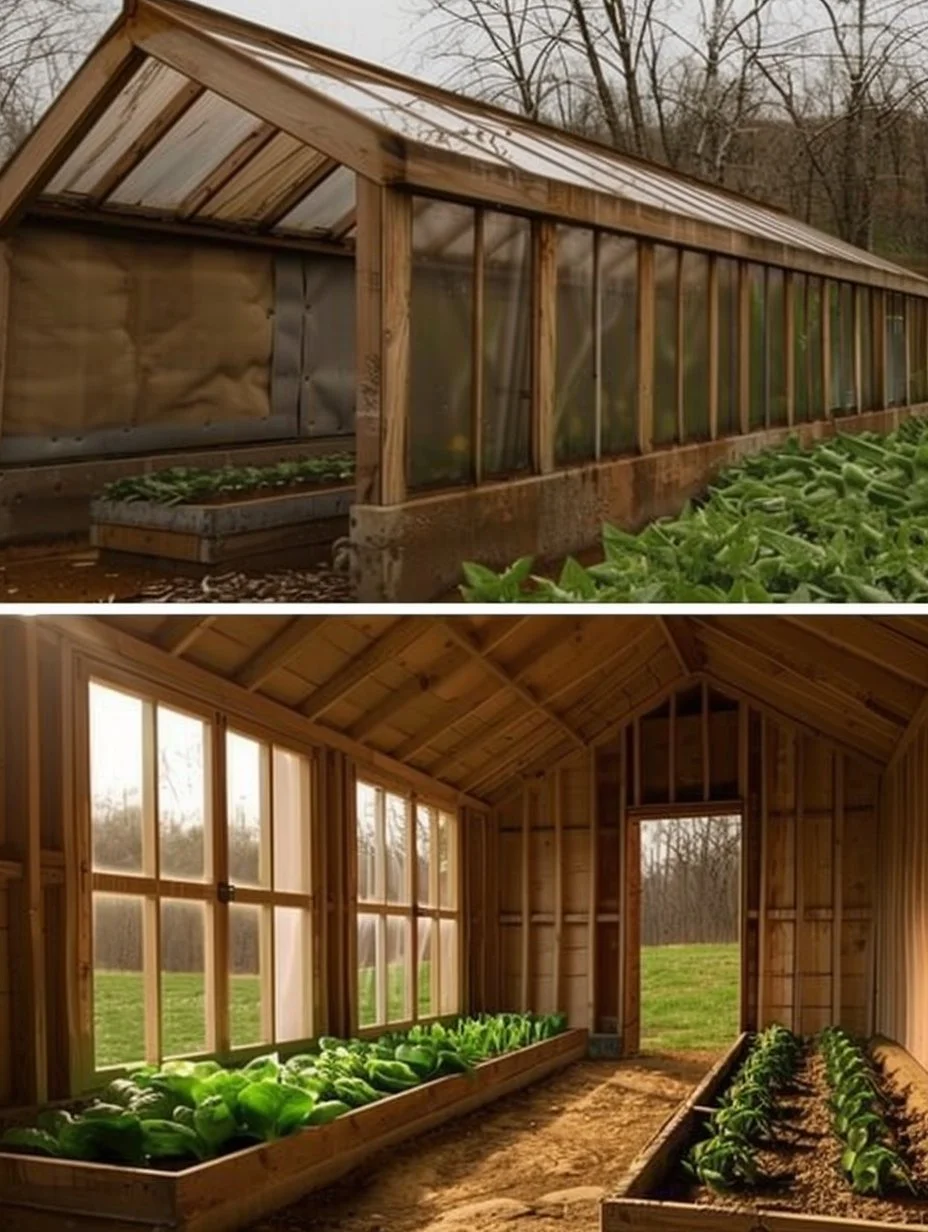
Imagine a world where you can grow fresh vegetables and herbs year-round, regardless of the weather outside. Sounds dreamlike, right? Building a $300 underground greenhouse for year-round gardening is not just practical but also an affordable way to achieve this dream. This project allows you to cultivate your favorite flora all year, taking advantage of the earth’s natural insulation.
Such a build is unique and special because it employs simple principles of greenhouse design while utilizing materials that can often be found locally or at minimal cost. The estimated time to complete this project is around a weekend, making it a great choice for DIY enthusiasts. You don’t need advanced skills to tackle this construction, as the steps are clear and straightforward.
In terms of cost, with a budget of about $300, this underground greenhouse stands out as a cost-effective growing solution. Whether your garden flourishes indoors or outdoors, the underground greenhouse thrives on natural processes, creating a microclimate conducive to plant growth. It’s this combination of affordability, ease, and innovation that makes this project an invaluable addition to your gardening repertoire.
Key Benefits of How to Build a $300 Underground Greenhouse for Year-Round Gardening
Why You’ll Love This Build
- Cost-Effective: With a minimal budget, you can design a structure that lasts.
- Energy Efficient: Natural insulation reduces heating costs in winter.
- Year-Round Use: Grow a variety of plants in any season.
- Easy to Customize: Tailor the design to fit your specific needs and space.
- Eco-Friendly: Utilize sustainable practices in your gardening efforts.
- Low Maintenance: Simple structure means less long-term upkeep.
What Makes It Stand Out
This underground greenhouse isn’t just another gardening trend; it excels in its originality and cost-effectiveness compared to store-bought greenhouses. Many off-the-shelf models lack the personalization this build allows, giving you the freedom to modify the dimensions and features based on your gardening ambitions.
Customization options are endless! From raised beds inside to specific lighting arrangements, creativity is your only limit. Best use-cases include not only vegetable gardens but also flower beds, microgreen production, and even starter plants for the spring. Unlike traditional greenhouses that might require extensive heating, this design leverages the earth’s natural warmth, making it sustainable and economically viable.
Project Specs for How to Build a $300 Underground Greenhouse for Year-Round Gardening
At-a-Glance Details
- Skill Level: Beginner to Intermediate
- Estimated Time: 1 weekend
- Estimated Cost: $300 (USD)
- Dimensions: 6’ x 12’ (1.83 m x 3.66 m)
- Indoor/Outdoor Suitability: Outdoor
- Tools Needed: Shovel, circular saw, drill, measuring tape, level
Materials and Tools for How to Build a $300 Underground Greenhouse for Year-Round Gardening
Complete Materials List with Measurements
- 4x 2″x4″ lumber pieces (8 feet long) – framing
- 10x 2″x4″ lumber pieces (6 feet long) – support beams
- 15x 2″x6″ lumber pieces (12 feet long) – main structure support
- 1x Large roll of plastic sheeting (6 mil) – greenhouse cover
- 1x Roll of duct tape – sealing
- 8x concrete blocks (12″x12″x12″) – structural support
- 10x screws (3 inches long) – assembly
- Wood stain/sealant – protection (optional)
Complete Tools List
- Shovel – for digging
- Circular saw – for cutting lumber
- Drill – for screwing and mounting
- Measuring tape – essential for accuracy
- Level – to ensure straight lines and even structures
Substitutes and Alternatives
If specific lumber types aren’t available, consider using reclaimed wood or different thicknesses of plywood for linings. For insulation, straw bales or foam boards can also replace concrete blocks while providing decent thermal protection. You might even explore using old windows or doors from renovations to create a more permanent greenhouse effect.
For tools, if a circular saw is not available, handsaws can substitute, albeit with a bit more effort. Always ensure to use personal safety equipment, such as gloves and eye protection, when operating tools.
Cut List and Measurements for How to Build a $300 Underground Greenhouse for Year-Round Gardening
- 4 pieces – 2″x4″ lumber (48 inches/122 cm) – vertical supports
- 10 pieces – 2″x4″ lumber (72 inches/183 cm) – horizontal beams
- 15 pieces – 2″x6″ lumber (144 inches/366 cm) – main structural supports
- 8 concrete blocks (12″x12″x12″/30.5 cm) – for structural support
- Pilot holes – use a 1/8 inch drill bit for screw placement in lumber
Safety and Prep for How to Build a $300 Underground Greenhouse for Year-Round Gardening
Prior to starting this project, ensure you have personal protective equipment (PPE) such as gloves, goggles, and closed-toe shoes. Setting up your workspace in a well-lit and ventilated area is crucial for both safety and efficiency. Accuracy in measuring and marking is vital; it may help to use chalk lines or markers for accuracy.
When using power tools, make sure they are in good condition and that you are familiar with their operation. Always clamp down wood when cutting to prevent slipping, and ensure your area is clear of debris to avoid accidents.
How to Build How to Build a $300 Underground Greenhouse for Year-Round Gardening – Step-by-Step Directions
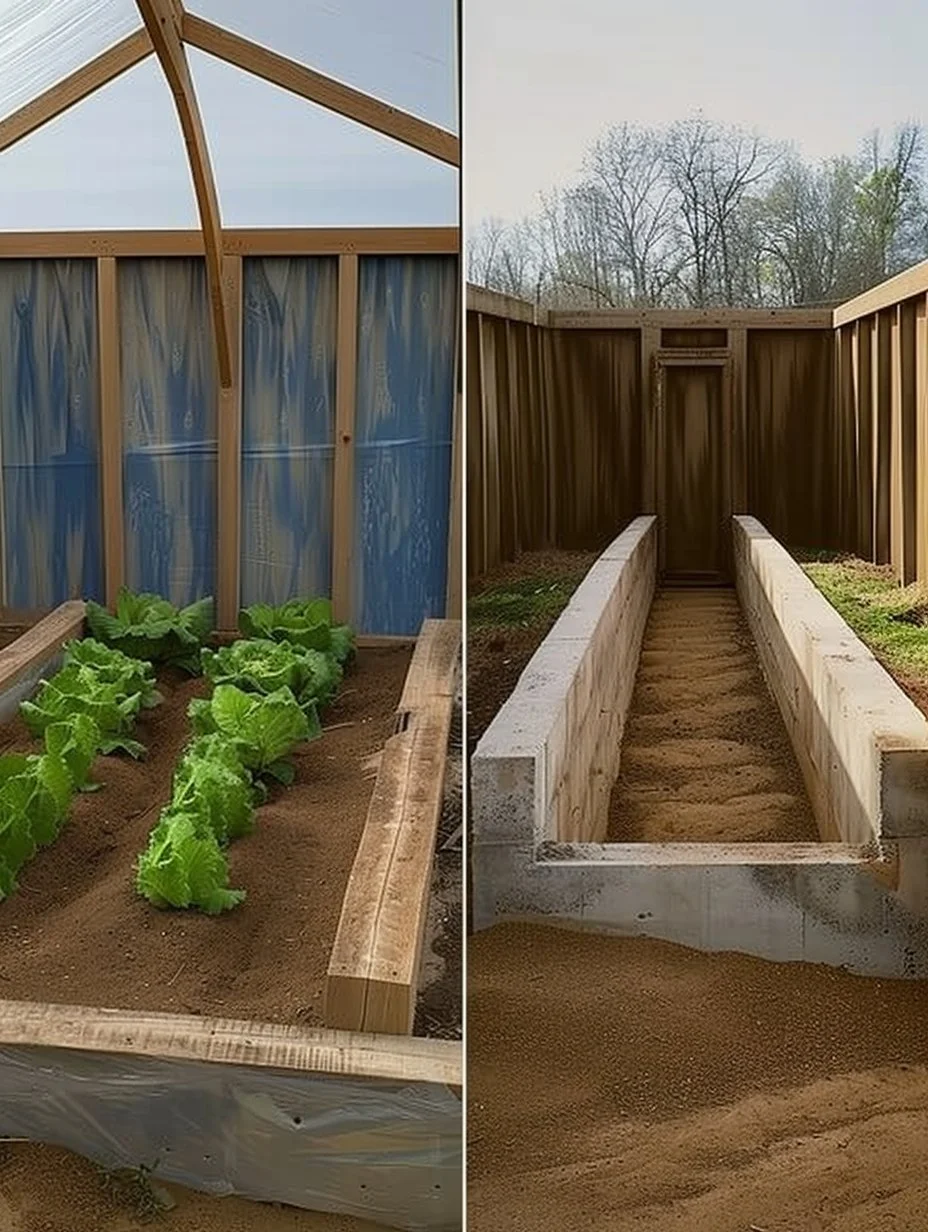
Step 1 – Prep and Layout
Begin by choosing an appropriate location for your underground greenhouse. Ensure the area receives sunlight throughout the day. Clear the site of debris and measure out a rectangular area measuring 6 feet by 12 feet (1.83 m x 3.66 m). Use stakes and string to outline the dimensions clearly.
Step 2 – Cut and Label Pieces
Using the circular saw, cut all your lumber to the specified lengths in the cut list. For ease of assembly, label each piece with a marker. Double-check your measurements before making the cuts, ensuring they align with your project specifications.
Step 3 – Dry Fit and Mark Joinery
After cutting, lay the pieces out in their approximate positions to check the fit. Mark where you will drill pilot holes for screws. As needed, ensure that your joints are snug with 1/8-inch pilot holes to reduce stripping.
Step 4 – Assemble the Frame/Body
Start building the frame by attaching the vertical supports to the horizontal beams using screws. Create a sturdy rectangle in the center of the layout. Aim for even torque when driving the screws to prevent splitting.
Step 5 – Reinforce and Square
Check the squareness of the frame by measuring diagonally from corner to corner. If both diagonals are equal, your frame is square. Use additional screws to reinforce corners and secure the frame against lateral movement.
Step 6 – Attach Surfaces or Panels
Next, use the 2″x6″ lumber to create the walls of the greenhouse. Space screws approximately every 24 inches (60 cm) along the edges, ensuring a tight seal for the greenhouse cover. Allow adequate drying time if using adhesive along with screws.
Step 7 – Sanding and Edge Treatment
Once assembled, sand any rough edges on the frame to ensure safety and aesthetics. Start with 80-grit sandpaper and progress to 220-grit. Clean the dust off the surface thoroughly before moving to the next step.
Step 8 – Finish Application
Apply a wood sealant or waterproof stain to protect the wood from moisture. Allow to dry as per instructions on the product, typically taking 24 hours for full cure. After drying, further cover with the plastic sheeting, securing it tightly with duct tape to prevent flapping or leaks.
FAQ Section
What materials do I need to build an underground greenhouse? You’ll need treated lumber, concrete blocks, plastic sheeting, screws, and optional sealant for protection.
How long does it take to build the underground greenhouse? Typically, this project can be completed over one weekend.
Is it suitable for all climates? Yes, this greenhouse design works well in various climates due to its underground insulation properties.
What can I grow in my underground greenhouse? A variety of vegetables, herbs, and even flowers can thrive in an underground greenhouse.
Do I need special skills to build this greenhouse? No, the project is designed for beginners with simple construction techniques.
How do I maintain the temperature inside? The earth’s natural thermal properties keep the temperature balanced, but you can add ventilation for extreme weather.