
Have you ever walked into a room and felt immediately captivated by its charm? Often, it’s the little design elements that truly pull a space together. A wooden panel wall can add warmth and dimension, and when paired with shelves, it becomes a functional masterpiece. In this guide, you’ll learn exactly how to create a wooden panel wall with shelves, transforming your living space into a haven of style and practicality.
Creating a wooden panel wall isn’t just about aesthetics; it’s about enhancing the organization of your space, showcasing your favorite items, and even making a statement about who you are. Whether you want to display books, plants, or photographs, this guide will take you through the process step-by-step, ensuring you feel empowered to bring this vision to life.
Table of Contents
Materials and Tools Needed
Essential Materials
To begin your project on how to create a wooden panel wall with shelves, it’s important to gather the right materials. You’ll need:
- Wood Panels: Depending on your aesthetic, you could use plywood, reclaimed wood, or paneling. The size and thickness will depend on your design.
- Wood Glue: Great for securing your panels together.
- Screws or Nails: Use screws for added stability, especially if you plan to hang heavier items on your shelves.
- Sandpaper or a Sander: Smooth the edges of your wood for a clean finish.
- Stain or Paint: Choose a finish that complements your interior style.
Tools Required
Having the right tools can make the process much smoother. Here’s what you’ll need:
- Measuring Tape: For precise measurements.
- Level: To ensure your panels and shelves are perfectly straight.
- Drill: To secure your panels and shelves.
- Saw: A jigsaw or circular saw will help you cut your panels to size.
- Paintbrush or Roller: If you’re adding a finish to your panels.
Preparing Your Wall
Choosing the Right Location
Before diving in, think about where you want your wooden panel wall. Popular locations include living rooms, home offices, or even bedrooms. The area should be free of obstructions and ideally have easy access to electrical outlets if you’ll be incorporating lighting.
Measuring and Marking
Once you’ve selected your location, it’s time to measure. Use your measuring tape to determine the width and height of the wall space you want to cover. Mark these dimensions with a pencil, making sure everything is level. This is a crucial step in how to create a wooden panel wall with shelves, as accurate measurements will ensure everything fits perfectly.
Installing the Wooden Panels
Cutting the Panels
With your measurements marked, it’s time to cut your wood panels. Follow your measurements closely, and remember to wear safety gear. If you’re using pre-cut panels, skip this step.
Attaching the Panels
Now that your panels are cut to size, it’s time to attach them to the wall. Start from one corner and use a level to ensure each panel is straight as you secure it with screws or nails. Continue until the entire space is covered. Don’t forget to apply wood glue between panels for additional hold!
Adding Shelves
Types of Shelves
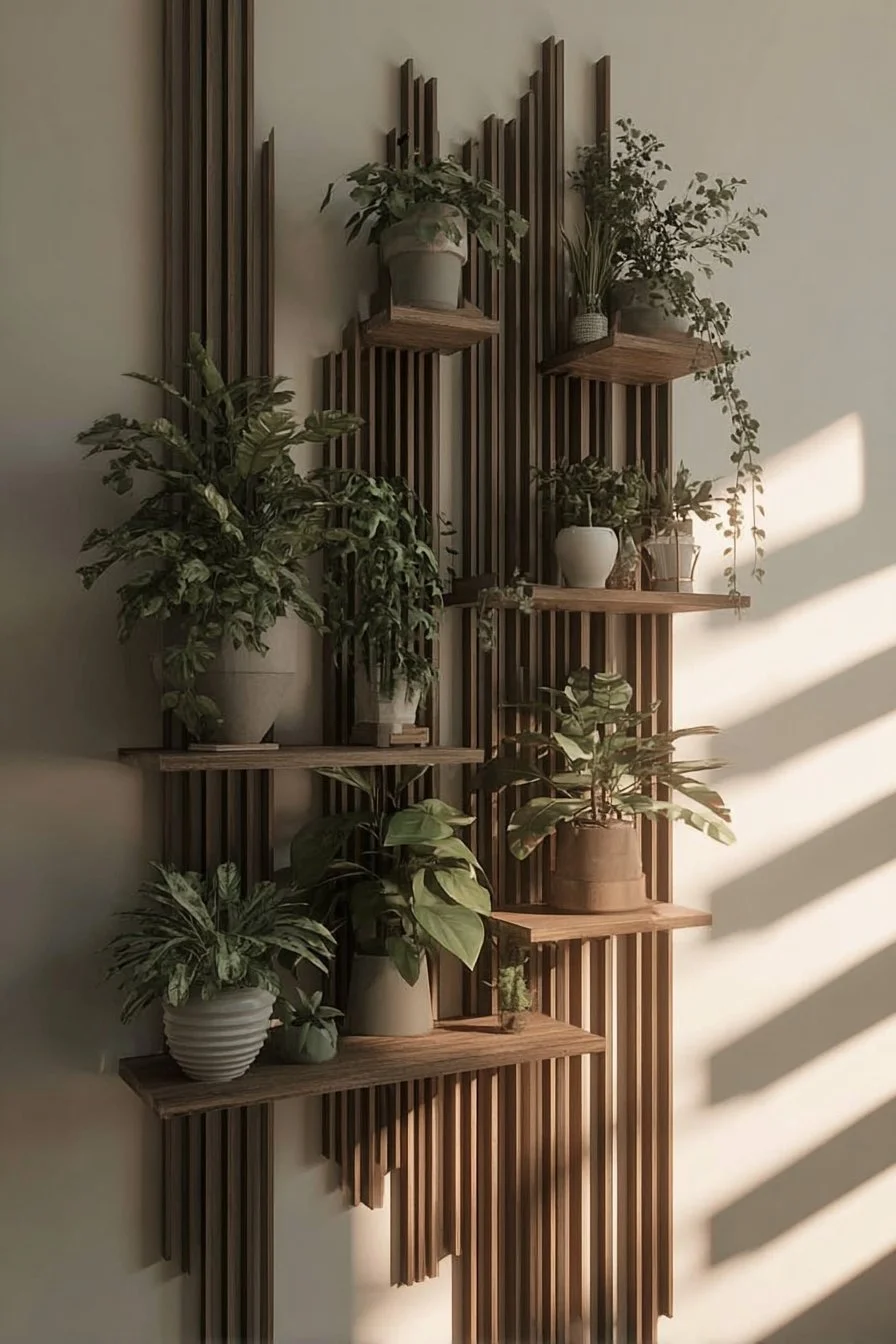
When it comes to shelves, you have a multitude of options. Floating shelves are modern and sleek, while brackets can add a touch of industrial charm. Consider what would best complement your wooden panel wall.
Installation Tips
Measure where you want your shelves to go and mark their positions on the wall. Use a level to ensure they’re straight before drilling holes for the brackets or supports. This step is crucial, as properly installed shelves will not only look good but also hold your items securely.
Adding Finishing Touches
Staining and Painting
If you want to add a personal touch, consider staining or painting your wooden panels. This can change the entire aesthetic of the wall and help it better match your décor. Always allow sufficient drying time between coats.
Decor Ideas
Once your wooden panel wall and shelves are up, it’s time to make it your own! Think about incorporating plants, artwork, or personal mementos. Choose items that resonate with you and bring personality to your wall.
Maintenance and Care
To ensure your wooden panel wall continues to look its best, regular maintenance is crucial. Dust the surface occasionally and, if you used stain or paint, consider refreshing it every few years.
Conclusion
Incorporating a wooden panel wall with shelves can dramatically enhance the look and function of your space. With careful planning and creativity, you can customize this feature to reflect your personality and meet your organizational needs. Embrace this project with confidence, and enjoy the process of transforming your home!
FAQs
What type of wood is best for a panel wall?
Choosing hardwoods like oak or maple offers durability, while softwoods like pine provide warmth. Consider your style and budget when making your choice.
Can I create a wooden panel wall on a rented property?
Yes! Consider velcro strips or adhesive mounting solutions that don’t damage walls, allowing you to create a beautiful feature without permanent alterations.
How much weight can the shelves hold?
This depends on the type and installation method. Floating shelves should be secured properly, while bracketed shelves can typically hold more weight with proper mounting.
Do I need to seal the wood after staining?
Yes, sealing the wood with a clear coat can protect it from moisture and everyday wear, ensuring longevity.
How long does it take to complete the project?
Realistically, this project can take anywhere from a day to a weekend, depending on your experience level, the size of the wall, and interruptions.