
Introduction to 7 Crochet Potted Herb Holder Free Patterns
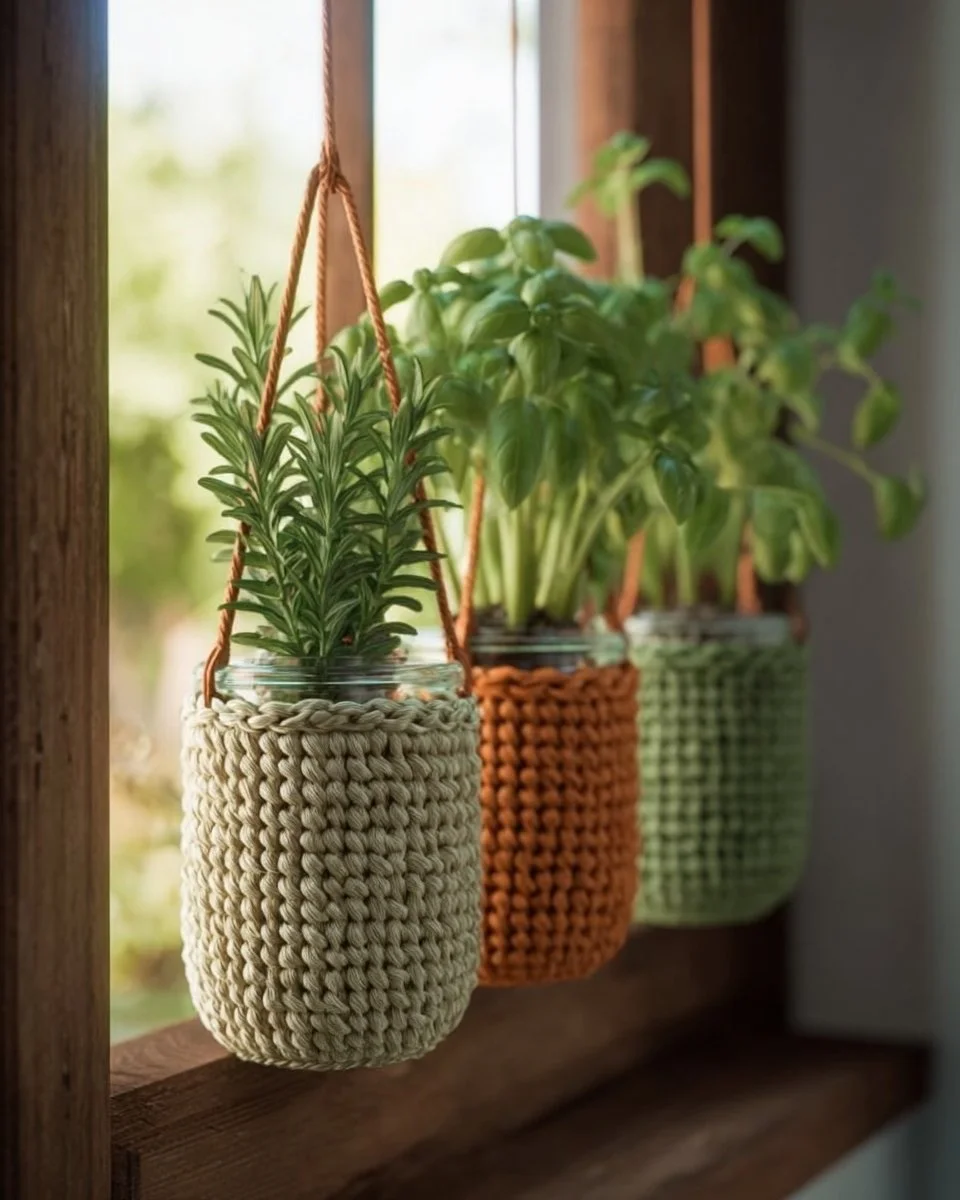
If you’re a fan of gardening or cooking, you might already know the joy of having fresh herbs at your fingertips. Imagine stepping into your kitchen or patio and grabbing a sprig of basil, parsley, or thyme whenever the craving strikes. The good news is that you don’t need a sprawling garden to achieve this; with the 7 Crochet Potted Herb Holder Free Patterns, your green thumb can flourish indoors or outdoors. These crochet holders are not only practical but also add a touch of creativity and charm to your living space.
So, what sets these crochet potted herb holders apart from traditional planters? They are incredibly versatile! You can customize them to your color scheme, and they are lightweight and portable, making it easy to reposition them as needed. Plus, they’re an affordable and straightforward DIY project that can be completed in a weekend.
The lovely part about using crochet for plant holders is the texture it brings to your potted herbs. You may wonder, “How long will this take?” or “Is it too complicated?” Don’t worry; these patterns are designed for various skill levels and can usually be completed in just a few hours, with minimal cost involved—a perfect weekend project.
Table of Contents
Key Benefits of 7 Crochet Potted Herb Holder Free Patterns
Why You’ll Love This Build
- Durability: Crochet holders are sturdy and can withstand the test of time when made with appropriate materials.
- Simplicity: The crochet patterns are beginner-friendly, making it easy for anyone to get started.
- Versatility: You can easily change colors or patterns, tailoring them to your personal style.
- Portability: Lightweight and easy to move, these holders can fit anywhere in your home or garden.
- Weather Resistance: Using the right yarn can make these holders suitable for outdoor use.
- Cost Savings: Crafting your own holders saves money compared to buying planters at a store.
What Makes It Stand Out
These crochet potted herb holders stand out due to their affordability and creativity. Unlike traditional ceramic or plastic pots, these holders allow for a tactile experience that adds warmth to any setting. You can choose from a variety of yarn types, allowing you to consider weather-resistant options for outdoor use. Best use cases are in kitchens, patios, or even offices, where they can serve as decorative elements while providing you with easy access to herbs.
Project Specs for 7 Crochet Potted Herb Holder Free Patterns
At-a-Glance Details
- Skill Level: Beginner to Intermediate
- Estimated Time: 3-5 hours per holder
- Estimated Cost (USD): $20-30 for materials (varies by yarn choice)
- Dimensions: Varies based on pattern; typically around 6-8 inches (15-20 cm) in diameter
- Indoor/Outdoor Suitability: Both, depending on yarn type
- Tools Needed at a Minimum: Crochet hook, scissors, yarn needle
Materials and Tools for 7 Crochet Potted Herb Holder Free Patterns
Complete Materials List with Measurements
- Cotton yarn (100% cotton for breathability): 3 skeins, approx. 100 yards (91 m) each
- Fiberfill stuffing: 1 small bag for additional shape
- Optional: Colorful yarn for embellishment
- Optional: Natural twine for hanging or added details
Complete Tools List
- Crochet hook (size G/6 or 4.0 mm recommended)
- Scissors
- Yarn needle for weaving in ends
- Stitch markers (if desired for tracking stitches)
Substitutes and Alternatives
For yarn, if you are on a budget, consider using acrylic blends which can be more affordable. They may not have the same breathability as cotton yarn, so keep that in mind, especially for herbs that require good drainage. If you prefer a more rustic look, jute twine can be used as an alternative material. Additionally, if you lack a crochet hook, you can borrow one from a friend or purchase an inexpensive starter set.
Cut List and Measurements for 7 Crochet Potted Herb Holder Free Patterns
Since this DIY project involves crochet, there’s no exact cut list similar to woodworking projects. However, you can prepare by ensuring that your yarn is wound neatly. The primary ‘cuts’ involve finishing off yarn pieces as you work through the patterns.
Safety and Prep for 7 Crochet Potted Herb Holder Free Patterns
When crocheting, ensure your workspace is well-lit to avoid straining your eyes. If you’re using scissors or any other cutting tools, be mindful of your surroundings to avoid accidents. Set up a comfortable seating area, and have a measuring tape handy to check the dimensions as you work. Warm up your hands to avoid fatigue, especially during lengthy projects.
How to Build 7 Crochet Potted Herb Holder Free Patterns – Step-by-Step Directions
Step 1 – Prep and Layout
Start by gathering your materials in a well-lit workspace. Take a moment to unwind your yarn and prepare the crochet hook. Measure out about 5 feet of yarn to prevent knots or tangles.
Step 2 – Cut and Label Pieces
While there are no traditional cuts in crochet, ensure you have your yarn skeins accessible and untangled. You may want to wind each skein into a center-pull ball for easier handling.
Step 3 – Dry Fit and Mark Joinery
As you begin the crochet pattern, check your tension regularly by holding the work to ensure it’s consistent. This is essential for a neat and professional-looking holder.
Step 4 – Assemble the Frame/Body
Follow your crochet pattern closely, beginning with the base. This typically involves creating a magic circle to form the foundation of your holder. Maintain even tension in each stitch.
Step 5 – Reinforce and Square
For a sturdy holder, make sure to increase stitches evenly as advised in the pattern. This technique will help to create a more squared shape, ensuring your pots will fit nicely.
Step 6 – Attach Surfaces or Panels
If your pattern includes decorative panels or surfaces, crochet these separately and then attach them using a slip stitch or similar method as outlined in the pattern.
Step 7 – Sanding and Edge Treatment
While crochet doesn’t require sanding, trimming any leftover yarn ends and weaving them securely in will help to finish the edges neatly.
Step 8 – Finish Application
Once crocheting is complete, you may want to wash your yarn pieces to remove any manufacturing residues. Let them dry completely before placing pots inside.

Frequently Asked Questions
Can I use any type of yarn for these holders?
You can use different yarn types, but cotton is recommended for breathability, especially for herb growth.
Are these holders suitable for outdoor use?
Yes, as long as you choose weather-resistant yarns, your holders can thrive outdoors.
How do I maintain my crochet potted herb holders?
Regular checks for wear, along with periodic washing, will keep your crochet holders vibrant.
Can I use these patterns for other plants?
Absolutely! These holders can accommodate a variety of small plants besides herbs.
What skill level is required for this project?
Beginners to intermediate crocheters can tackle these free patterns with ease.