
Introduction to 25 Inexpensive Raised Garden Bed Ideas You Can Build At Home
Are you looking to transform your gardening experience without breaking the bank? Creating your own raised garden beds is a fantastic way to elevate your gardening game. With the right designs, you can cultivate fruits, vegetables, or flowers in a way that’s both practical and visually appealing. This guide on 25 Inexpensive Raised Garden Bed Ideas You Can Build At Home will inspire you to get started with your DIY project today!
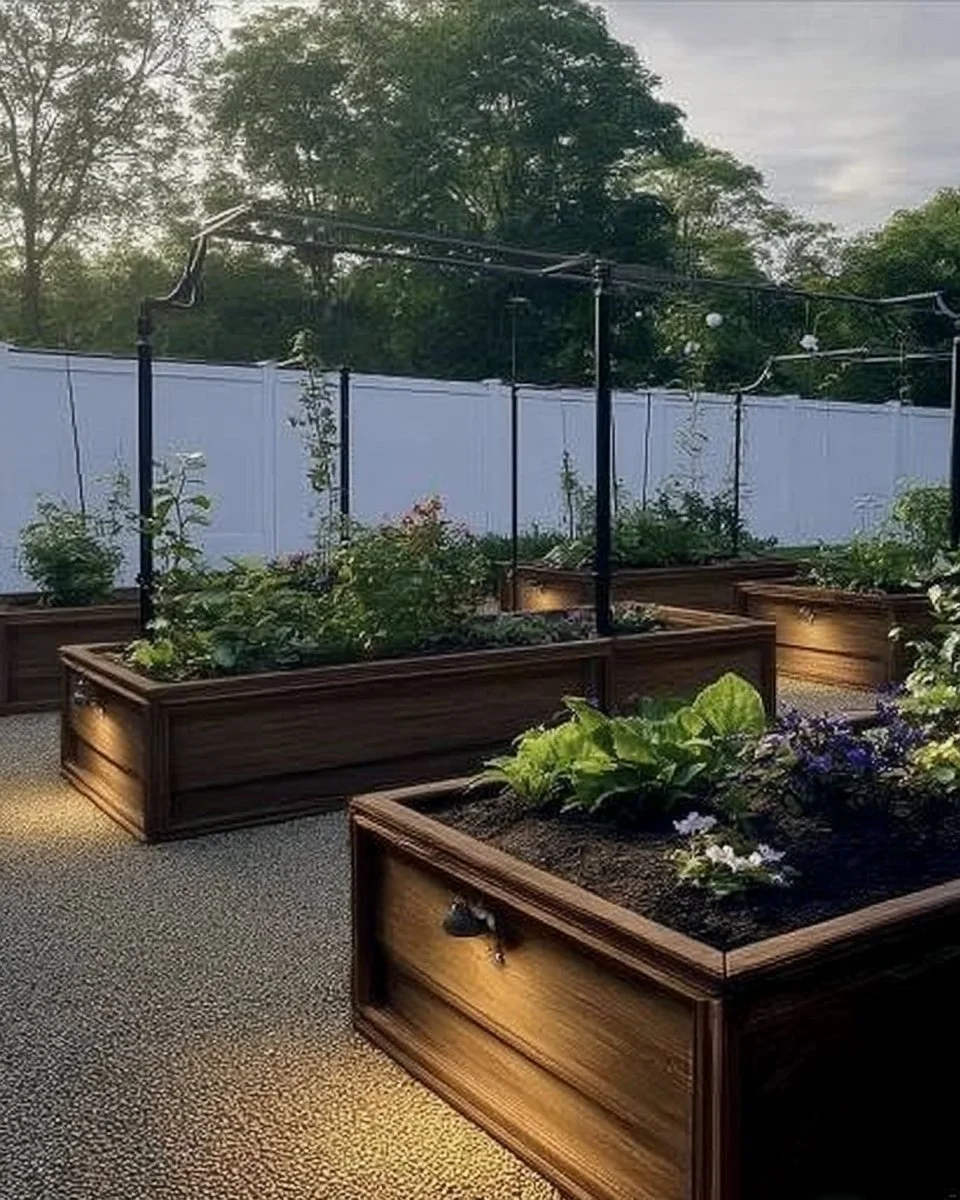
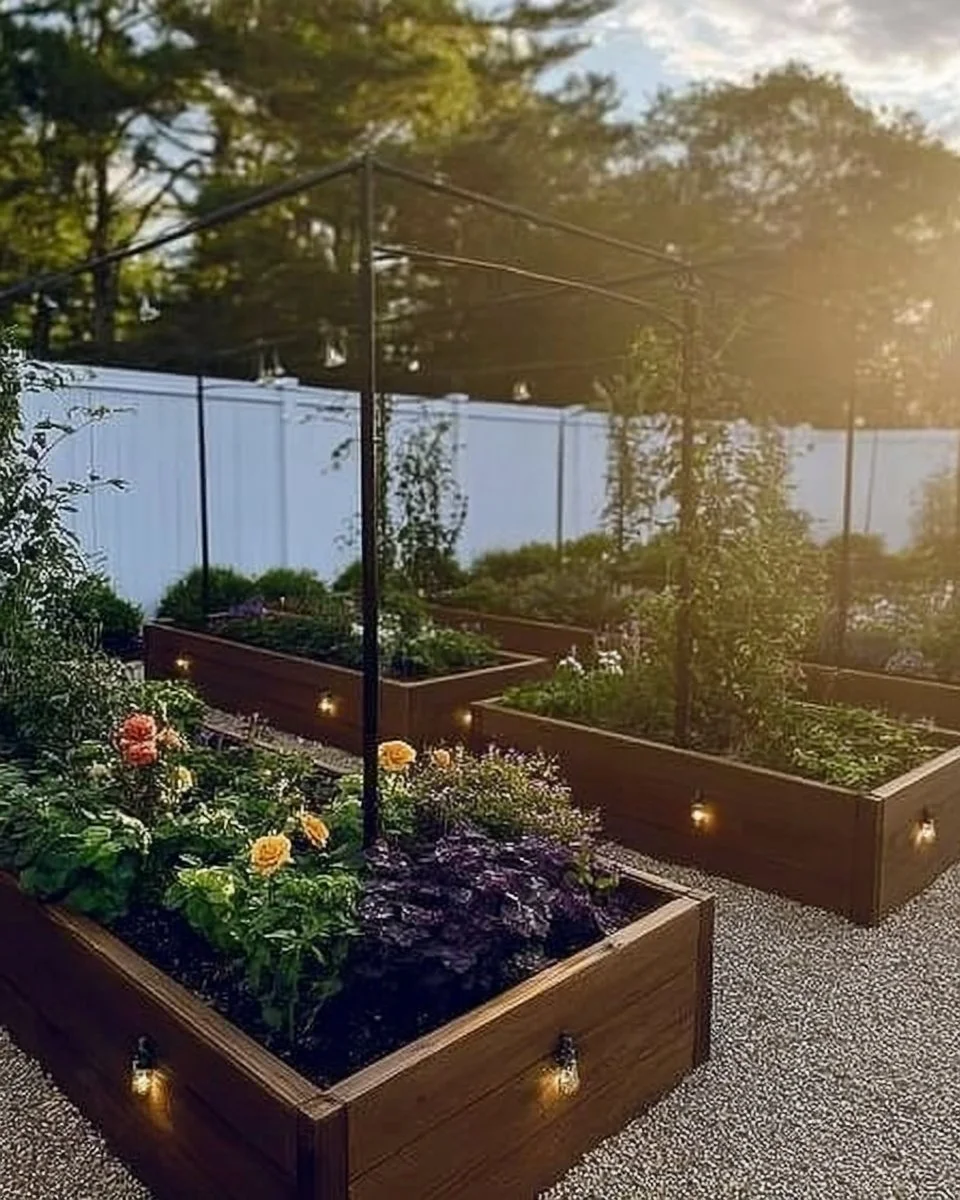
Raised garden beds are special for numerous reasons. They improve drainage, provide better soil quality, and can even keep pests at bay—all while making gardening easier on your back! Plus, they are incredibly versatile; you can customize them to match your available space and style preferences. Not only can you build them with minimal financial investment, but the satisfaction of nurturing your plants in a project you’ve crafted by hand is priceless.
This project can usually be completed within a weekend, depending on the complexity of your chosen design. It’s perfect for both beginners and seasoned DIY enthusiasts, so you can expect to enjoy the process regardless of your skill level. In this article, we’ll explore various designs, some costing significantly less than others. You’ll find that with a little creativity and motivation, you can improve your garden without a hefty price tag.
Key Benefits of 25 Inexpensive Raised Garden Bed Ideas You Can Build At Home
Why You’ll Love This Build
- Cost-Effective: Many designs use reclaimed or inexpensive materials to keep costs down.
- Durable: When built right, raised beds can last for years, holding up against weather elements.
- Versatile Design Options: Tailor sizes and shapes to fit your outdoor space perfectly.
- Easier Access: Gardening becomes less strenuous with the elevated height of raised beds.
- Better Soil Management: You control the soil quality and drainage, leading to healthier plants.
- Space Efficiency: Raised beds can maximize small areas, perfect for urban gardening.
What Makes It Stand Out
One of the most distinguishing aspects of building your own raised garden bed is the ability to customize your design. Unlike store-bought options, which often limit you in size and style, DIY raised beds let you choose your materials and dimensions. This ensures that your raised garden bed fits seamlessly into your landscaping while catering to the specific plants you intend to grow.
Moreover, this project appeals to eco-conscious individuals. Using reclaimed wood or other sustainable materials not only reduces costs but also minimizes environmental impact. Whether you choose a simple rectangular design or a more intricate layout, this crafty endeavor allows you to express your individuality in your gardening space.
Project Specs for 25 Inexpensive Raised Garden Bed Ideas You Can Build At Home
At-a-Glance Details
- Skill Level: Beginner to Intermediate
- Estimated Time: 4-8 hours (varies by design)
- Estimated Cost (USD): $50 – $200 (varies by materials used)
- Dimensions: Customizable (typically 4 ft x 8 ft x 1 ft)
- Indoor/Outdoor Suitability: Outdoor
- Tools Needed at a Minimum:
- Circular saw
- Drill/driver
- Tape measure
Materials and Tools for 25 Inexpensive Raised Garden Bed Ideas You Can Build At Home
Complete Materials List with Measurements
- Cedar lumber: 2x4s or 2x6s, lengths as needed for vertical and horizontal framework
- Plywood (for bottom or sides, if needed): ¾ inch thick
- Wood screws: 2.5 inches lengths
- Landscape fabric: Enough to cover the bottom and sides to prevent weed growth
- Wood preservative or stain (optional): 1 gallon (if desired for weather resistance)
- Brackets (optional for reinforcement): 90-degree corner brackets
Complete Tools List
- Circular saw: For cutting lumber
- Drill/driver: For screws
- Tape measure: To ensure precise measurements
- Level: To check for squareness
- Safety gear: Goggles, gloves, and a dust mask
Substitutes and Alternatives
If you’re working within a tight budget, consider using reclaimed wood such as pallets or leftover lumber from other projects. Pallet wood can create a rustic aesthetic and is often free if sourced correctly. For screws, you might find that second-hand hardware can save money without sacrificing quality. Additionally, if lumber is difficult to find in your area, explore alternatives such as concrete blocks or bricks, which can create durable raised beds as well.
Cut List and Measurements for 25 Inexpensive Raised Garden Bed Ideas You Can Build At Home
- Lumber cuts:
- Side panels: 4 pieces, 48 inches (122 cm) each (2×6 or 2×4)
- End panels: 2 pieces, 32 inches (81 cm) each (2×6 or 2×4)
- Support beams: 4 pieces, 48 inches (122 cm) each (optional, for added structural integrity)
- Plywood (if using): Cut to fit the bottom area if needed
- Pilot holes: Pre-drill 1/8 inch holes for screws, ensuring not to split the wood.
Safety and Prep for 25 Inexpensive Raised Garden Bed Ideas You Can Build At Home
Before you begin, it’s crucial to prepare your workspace. Make sure you have a clean, well-lit area with enough room to work comfortably. Always wear personal protective equipment (PPE), including safety goggles to protect your eyes and gloves to shield your hands. A dust mask is advisable when cutting wood, as it will help avoid inhaling sawdust.
Measure and mark carefully to avoid any mistakes that might lead to wasted materials. Clamping pieces can ensure stability while you work. Good ventilation is essential, mainly if you’re using any wood treatments or paints. Always work comfortably and at your own pace, keeping safety as a priority.
How to Build 25 Inexpensive Raised Garden Bed Ideas You Can Build At Home – Step-by-Step Directions
Step 1 – Prep and Layout
Begin by selecting a suitable location for the garden bed, considering sunlight and drainage. Mark the 4×8 area using stakes and string to visualize the layout and ensure it’s square. Use a level to check the ground and make adjustments as necessary to create a flat surface.
Step 2 – Cut and Label Pieces
Using your circular saw, cut the lumber according to your cut list. Clearly label each piece to avoid confusion during assembly. You may want to sand the cut edges slightly to prevent splinters and ensure a smooth finish.
Step 3 – Dry Fit and Mark Joinery
Lay out all cut pieces in their respective positions. Make sure the corners are aligned and spaced correctly. Mark where pilot holes will be drilled on each connection point to ease assembly later on. Hold the pieces together to check for fit, ensuring there’s no wobble.
Step 4 – Assemble the Frame/Body
Start assembling the frame by connecting the long and short pieces together using wood screws. It’s essential to drive screws straight and secure them tightly while ensuring the frame remains square. If using braces, attach them now for added strength.
Step 5 – Reinforce and Square
Check the frame’s squareness by measuring diagonally from corner to corner. Adjust as necessary until they are equal. For added structural support, consider securing the framework using corner brackets in addition to screws.
Step 6 – Attach Surfaces or Panels
If your design requires panels or a bottom base, now is the time to attach them securely to the frame. Ensure that screws are evenly spaced—about every 12 inches—to hold them in place. If using plywood as a base, attach it carefully with appropriate fasteners.
Step 7 – Sanding and Edge Treatment
After the main structure is assembled, sand any rough edges for a smooth finish. Start with a medium-grit sandpaper and progress to finer grits to eliminate any imperfections. Ensure to clean off any dust with a damp cloth before moving to the next step.
Step 8 – Finish Application
If you opted for any stains or treatments, apply them only after sanding is complete. Follow the manufacturer’s instructions for drying time between coats if necessary. This step helps to enhance weather resistance and prolong the life of your raised garden bed.
Conclusion
Building your own raised garden bed can be a rewarding project that combines creativity and practicality. With the guidance provided in this article on 25 Inexpensive Raised Garden Bed Ideas You Can Build At Home, you can easily select a design that fits your space and gardening needs. Whether you’re a seasoned gardener or a curious beginner, these DIY ideas offer the perfect opportunity to engage in a fulfilling hands-on activity while improving your outdoor space. Enjoy your gardening journey!