
Introduction to 20 Heartfelt Valentine Door Decorations to Welcome Love Home
Valentine’s Day is not just about chocolates and flowers; it’s the perfect opportunity to express your love and affection for those around you. What better way to set a tone of warmth and charm than with thoughtful decorations? The project of creating 20 Heartfelt Valentine Door Decorations to Welcome Love Home allows you to transform your entryway into a festive, inviting space that resonates with the spirit of love.
Whether you’re gearing up for a romantic evening or just want to spread some cheer to passersby, these decorations are ideal. They are not only easy to make, but they are also made with readily available materials, making them an affordable choice. You can design these decorations to suit your own unique style, adding a personal touch that store-bought alternatives simply cannot replicate. Each decoration takes little time to create, making them perfect for those with busy schedules.
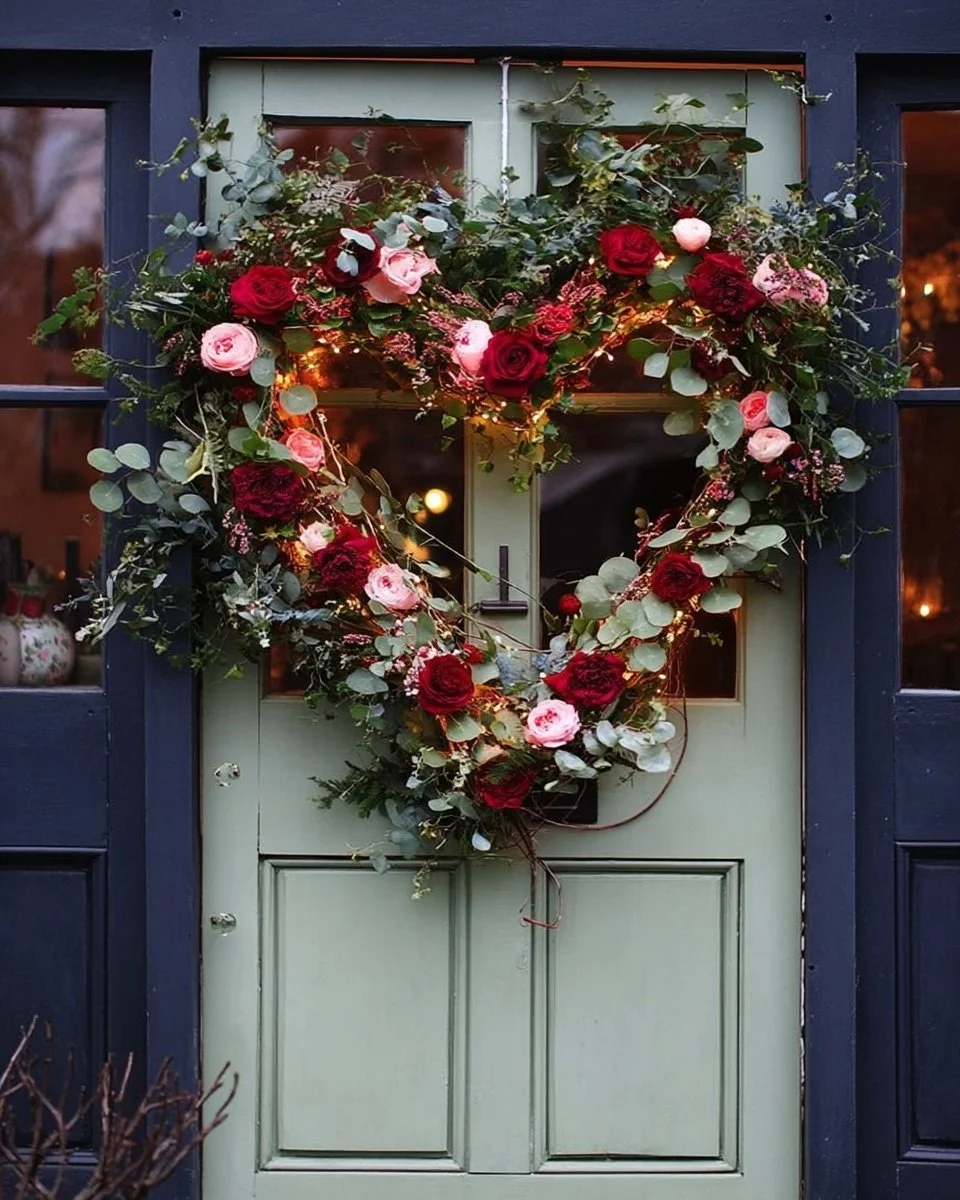
Imagine adorning your door with whimsical heart-shaped wreaths, handmade garlands, or charming signs. The joy derived from creating and displaying these pieces will surely be a highlight of your Valentine’s celebrations. Whether you have a flair for crafting or simply enjoy hands-on activities, this project caters to everyone.
Table of Contents
Key Benefits of 20 Heartfelt Valentine Door Decorations to Welcome Love Home
Why You’ll Love This Build
- Affordable Decoration: Use inexpensive materials to create impressive decor that enhances your home.
- Customizable: Tailor designs and colors to fit your personal style or theme.
- Expressive: Showcase your creativity and love through handmade art.
- Easy to Store: These decorations can be easily stored for future celebrations.
- Quick Setup: They can be assembled quickly, making them a perfect last-minute project.
- Versatile: Suitable for both indoor and outdoor display according to your preference.
What Makes It Stand Out
The originality of these decorations is in their personal touch. Unlike commercial pieces, handmade decorations allow for infinite customization. You can infuse your personality and preferences, choosing colors, themes, and styles that resonate with you. They shine as a thoughtful representation of affection, creating a more impactful atmosphere in your home.
Best use-cases for these decorations include welcoming guests for a Valentine’s Day gathering, surprising your partner with festive cheer, or even brightening up your neighborhood. Compared to store-bought items, these creations show effort and love, adding warmth that mass-produced items often lack.
Project Specs for 20 Heartfelt Valentine Door Decorations to Welcome Love Home
At-a-Glance Details
- Skill Level: Beginner to Intermediate
- Estimated Time: Around 5-10 hours (depending on the complexity of designs)
- Estimated Cost (USD): Approximately $50 – $100 (varies with choice of materials)
- Dimensions: Varies by decoration (generally around 12-24 inches)
- Indoor/Outdoor Suitability: Suitable for both indoor and outdoor setups
- Tools Needed at a Minimum: Scissors, glue gun, paintbrushes, wire or twine, and a measuring tape
Materials and Tools for 20 Heartfelt Valentine Door Decorations to Welcome Love Home
Complete Materials List with Measurements
- Felt or Cardstock: 12 sheets (various colors)
- Wooden dowels: 4 pieces, 1 inch in diameter, length 24 inches
- Twine or Ribbon: 1 roll (approximately 50 feet)
- Craft Paint: 1 set (various colors)
- Decorative Stickers or Gems: 1 pack (optional for embellishment)
- Hot Glue Sticks: 1 pack
- Spray Sealer: 1 can (for outdoor durability)
Complete Tools List
- Scissors: Standard craft scissors
- Glue Gun: A hot glue gun for easy assembly
- Paintbrushes: Various sizes for painting details
- Wire Cutters: For cutting any wire used in decorations
- Measuring Tape: Essential for accurate measurements
Substitutes and Alternatives
For those on a budget, paper products can be used instead of felt or cardstock. Consider sourcing recyclable materials like leftover wrapping paper, making your project both eco-friendly and cost-effective. Craft paint can be swapped with leftover house paint if you already have some, while decorative stickers can be replaced with hand-painted designs for a DIY flair.
Cut List and Measurements for 20 Heartfelt Valentine Door Decorations to Welcome Love Home
- Hearts: Cut 6 hearts per decoration, each measuring 6 inches (15 cm) across at the widest point
- Wooden Dowels: No cuts necessary, can be used as is
- Twine or Ribbon: Cut to lengths of 3 feet (90 cm) for hanging
- Banners: Cut triangular pieces of cardstock, 5 inches (12.5 cm) at the base and 7 inches (17.5 cm) tall
Safety and Prep for 20 Heartfelt Valentine Door Decorations to Welcome Love Home
Before starting your decorations, it’s essential to ensure your workspace is safe and organized. Wear safety goggles, especially when using sharp tools like scissors or wire cutters. Set up a clean area that is well-ventilated—especially if you’re painting or using glues. Measure all materials carefully to ensure your pieces fit together snugly, which will aid in overall stability. Clamping materials while glue sets can also enhance durability.
How to Build 20 Heartfelt Valentine Door Decorations to Welcome Love Home – Step-by-Step Directions
Step 1 – Prep and Layout
Begin by organizing your workspace. Gather all materials and tools, ensuring you have everything at hand. Lay out your cut pieces to visualize the final arrangement.
Step 2 – Cut and Label Pieces
Using the scissors, cut all necessary elements according to the provided measurements. Label each piece if necessary, to keep your workflow organized, especially when dealing with multiple decorations.
Step 3 – Dry Fit and Mark Joinery
Before gluing or assembling pieces, do a dry fit. Ensure all pieces connect correctly, marking spots for glue or attachment points for further precision when assembling.
Step 4 – Assemble the Frame/Body
For decorations using wooden dowels, start by attaching hearts or embellishments to the dowels. Use hot glue and press firmly for a minute until secure.
Step 5 – Reinforce and Square
Check the alignment of your decoration, ensuring every piece is straight and secure. Adjust as needed to prevent wobbling once hung.
Step 6 – Attach Surfaces or Panels
If your decoration includes panels or signs, attach them firmly to the back support structure using hot glue. Allow sufficient drying time before moving on.
Step 7 – Sanding and Edge Treatment
If any edges are rough, use fine sandpaper to smooth them out. Clean off any dust or glue residue for a polished finish.
Step 8 – Finish Application
After everything is assembled and dried, apply a protective spray sealer for outdoor decorations. This will enhance durability against weather elements.
Step 9 – Add Final Touches
Embellish your decorations as desired with stickers or gems. Ensure everything is securely attached and visually appealing, making any last-minute adjustments.
Step 10 – Display Your Creation
Finally, hang or place your decorations. Use hooks or twine to secure them in place, showcasing your work and welcoming love into your home.

FAQ
What materials do I need for these decorations?
You need felt or cardstock, wooden dowels, twine or ribbon, craft paint, decorative stickers, hot glue sticks, and spray sealer.
How long does it take to make these decorations?
Expect to spend around 5-10 hours, depending on the complexity of the designs and your crafting pace.
Can these decorations be used outdoors?
Yes, they can be used outdoors, especially if you apply a protective spray sealer for durability.
Do I need advanced crafting skills?
No, this project is beginner-friendly and suitable for everyone, regardless of crafting experience.
Are there any substitutes for the materials?
Yes, consider using recycled materials or leftover paint to reduce costs.