
Introduction to 10 Painted Tyre Planter DIY Tutorial Ideas
Have you ever thought about giving old tyres a new lease on life? Imagine transforming those tired, worn-out tyres into beautiful planters that add character to your outdoor or indoor space. The 10 Painted Tyre Planter DIY Tutorial Ideas offers a creative and engaging way to recycle and repurpose while brightening up your garden, patio, or balcony. This project is perfect for anyone who wants to unleash their inner artist without breaking the bank.
Creating painted tyre planters stands out as not just an eco-friendly endeavor, but also a fun activity suitable for all ages. Whether you’re a novice or an experienced DIYer, this project is achievable and rewarding. The materials are readily available, usually at little to no cost, especially if you already have old tyres lying around.
You can expect to spend a few hours crafting these spectacular planters. With a splash of paint and a sprinkle of creativity, these tyre planters could perfectly fit any décor style — rustic, modern, or whimsical. Best of all, they provide a space-efficient solution for gardening in small areas, allowing you to grow herbs, flowers, or even vegetables right in your own backyard.
Table of Contents
Key Benefits of 10 Painted Tyre Planter DIY Tutorial Ideas
Why You’ll Love This Build
- Durable: Tyres are made to withstand harsh conditions, ensuring your planter lasts for years.
- Affordable: Utilize discarded materials, saving money on expensive planters.
- Versatile: Paint them in various styles to suit your personal taste.
- Eco-Friendly: Repurposing tyres helps reduce waste and environmental impact.
- Space-Saving: Ideal for small gardens or balconies, maximizing your planting area.
- Weather Resistant: Tyres hold up well against rain and sun, protecting your plants.
What Makes It Stand Out
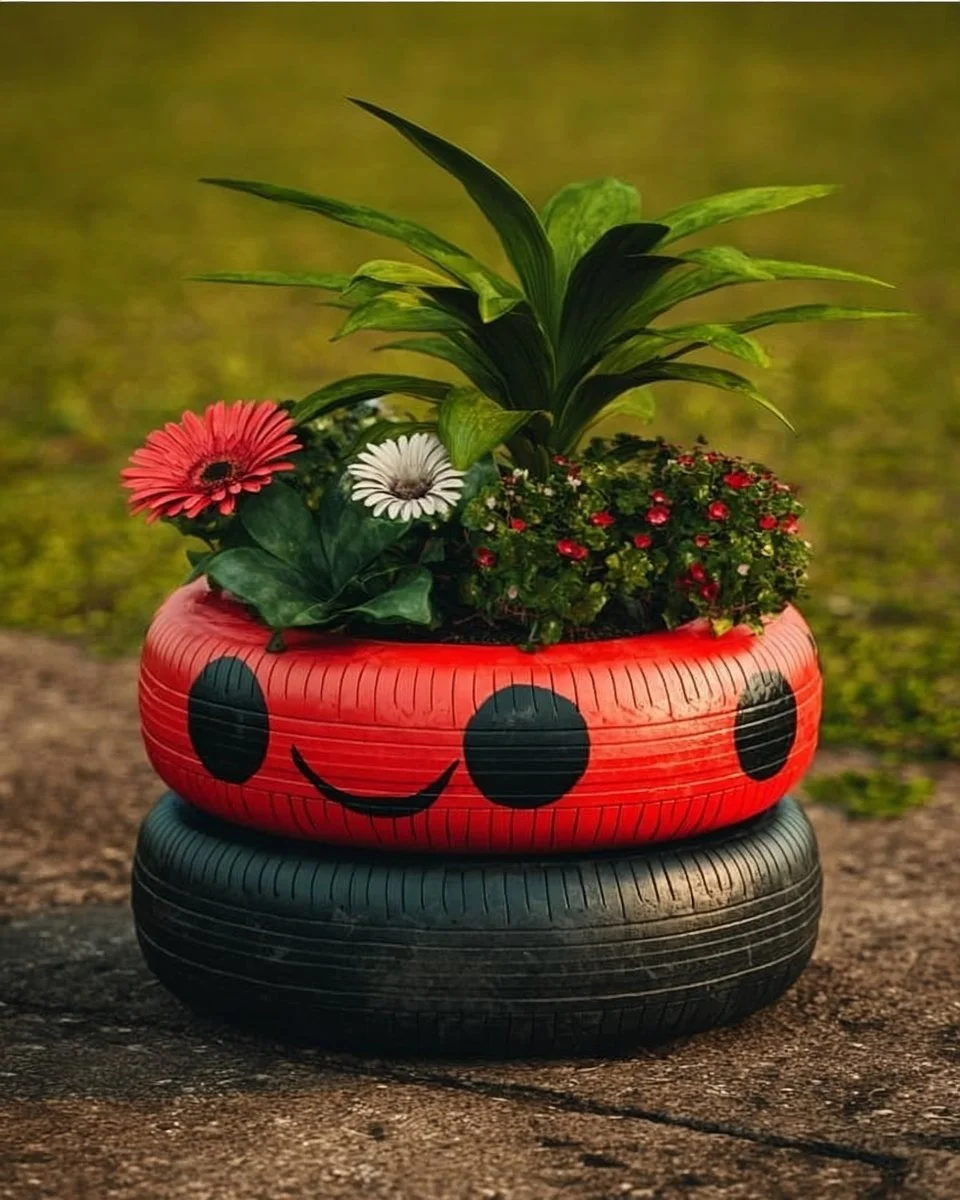
One distinctive feature of the 10 Painted Tyre Planter DIY Tutorial Ideas is the opportunity for customization. Each planter can be painted in your favorite colors or patterns, allowing you to express your style. Unlike store-bought planters, which often conform to generic designs, these tyre planters can truly reflect your personality and creativity.
The project shines in its adaptability and functionality. You can use these planters for herbs in an urban apartment, vibrant flowers in a suburban garden, or as a focal point at outdoor events. With just a few ideas and a little effort, your garden can become a unique showcase of art and sustainability.
Project Specs for 10 Painted Tyre Planter DIY Tutorial Ideas
At-a-Glance Details
- Skill Level: Beginner to Intermediate
- Estimated Time: 3–5 hours
- Estimated Cost: $20–$50
- Dimensions: Varies based on tyre size (typically 24” (60 cm) diameter)
- Indoor/Outdoor Suitability: Both
- Tools Needed at a Minimum: Paintbrushes, spray paint, utility knife
Materials and Tools for 10 Painted Tyre Planter DIY Tutorial Ideas
Complete Materials List with Measurements
- Tyres: Old car, bike, or truck tyres (1+)
- Acrylic Paint: Various colors (1 quart or liter per color)
- Varnish/ Sealant: For weatherproofing (1 quart or liter)
- Potting Soil: Enough to fill each tyre (1 bag of around 2 cu ft)
- Plants/Seeds: Your choice of flowers or edibles (as desired)
Complete Tools List
- Utility Knife: For cutting openings if needed
- Brushes: For detailed painting
- Spray Paint Nozzle: Optional for spray painting large areas
- Drop Cloth: To protect your work surface
- Gloves: To keep hands clean
Substitutes and Alternatives
If you don’t have old tyres at hand, consider checking local classifieds, junkyards, or online marketplaces. Many people give them away for free. Alternatively, you could use large plastic containers or wooden boxes for a similar planter effect. For paint, if weather-resistant outdoor paint isn’t accessible, plain acrylic paint sealed with a varnish will work well for indoor variants.
Cut List and Measurements for 10 Painted Tyre Planter DIY Tutorial Ideas
- Tyres: No cutting necessary; use as-is
- Drainage Holes: If required, use a utility knife to cut 4 small holes (1 inch or 2.5 cm) on the bottom of each tyre
Safety and Prep for 10 Painted Tyre Planter DIY Tutorial Ideas
Safety should always be a priority when engaging in DIY projects. Use gloves to protect your hands from paint and potential sharp edges. Ensure you’re working in a well-ventilated area, especially if using spray paint or strong sealants. Providing adequate surface space for your work helps in maneuvering the tyres easily. Take care to measure accurately to avoid miscalculations that could affect the planter’s final look.
How to Build 10 Painted Tyre Planter DIY Tutorial Ideas – Step-by-Step Directions
Step 1 – Prep and Layout
Begin by clearing your workspace to create enough room for the tyres. Lay a drop cloth to protect your surfaces. Clean the tyres thoroughly, removing dirt and debris to ensure proper paint adhesion.
Step 2 – Cut and Label Pieces
If you wish to add drainage holes, decide where they should go and outline the spots using a marker. Cut small openings in the bottom of each tyre with a utility knife for proper drainage.
Step 3 – Dry Fit and Mark Joinery
Lay your tyres in the desired configuration. Consider stacking them for height, or arranging them side by side for a more sprawling effect. Ensure they’re stable for planting.
Step 4 – Assemble the Frame/Body
If stacking, use strong adhesive designed for rubber or a durable glue to secure the joints between tyres. Be sure to allow the glue to cure as indicated on the package for optimal strength.
Step 5 – Reinforce and Square
Check the stability of the planters. If they’re wobbling, adjust your stacking or add additional adhesive as needed. Make sure they look even from all angles.
Step 6 – Attach Surfaces or Panels
If you’re using wood panels or fabric to line the inside of the tyre for added aesthetics, now is the time to attach those securely using a spray adhesive or heavy-duty glue.
Step 7 – Sanding and Edge Treatment
This step isn’t always necessary, but if you feel there are areas on the tyres that are rough or sharp, using sandpaper to smooth edges can be beneficial.
Step 8 – Finish Application
Now it’s time for the fun part—painting! Start by applying a coat of outdoor acrylic paint to the tyres. Depending on the color, multiple coats may be required. Allow drying times between. Once the desired color is achieved, seal the paint with a weatherproof varnish to protect your work.
Step 9 – Planting
Once the paint and sealant have dried, you can fill the tyres with potting soil. Finally, plant your chosen flowers, herbs, or vegetables, and watch your garden flourish.
Step 10 – Display Your Creation
Position your new painted tyre planters in their designated spots. Enjoy a refreshing drink as you admire your eco-friendly garden creations!

FAQ Section for 10 Painted Tyre Planter DIY Tutorial Ideas
Can I use any type of tyre for this project? Yes, any type of old car, bike, or truck tyre works well.
How do I ensure the paint adheres well to the tyre? Clean the tyre thoroughly and let it dry completely before painting.
Is it safe to use tyres for outdoor planters? Yes, tyres can be used outdoors, but it’s best to line them with a protective barrier before adding soil and plants.
What types of plants grow well in tyre planters? Herbs, flowers, and vegetables are excellent options for tyre planters.
Will the tyres affect the soil temperature for my plants? Yes, tyres can heat up in the sun, which might increase the soil temperature, helping plants thrive.
How long do painted tyre planters last? With proper care and sealing, painted tyres can last many years, making them a durable choice for gardening.